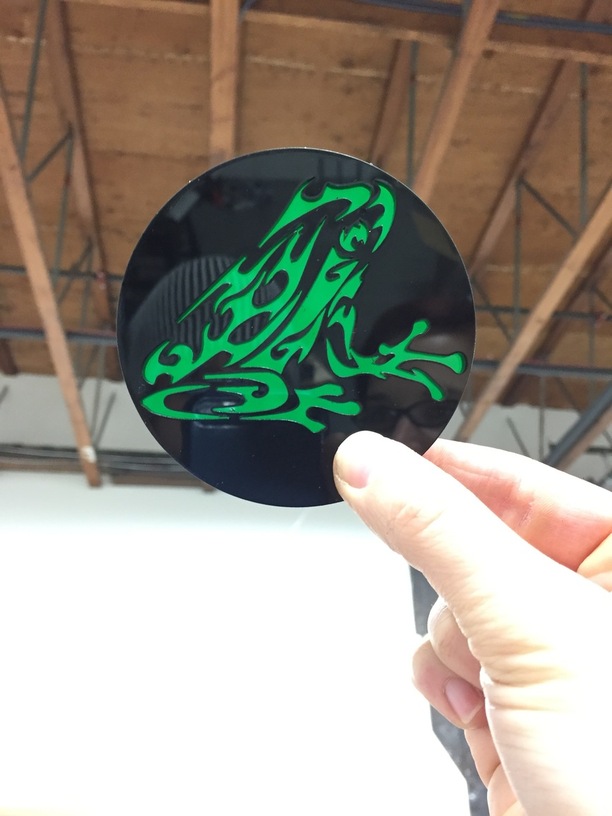
A friend of mine has developed a kids game for helping teach logic, and has been using spray painted beer coasters. Of course I thought we could upgrade this situation using lasers(!) for laser thursday.
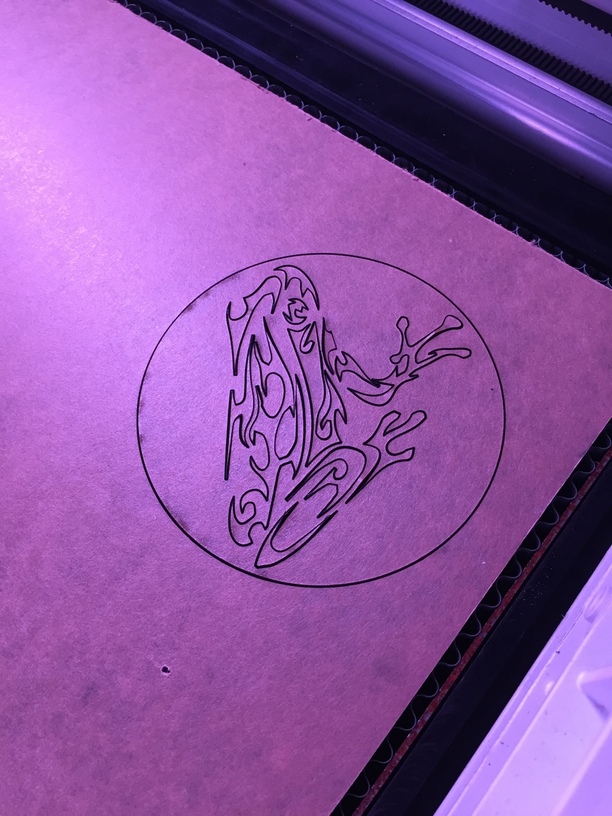
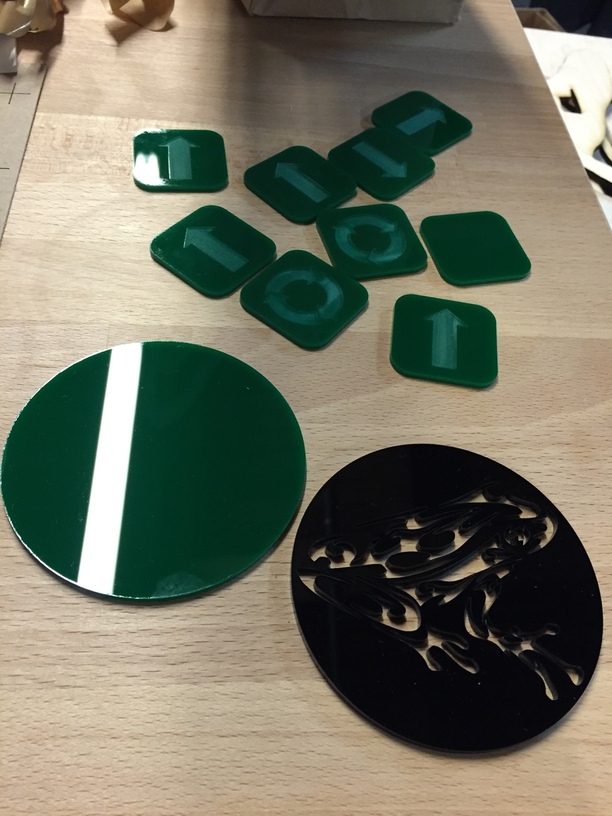
The illustrator file was pretty simple, I created a 3.5 inch circle and centered the frog design (helpfully also in svg) in the middle of one, then used the illustrator plugin to send it over to Glowforge. Since I wanted to cut the 2 circles out of different colors (and we were using full size sheets), I ignored one circle while I cut out the other and did the whole thing in two steps. The frog design in the Glowforge:
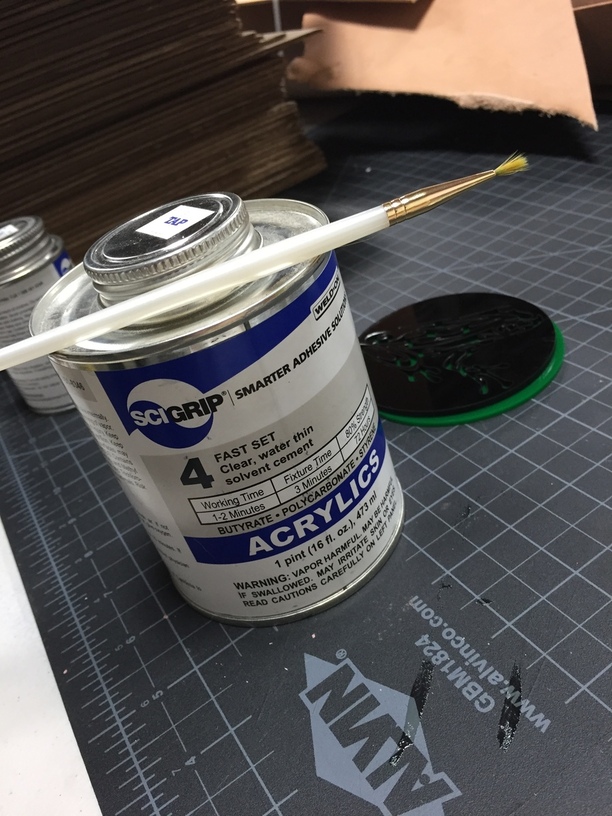
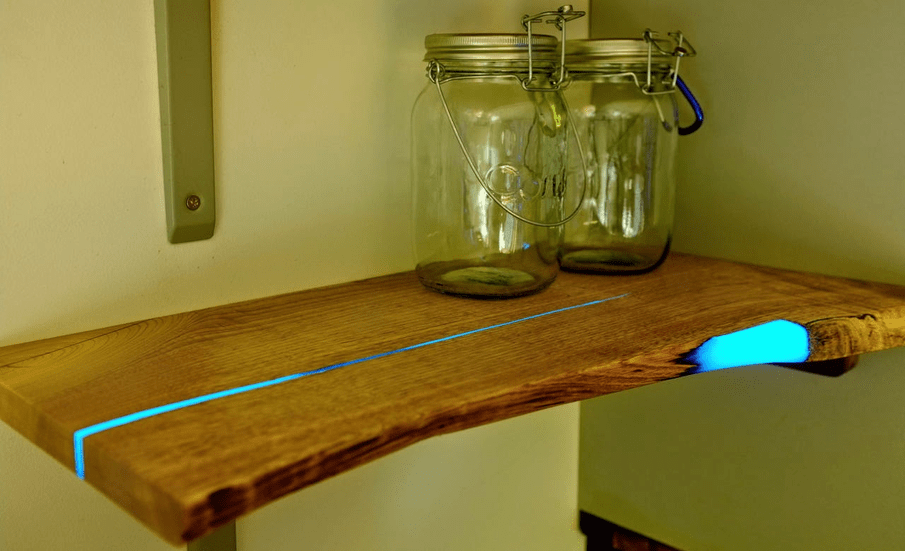
The stuff seems thinner than water, so he recommended that we hold the pieces together and just paint along the edge (the acrylic we used wasn’t see through, so we didn’t have concerns about seeing where it bled into). I accidentally dripped a little onto the black surface of the piece, but it dried before I could figure out what to do about it, and left just the very lightest of marks. (You can hardly see it after it gets fingerprinted up.)
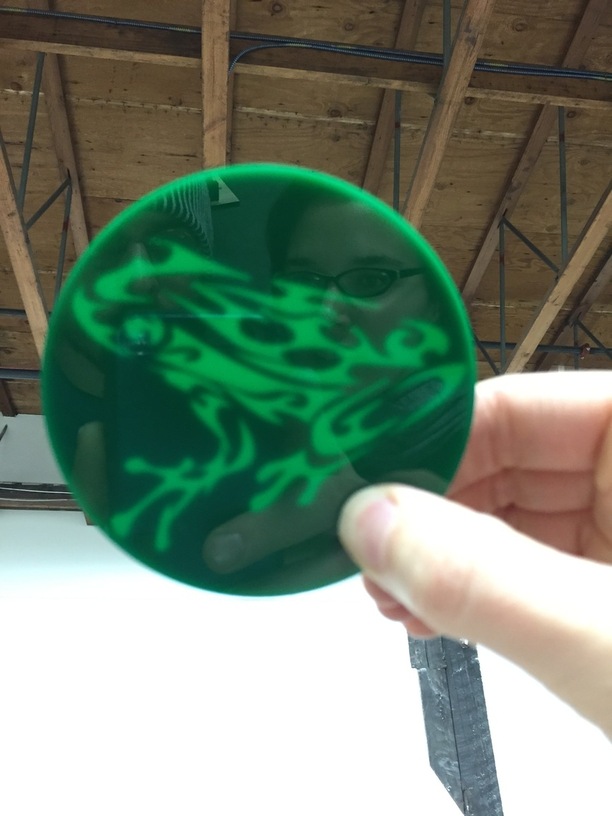
The final piece:
Thanks! Next time, I think a thinner black layer and a less busy design to allow more green to show through, since color is part of the game rules, but we’re super happy with how it turned out.
I found using a syringe to apply the solvent very accurate. Akin to an exact knife as opposed to a brush.
If the joints are tight, capillary action will draw it into and across the joint.
Shiny frog!
Man those look good. I can foresee us doing this as well, maybe playing around with resin fills with additional material in for texture. Im really trying to put together a plan for a multi material catan board. Im hoping one of the tiles I can use a resin with mica chips in it for the ore tile.
[quote=“takitus, post:6, topic:1406”]
I can foresee us doing this as well, maybe playing around with resin fills with additional material in for texture.[/quote]
@nick1 has been playing around with filling laser engraves in acrylic with paint, and it looks really cool. Maybe he’ll have time to post some of the stuff he’s been doing soon
That looks awesome! There’s bi-color acrylic, by the way; same as in the demo video with the airplane hand drawn invitations; laser through the top layer and the bottom layer is a second color…might be easier?
Yeah, we only had white on red in the office though, and the frog had to be green. We’re thinking about also using @madebynick 's technique of just painting in the engrave before we take off the contact paper.