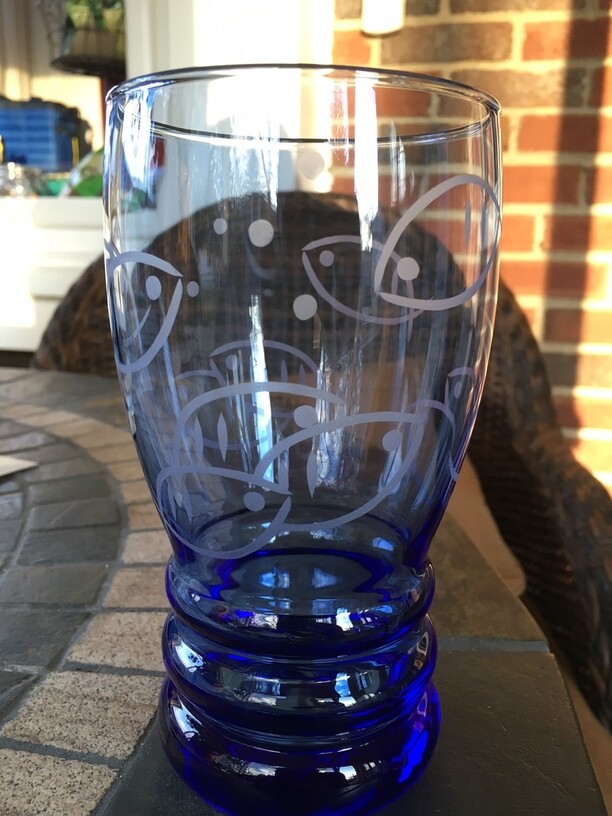
This was made by creating a vector based design, cutting a vinyl stencil on a Silhouette CAMEO, applying the stencil to the glass and then using a simple sandblaster (from Harbor Freight) to etch the glass.
No, I don’t currently have an enclosure (future project). So far the volume has been low and with 220 grit blasting media I’ve simply done the work outside and let it blow into the yard. If / when my volume increases, I’ll build an enclosure. I’ve seen some links on other threads to simple do it yourself enclosures that I would build myself.
My parents used to do a boatload of really nice work when I was younger. It was really cool because they would hand cut out a lot of the stencils. I can imagine custom work would be so much easier with a laser
edit: I wish I had some pictures of their work
It’s fairly inexpensive tool and I’ve been having a great time with it. I purchased it in early December and my first project was to cut our 20 paper reindeer, which my wife colored and hung on our daughters Christmas tree.
This was done as a joke as there was a paper reindeer that my daughter had made in school (first or second grade) and she hated to see it on our Christmas tree, so my wife wanted to replicate it and cover her tree with them. It worked great. Both my wife and daughter loved it.
Toilet flanges are the thing to use for the glove ports. You can find everything you need at Home Depot. Just be careful when cutting holes in these plastic bins, they crack very easily if you push your luck.
There is a laser-cuttable masking film here… It’s cool because you don’t have to do any weeding. Unfortunately, you laser the film while it is on the glass which means we can only do flat items in the GF.
I’m thinking about cutting the opening in the plastic container with an old wood burner or soldering iron. Less likely to break the plastic than cutting it.
will do, I’m sure a family member somewhere still has a piece or two - I’ll check around. One way or another, its definately an art form I would like to try my hand at sometime soon ( i.e. when I’m done refurbishing this house)
The plastic can be drilled carefully. What is happening is as the bit cits through, before rotation clears the hole the last remaining bit to be cut is caught in the drill flute, which initially lifts it instead of cutting it, tearing the plastic.
For a small hole -
Either use light pressure and high speed, and don’t allow the bit to be pulled down into the hole, or best is to sandwitch the plastic between blocks of wood to prevent tearing.
For a hole big enough to stick your hand through, the melting idea would be very safe.
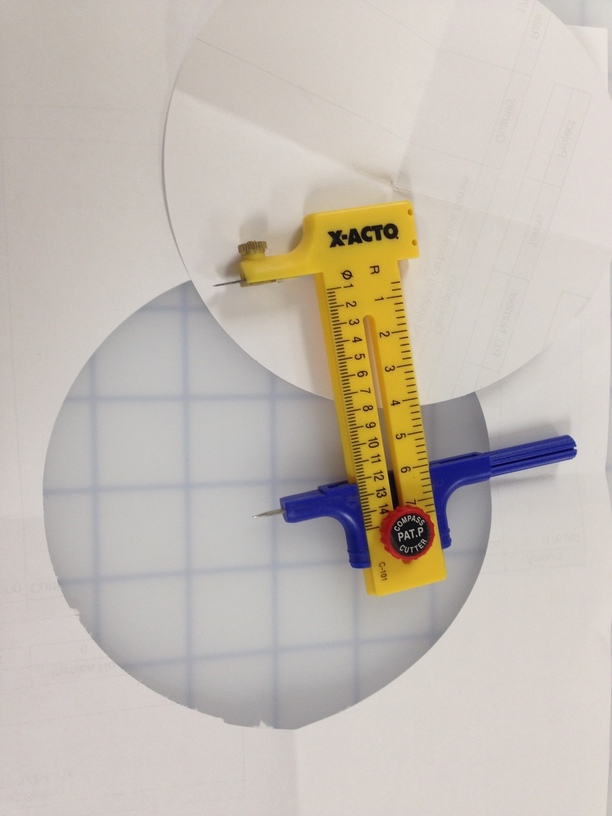
A sharp new blade rather than a “heavy duty” one. If going that route, I would lay the container on its side on top of a solid cutting surface, and cut the circle from the inside. Don’t try to cut all the way through on the first go, but rather score and then then score again.
I might also use a compass/circle cutter like this one (again using a fresh blade and multiple passes):