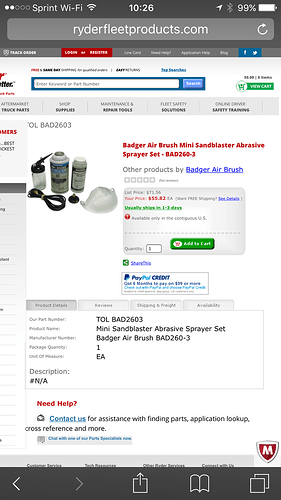
My wife and I use a silloute to cut vinyl and sand blast the image just like the one shown above. Mini sandblasters usually run about 50 bucks and it doesn’t take much of the sand. A couple of quick passes similar to spray painting will mark the glass really well. This is the one we use. Found it at the local woodcrafters.
@dan - while building the GF, will you be developing the product with a expansion port for a rotary axis for working on round objects. I realize not for this first go around but maybe we can purchase as an upgrade to our GF at a later date.
Sandblasting is the best way to etch glass 
That looks awesome @dan!! Had a total Rube Goldberg moment the other day that resulted in a spectacularly shattered engraved glass- glad to know the lasercut stencil method works so well! Could you tell us what brand of adhesive paper you used?
here is link for sandblasting http://www.harborfreight.com/catalogsearch/result?q=sandblasting
I found some nice flip top flask style bottles that will fit in the Glowforge as well if anyone is interested. They arrived a couple of days ago from across the pond (local for the Brit’s in the forum). Nutleys Kitchen Gardens. I can confirm they’ll easily fit in the 1.5" space. I have some of the Bormioli Rocco flasks as well from another project. However they top out at 1.56", so I’m not overly optimistic they’ll work.
my girlfriend would have bought out your whole stock if we had the glowforge ready to go before christmas. ill have to shoot her this link. she loves these style bottles and doesnt know they come in that format
Have to admit… in this instance. I’d just use vinyl and a vinyl cutter to create the stencil for sand blasting.
Sandblasters seem to be pretty common on Craigslist in mid-Missouri. Generally for parts cleaning tractors and vehicles. It seemed to be always a tool in search of a need in my shop. Now I have an excuse. Or may just have to borrow one.
Looks like you have some pretty cool neighbors!
You can also create 3d sand blasted images by creating a layer for each depth in your design. This technique can create really detailed images if you work in thick enough glass. I did a piece years ago of 3 calla lillies and it would have been easier and looked better if the layers had been laser cut. Getting even more excited!
And of course you have 123dMake to make those layer plans 
Perfect! I was slightly bummed the opening would not allow for a bottle or glass for etching purposes. This is a brilliant go-around.
I’d love a tutorial video on how you did that. I would definitely want to do this once I get my glowforge (even if it means buying a sand blaster!
haha, yup, me too. now I need to make space for a sand-blasting cabinet, add another circuit to my fuse panel, and run more outlets into my warehouse space. whee!
Another alternative to the sandblaster is to use glass etching cream. I’ve seen this product used in the glass blowing shop where I’ve been learning to blow glass.
Other than etching paste…I recommend the HARBOR FREIGHT “air eraser” for $24 (after 20% coupon +tax) IF you are doing small work here-and-there. For a lot of work just invest in a used or harbor freight blast cabinet and a decent blast setup.
That’s a GREAT little tool, didn’t know it existed! Thanks for pointing it out… what’s the PSI?
