I’m always fascinated by ways you can take 2D designs and make them 3 dimensional. One really easy way to do this is using http://www.123dapp.com/make (which can take any 3D model and turn it into stacked slices or intersecting planes with a few clicks).
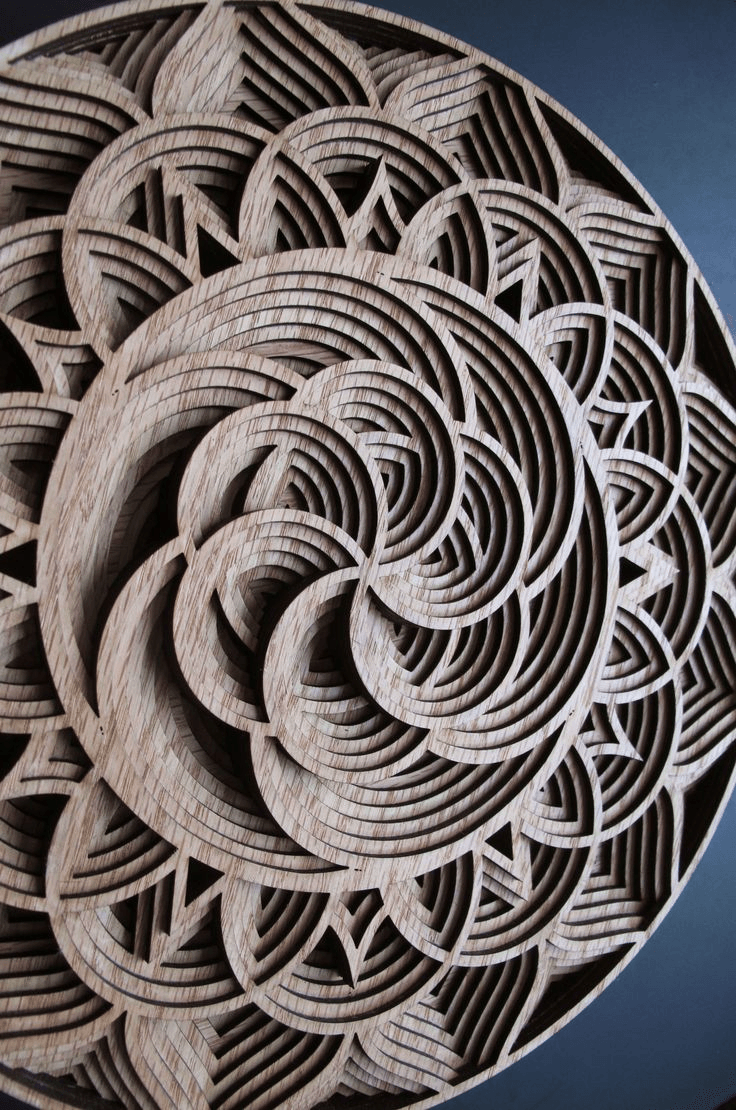
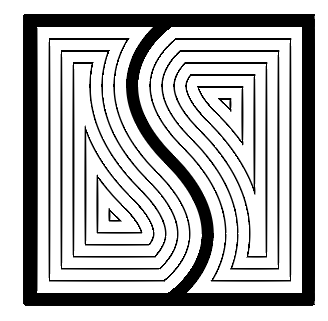
I’ve also seen a technique of taking a thin design of some kind and expanding the shapes slowly across stacks of material to get a really cool effect, like so:
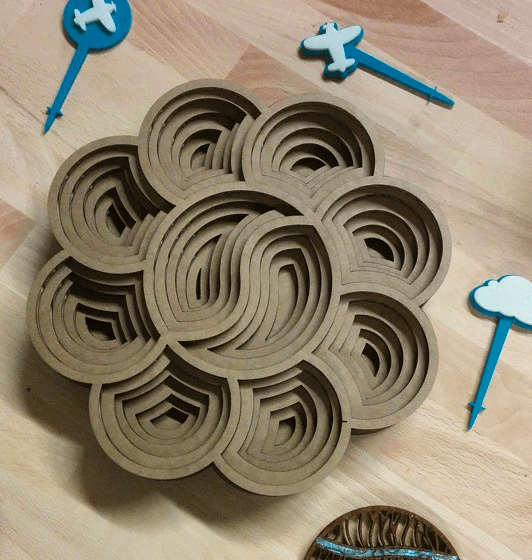
I tried a simple one with cardboard-- took about 20 minutes in Illustrator and then 5-10 minutes on a laser (I used cardboard-- wood would be a bit slower). Here’s mine:
I look at amazing things like this and say, HOW??? I would love to learn how to design, cut, and assemble something like this. I have pre-ordered the glow forge basic and I am hoping that people will be kind enough to post some tutorial videos on you tube.
Very cool. I’m really excited about the prospect of making 3D objects from 2D slices. There’s another technique I’m really excited to try out “Sliceforms”. Any idea what sort of software there is out there to facilitate this sort of creation?
The top post references 123D as an excellent free resource for slicing 3D into 2D. I’ve downloaded it and started slicing spheres to get the idea. Here is an excellent tutorial for the process. And this Instructable has been referenced a few times. Finally, this thread contains one of the most sustained discussions on design programs.
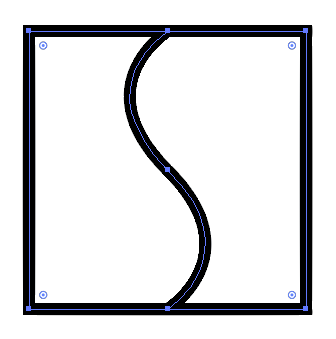
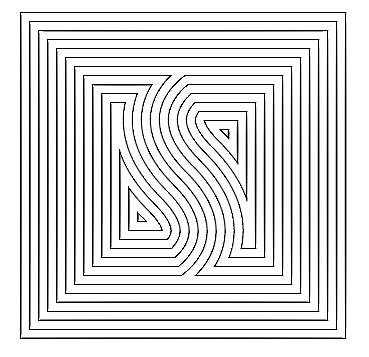
I’ll give you guys a quick “how” on this. Surprisingly easy. First, make any shape at all in Illustrator with fat lines (.25" is good). Like so:
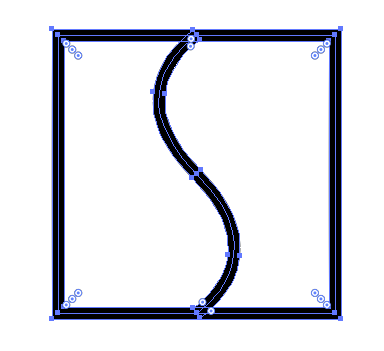
Go to Object > Path > Outline stroke to turn into outlines. Then you’ll have something like this:
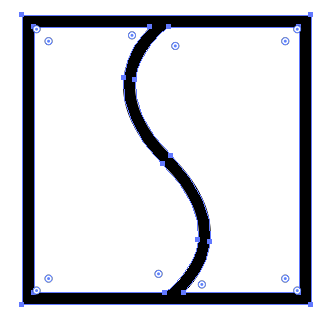
delete the original paths, so now you have some overlapping black shapes. In the Pathfinder palette, select unite-- this basically turns it into 1 shape. Like so:
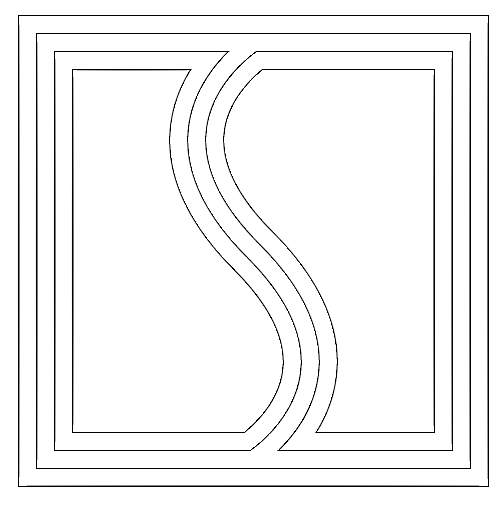
The rest is super easy. Select the shape, and go to Object -> Path -> Offset Path, and offset the outline by whatever your line thickness was originally. It’ll look something like this:
Select the new shape and offset the path on it, same way. Rinse, repeat-- eventually you’ll have something like this:
It offsets to the outside as well as the inside, so I just use the “direct selection tool” (the white arrow) and drag the outsides in, and end up like so:
(this whole thing took about 5 minutes-- obviously, it’s cooler if it’s bigger and more complex than this, but shouldn’t take much longer)
After I get the machine, I’m going for a walk to the grocery store and grabbing some empty boxes for free cardboard. This is on my hit list of projects.
Start going now. Develop a pile. You can go through cardboard VERY fast doing layered projects. Especially since you want to have equal layer thicknesses.
Each layer below the the one above it is the full width? It’s not a nest of pieces, but a stack of pieces cut out from different stock? Or am I missing it?
At first I made each layer “full-width” as you say. It makes it much easier to line everything up at the end, since you just stack all the layers on top of each other.
But in order to minimize weight, I started removing material in the back layers which would be covered by the front layers. In the above example, most of the material behind the turtle shell is blank. There is only one layer of material on top for the shell. This piece is made up of 11 layers of material.
Also, by removing some of the unseen material, I may have been able to save a bit on material costs, but using some of the off-cuts to cut smaller parts. But this was a very negligible saving. If my piece would fit on the bed of the laser, I would cut each layer full width just to simplify my life.
@polarbrainfreeze. Your sturtle is awesome. It’s reminds me of intarsia , but a very intricate layered version. I can’t wait to see what you do with the GF.
I have run into exactly the same tradeoff of lining things up for assembly versus trying to save on material efficiency that you describe. Partly due to the limitations of laser access, I have usually just used much more material than necessary in the past. Really hoping to jump that hurdle with the GF. You can see some of my work at www.julialachman.com