One of the projects on the examples for glowforge is a relief map of seattle/lake washington. I really want to make a few of these kinds of things of my own.
Today I just noticed/found out that the USGS has released all it’s maps, so you could probably make a map of anywhere in the US using this data
It’s really easy to get this data. You can grab GIS data from all over the world. Most is free to the public. You can use something like qGIS which is a free program to read it and export as illustrator files. That way you get vector line work (no tracing needed!). Look up your states (or the state you want the map from) GIS clearing house and you should be able to find them. This happened to be the site for NYs https://gis.ny.gov/
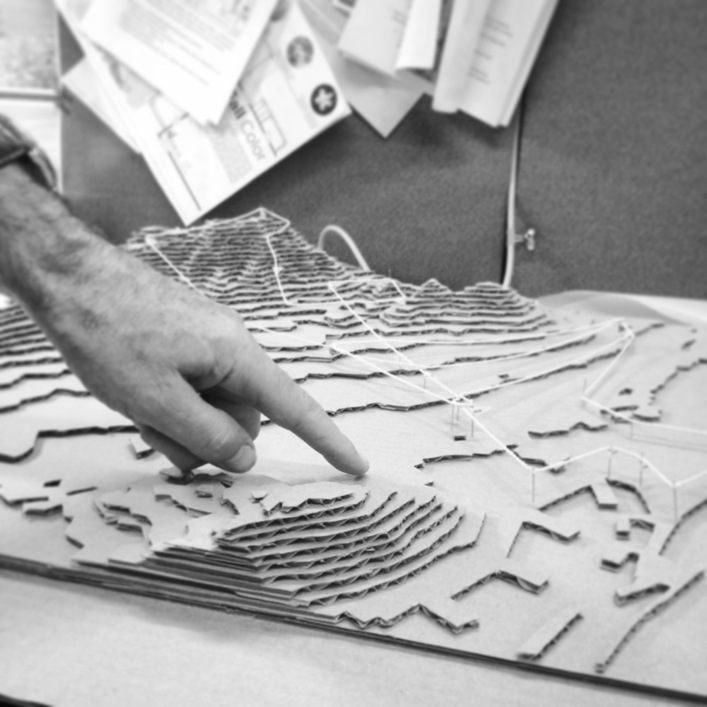
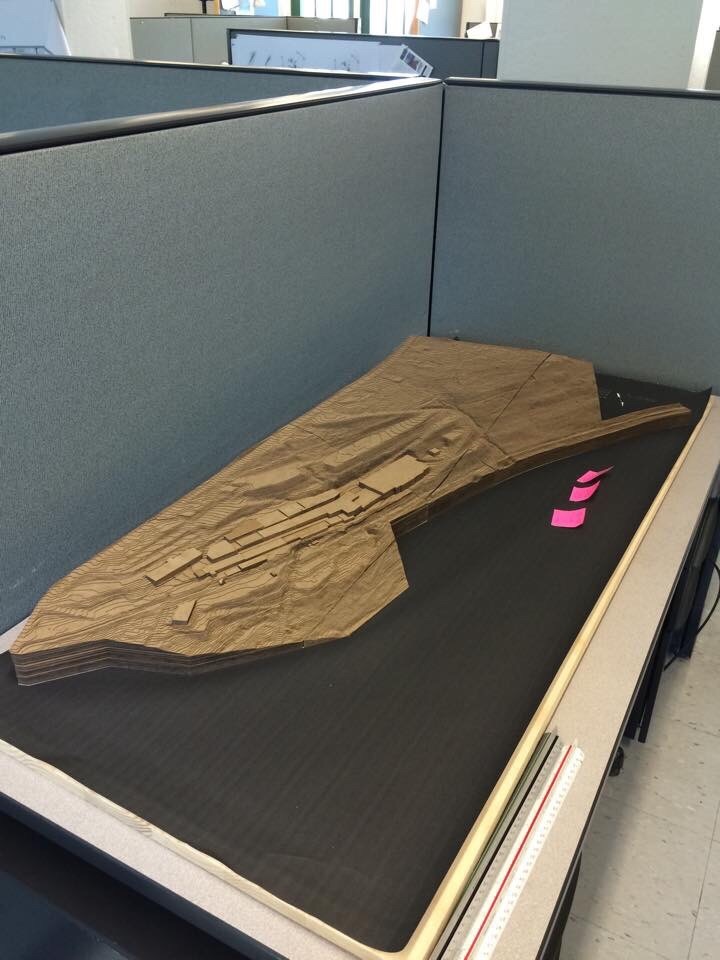
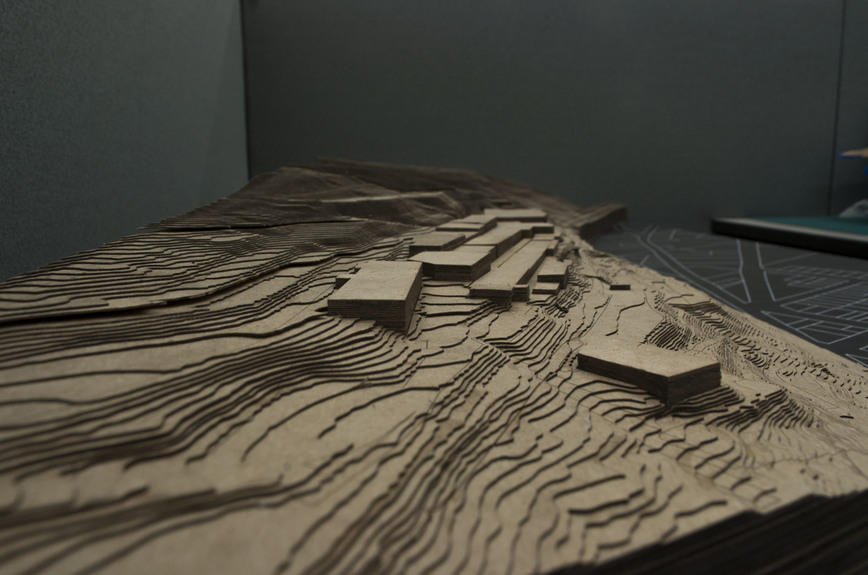
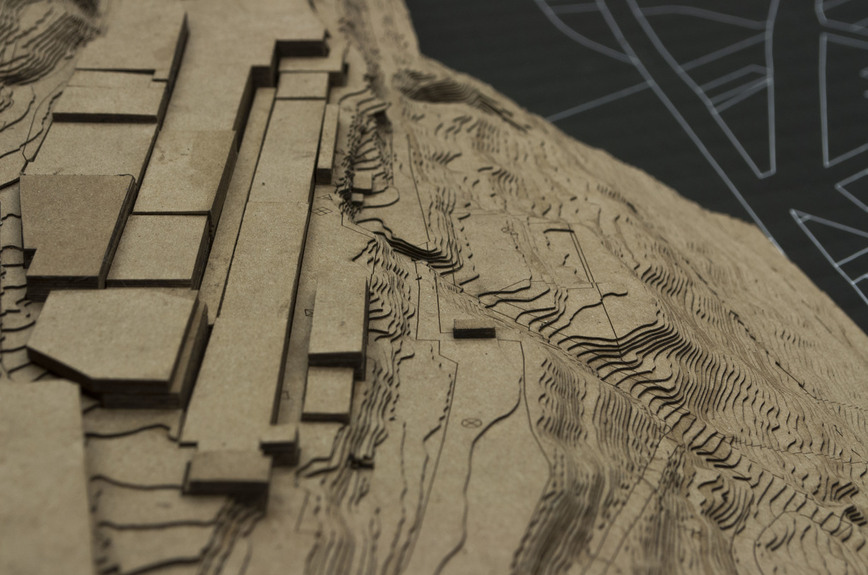
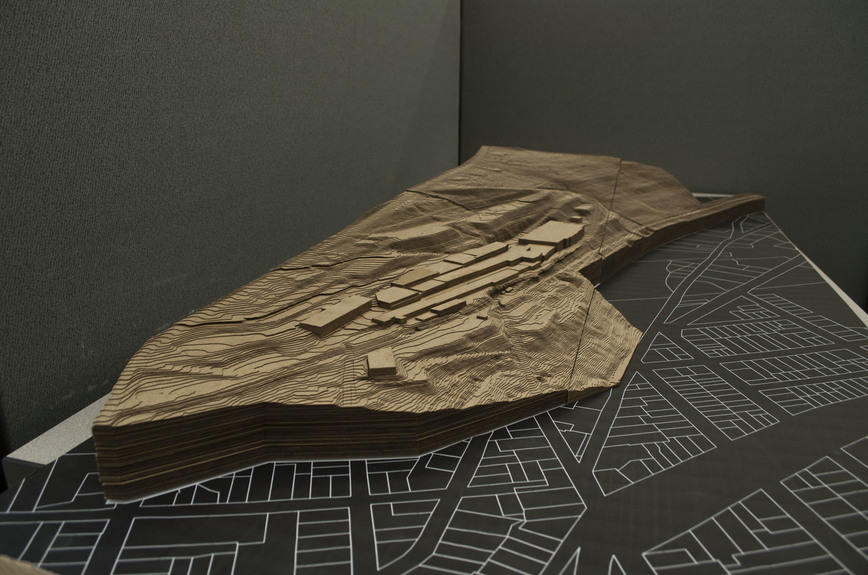
Lots of possibilities here! Im in the landscape design profession and we make regional models using laser cutters sometime. I’ll see if I can get a pic. They are quite impressive (one cost $500! In cutting time!)
How do you align these, especially the smaller pieces as you get closer to the top? I was thinking that you could design a hole in every layer that is only engraved on the back of the top piece, and use wooden dowels or something to align all the pieces with one another. No idea if that would work, or what the people who have made these already have done, though.
I think the dowel idea would work, never thought of doing it that way.
In the past (and typically) we score the lower layer with the outline of the next layer on top. So if you have a mountain and the top is 253 then the layer 252 will have 253 scored into it. We also label it so 252 says its topo 252 and that the scored next layer is 253 and then layer 253 is to 253. Then just glue it up! if you have multiple 253’s then we just label them with decimals or letters.
In this case for the $500 model it was aligned to the uphill corner because everything slopes down. so basically all the layers will the same corner and it is easy to line things up. I didn’t work on this one personally but my colleagues did and I will try and get more pictures (with details!)
I live in the mountains of Western North Carolina and would love a topographical model of our 2-1/2 acres! Little laser cut trees would also be an amazing addition to the model.
@jkopel’s comment sparked an idea. You could engrave a region on one piece in the shape of the piece that is to go above it. Then just plop it into the recess!
@markwarfel that is very kind of you. Would like to know what type of file you would make. I need to purchase some good software and am debating free Inkscape, or one of the pricey ones (Illustrator, PhotoShop, InDesign, or one of the Corel products).
I work mostly in Adobe Illusrator and AutoCAD but could output other files. I have used Corel and hate it. Really hate it haha. But that’s my personal preference. I think inkspace would be a good place to start. I’ve never used it but have heard great things. I think you could also use autodesk123D.
I also have a thought. The models I make are scaled which means that they are very precise and each layer represents a specific contour (usually either 1, 2, or 5 foot intervals). You could take a 3D model of your property and “slice” it in autodesk123D then assemble it. The layers won’t be a specific contour but it will give the same look. And it makes dealing with the material thickness easier. I also have to incorporate the material thickness into the scale and it can be a pain.
@markwarfel thank you. I had heard similar disparaging things about the Corel design software suite. I will look into Audodesk123D and AutoCAD as potential supplemental software to Inkscape for now. The only place I know to get the topographical information on my property is from our county’s GIS website. It shows contours in 10’ increments. My lot slopes 100’ from top to bottom, so I’m not certain I’ll get the level of detail I’d like to have. Do you know of any other way to generate a 3D model of 2.5 acres other than the county GIS system or the sites referenced above?
You could get it off google earth although I don’t know how accurate it will be. In sketchup you can bring in a location (your property) and then turn on terrain. It will create a plane that ungulates like your property. It’s not very accurate but a place to start. Look again on your counties site for a DEM of the area (stands for digital elevation model). It will be a bitmap image that is flat (3 dimensionally) but it is a color gradient where each color represents an elevation. You can interpolate contours on it in something like qGIS (just google a tutorial for DEM to contours)
There are other sources too but you would have to search around. I’m not sure what’s available in your area. Side not if you live near the blue ridge parkway (awesome road!) or the application trail there might be info through them. You can also hire a survey crew haha
The USGS has a cool site called earthexplorer (http://earthexplorer.usgs.gov/) that lets you search and preview a lot of the data they make available. Lots of it is free, but the file formats are often unique to the GIS world and it will require some work to make them usable in a laser cutter.
I was thinking about this some more and came up with an experiment I want to try.
The DEM format raster data is scaled across multiple 0-255 ranges. I wonder what would happen if you extracted each range separately and used it to “engrave” a smooth edge cutout as described above. Would they stack correctly? I have to try this!
Any Topo map is essentially made up of lines that directly correspond to the layers in these kinds of models, although I haven’t got a clue how one might convert one of those maps to individual cut files for all the layers yet (@markwarfel: qGIS does this?). Mark also mentioned above you can enter a location into Google Sketchup and it will generate a 3D model of that location (presumably by doing something like what I just said), but haven’t tried it yet. Probably not accurate enough for a single property, but for an entire mountain, maybe it would be workable. If it does a good enough job, you could save it, and then open it in Autodesk 123D Make to generate the cut files. I am not sure if 123DMake supports Sketchup’s files natively or if you would need either Sketchup Pro or a plugin to get a supported 3D model format though. I have always been fascinated with 3D models of real world objects (and the real world itself for that matter), so plan to experiment with this myself when I get a couple of hours to play with it. If nobody else has confirmed or refuted this by the time I have completed that analysis, I will add a post with my results.