ProofGrade Projects and Pre-Release Glowforge :glowforge: Design Catalog 12-piece puzzle

I wanted to put the acorn pic on the puzzle.

First test the acorn pic as engraving:


With masking on using a small part of the picture.


Sample or test engrave with masking removed. A medium bristle brush would help to brush off.
I’m starting this topic with a picture of a testing of the photo engraving. I opened the acorn picture in GIMP, cropped it to a smaller area, to make a square 1 7/8" by 3", native resolution, saved it as a *.png. Using the Glowforge UI, I placed it in the Glowforge workspace. It turned to greyscale. Chose medium engraving. Pressed print. 6m37s later, I was done. Material: 1/8 inch maple plywood.

Here is the original. Others are free to use this image of acorns, leaves and bark as they wish.

Is this something that people are interested in? The acorn is going to be the overlay on the 12-piece puzzle that is one of the ten designs of the design catalog I have access to.

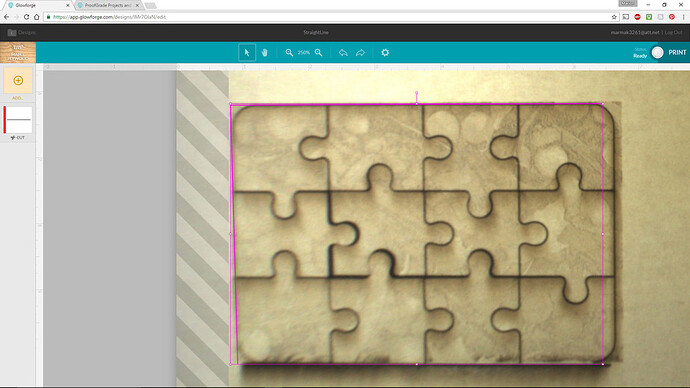
Here is the Glowforge engraving the acorns on the puzzle. I put that first in order. I resized the puzzle which is rather small out of the gate and resized the photo, which was larger in placing than area I wanted to engrave.

I put the print job on the material deliberately close to the limit of the scan/usable area. Masking still on.


Note the bottom of the engrave, where the engraving commences, is a little darker for a few lines. That was the same as on the test piece.


Here it is with the job complete. Recall that I had placed it at the limit of the usable area of the bed. Coloring outside the lines. That’s ok.


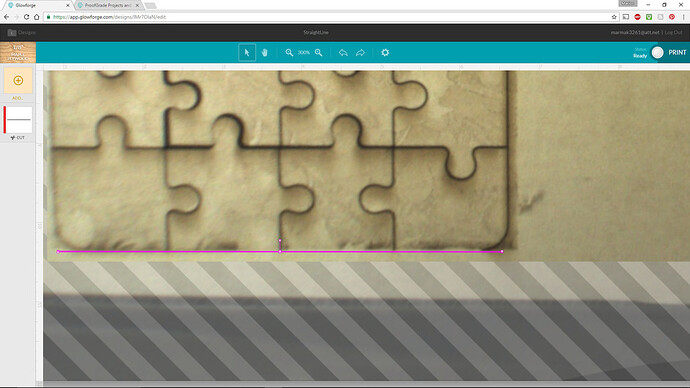
Note that the bottom of the puzzle is not cut through. We’ll fix that with placing a line imported form Inkscape as native drawing tools aren’t available at this time. I moved the material up slightly to access the bottom of the puzzle.

Here is a screen grab of the placement. Wish me luck!


Not too shabby but I could nudge it up a bit more. Learning how to interpret tolerances and how far an arrow key nudges (hey, that would be a nice test to try out and demonstrate.).

Ok, now let’s look at the other side:


Hey, where did the lines go? It’s something that I have noted on edges or corners of things on the extemeties of the bed, there is still some dialing in to do.

So this time lets try to finish the cutting from the other side and see how copy, paste, rotate, nudge, select all works. Whoops, scratch that. QR code is only on one side of the material for now. (@dan_berry:wink:)

So let’s print this and finish it up.


New experience, rubbing the masking of. It comes off easily, but there are lots of little bits! We call that post-processing! About half of the puzzle pieces were still attached together by miniscul bits of masking. The Glowforge team have this dialed in fairly precisely, at least for the bulk of it, to cut through the material but barely kiss the underlying masking. There is a tight fit with the masking on. Nice puzzle pieces that go together only one way. Glad I put an engraving on because it would be a challenge otherwise, even with a 12-piece puzzle for me. Kerf? I did some measurements last night and figure it is .01 of an inch. Ducmenting those tests will come.


Here is the puzzle. The engraving is very light. Pleasant. I’d say I might want something in between the bottom 1/8 inch that is darker, and the rest of it.

Mind you, I did not process this color photograph at all to optimize it. Just dragged the cropped photo in and shrunk it a bit.

So let’s try a darker engrave, shall we? And this time, use material farther away from the no-go zones.

And stay tuned in for the final print of the 12-piece puzzle from the design catalog at default, standard with darkest engraving. It will be nice. But I have to go to work. It’s ready to print.

But I have to go and the cat can’t push the button (well, probably could) and monitor the print (definitely not) while I go get ready!

To be continued. And I hope edited and corrected.

2016-12-11 12:16 CST
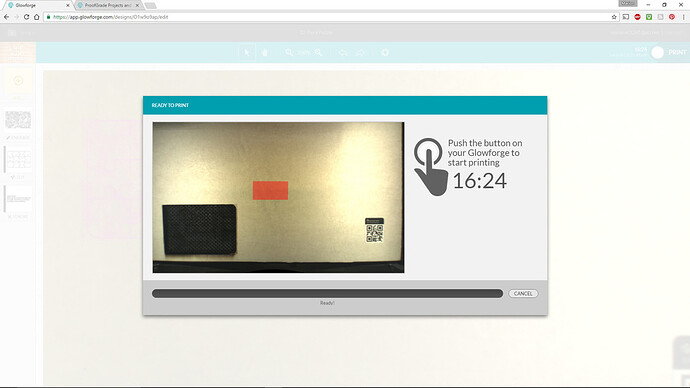
Here is the beginning of the engrave. 16:30 minuted to engrave deep in 2x3 spot on puzzle.

And final shot for now of finished dark engrave. Note once again, the cuts didn’t quite make it through. Now that’s an interesting challenge for coming back and overlay the puzzle cutout and redoing them.

The engraving is wonderful. It is a finely textured surface. Hard to get a pic of it.

45 Likes

We are definitely interested in this!

4 Likes

For an apples to acorns comparison, this is approximately the area shown in the first pic that @marmak3261 engraved.

11 Likes

This is pretty cool, thanks for posting!

Side note, I’ve built a parametric CAD model for a puzzle much like this that automatically adjusts the width and height, and inserts additional puzzle pieces, based upon however many puzzle pieces you want in either direction. In testing the CAD model I had entered a 100x100 (10,000 pieces) size puzzle. It took some time for the computer to compute that but it did successfully!

Unfortunately when I export a DXF file from Geomagic Design, instead of single line “tool paths” I get filled pen shapes, so back to the drawing board.

I had a cool idea for a photo engrave puzzle, that fits into a lasered photo frame, with a 3-point stand to hold the frame/photo at a slight angle off vertical.

6 Likes

It looks like you’re having cut-through problems because of the edges of the bed are out of focus. That’ll be fixed with multipoint autofocus. (But do let Rita know anyway).

7 Likes

Is there any chance your camera messed with the White Balance settings between shots? Just seems to have a yellow cast to me. Is the Proofgrade QR code White ?

1 Like

You are SO thorough, it blows my mind! Just reiterates why you were a perfect choice to get a pre-release.

5 Likes

I have a CFL in a lamp that I have on my desk. It’s very yellow light and has a strong ochre tint using the iPhone. I had been using an old Canon SLR digital, but it’s white balance is a mess and it is misfiring on many of the settings. The lighting in the Glowforge bed certainlyl has a different hue.

As @JeremyNielsen suggested, using similar hued lightin will help. Talked to someone today who has the equiipment and she said she’d come over and do some glamor shots for me.

4 Likes

You can color correct these fairly simply in a photo editor if you have a good reference in the image for a white value. Here’s one of your images from above that has the QR code sticker. I use GIMP for image editing these days (since I am not earning a living from imaging any longer in which case I prefer Photoshop). Look for the Levels adjustment, both Photoshop and GIMP have a button in “Levels” labeled “Set White Point”. You click that button, select an area in the image you know is supposed to be pure white, and the program does a fairly decent job adjusting the colors. If you want to manually adjust them from here you can.

To do this with your DSLR, you need a white balance card. It’s pure white on one side and grey on the other. You position the card under the lighting then adjust the exposure to make it as light as possible without over-exposing. Shoot one image where the white card fills the entire frame, then in your camera’s menu, manually set your white balance to read from that white image. Remove the white balance card from the scene and shoot, this should get the white balance set pretty darn close in camera.

If you have multiple types of lighting in one scene with differing color temperatures, getting accurate white balance is a no-win situation.

8 Likes

This is my first post in the forum, but I have been reading for just under a year. I would like to thank you @marmak3261 for all of the effort that you have put into your posts since you received your beta unit. Your attention to detail is awesome. The time that you take out of your personal life to support sharing all details of the current state of your GF is very much appreciated. I look forward to your posts and all the beta users posts to come. Thank you, Sir!

16 Likes

This! :+1:

1 Like

While we’re talking about puzzles, mind taking a look at this SVG file? This is a 10x10 (100 piece square) puzzle that’s a result of the parametric CAD model I mentioned earlier in the thread. When I generate the DXF file from the CAD program then bring into Inkscape, every single line and curve is its own segment. I have to wonder how the GF will handle the cutting order if all these segments are not joined together in contiguous lines/paths.

Hopefully this is clickable -->

Edit: By the way I dont expect you to run this file. More or less just thinking out loud, and sharing the SVG for anybody else that wants to play with it.

Can’t click the link…did you try to upload something? You might need to Zip it first.

I used the “Upload” button. I just figured out you can right click that little image and save the SVG file. I tried and it opened up in Inkscape exactly as I had saved it.

Huh! That’s handy! :grinning:

(Not sure how the file will be treated yet.)

1 Like

@mpipes, loaded just fine into the UI. I don’t have a 'forge free so I can’t test the pathing, but my best guess is that it’s going to be a bit all over the place. :slight_smile:

1 Like

Welcome @Andre1831 to posting. I’m happy to share what I have. Writing up posts does take a while but I see it as learning for me. Since the lonely request I have from Glowforge is to provide tons of feedback, I’m happy to oblige.

Definitely will try again to get my white balance fixed on the Canon so I don’t have to post process, but GIMP would handle it. Most of these shots are the iPhone and just dragged straight to upload. Thanks for the helpful comments.

Th lighting in the room needs the most attention. It has no built in and I just started dragging in lamps when I installed the Glowforge. A mixture of halogen, cfl, some old school cheap Florescent tube fixtures that you mount under cabinets. I had no idea what problems this would cause as I haven’t done close shooting indoors like this before.

So in addition to all the other shop features to prepare for, lighting is crucial as I’m discovering.

3 Likes

@dan Back in the days before large format inkjet printers, we had pen plotters. Boggles the mind how much they jumped around. These days, the software we use for generating patterns for our CNC fabric cutting table at work will read DXF files and automatically joins the segments into paths for us. The process to do this in Inkscape, while simple, is not fast by any means especially for a design like this with a lot of nodes. Just on the first horizontal line I’ve got nodes that refuse to join LOL.

3 Likes

It would have been more convenient if they printed the QR code on a material like a post-it note, so it could be repositioned to where it wouldn’t be cut, or even stuck to the back of the material.

I also worry that if they saturate the surface with invisible, UV readable, QR codes, there could come a time when the material is so cut up with previous jobs, that none of the QR codes are readable. IMHO, the post-it version of the QR code seems like a better solution. It can be placed over previous holes.

2 Likes

Hey @ande1831, nice to hear from you and I hope you will join in more; in any case, welcome to the forum!

3 Likes