No, mine is individually sheaved for the speeds I need for each head, with four speed ranges available @ the motor. Slow speed, 500rpm, grinding removes a lot of metal with minimal stops for quenching, and buffing @ 3000rpm works well for most of my stuff, with no speed change necessary between operations.
Sweet that you have a Reeve’s drive integrated into your design. I had one available, but it was of poor design & material quality, so I decided not to use it.
I, and I’m sure everybody, would love to see pictures of your grinders!
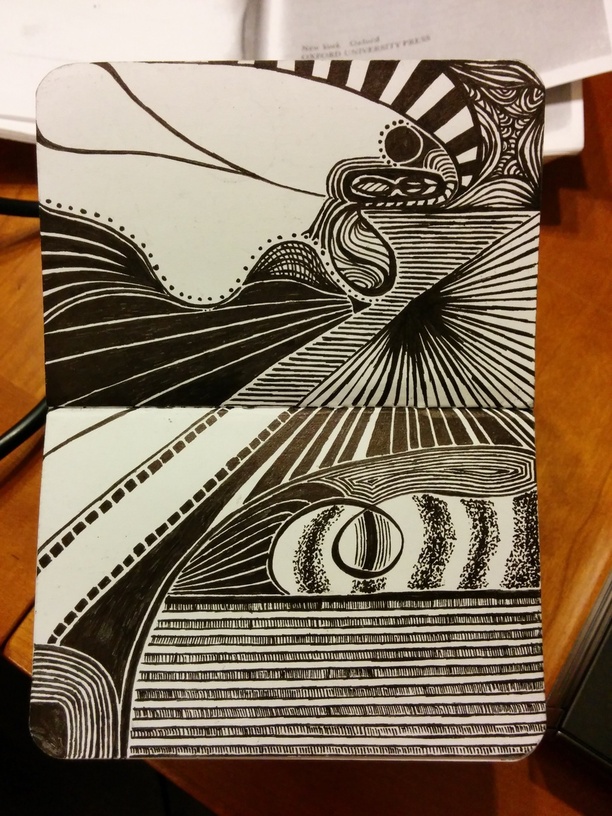
I do a lot of cooking as well, but it’s usually devoured before I get a chance to document. There are so many talented people! I love seeing all the beautiful things that have been made. It’s so inspiring to see all the different talents, it makes me want to learn more!
Hello Annette!
No apologies, your pictures are better than mine. I understand, Artists are picky.
So you already work with a laser?
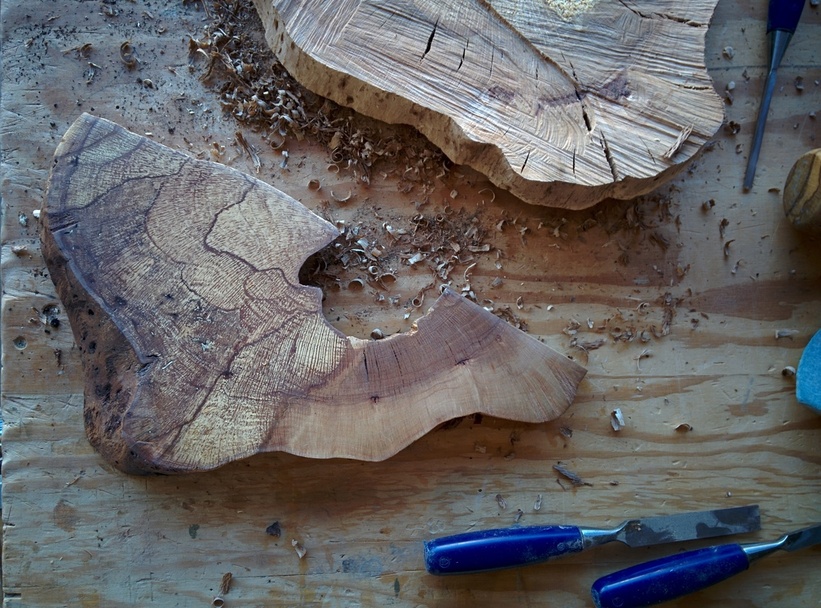
Like you, a bunch of us here have an affinity for wood!
How cool is it you will just be able to drop a doodle in the,forge and go?
Thank you for contributing!
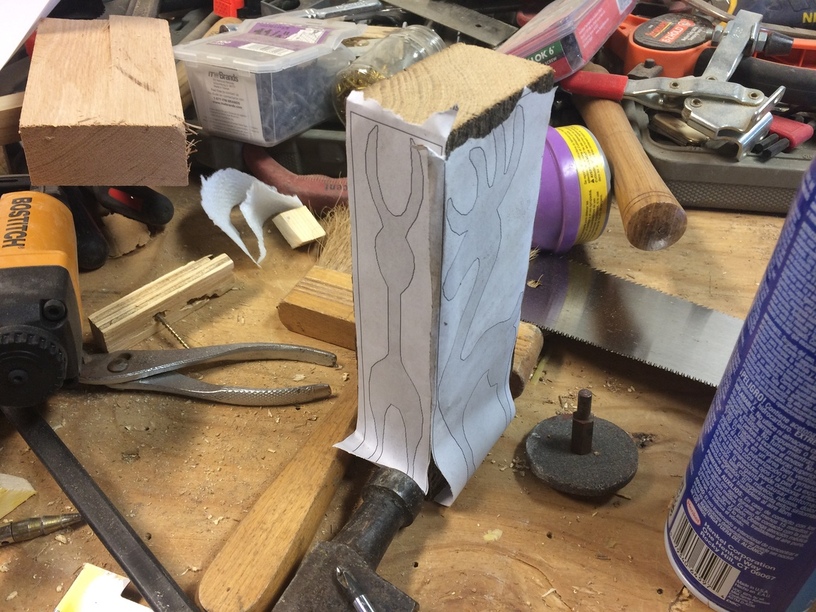
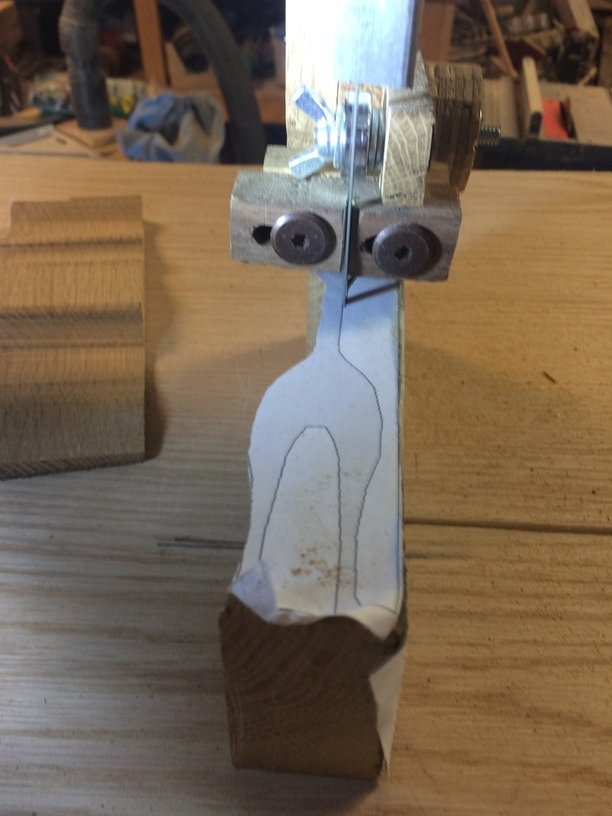
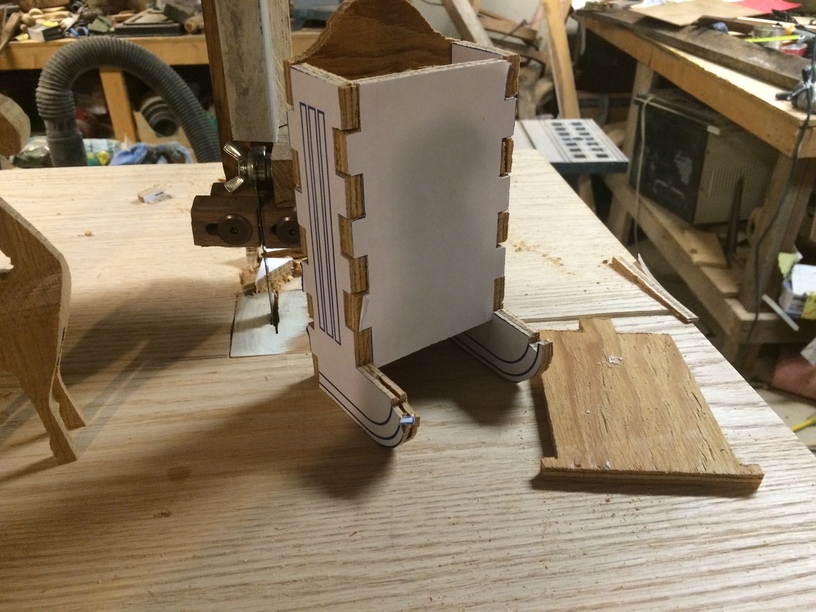
Having no Glowforge, I thought I would use the band saw to cut something. Grabbed some old oak 2x4 to give it a good test. Went through with no problems. This is a 3/16 blade I brazed back together after I broke it. It held up fine to some tight work in hard wood. Really cool to see the remainder appear after making the cuts.
Most of the laser projects were done when I was still in school and could use their laser cutter, but I am absolutely excited to be able to play around with things I draw on the Glowforge! It’s going to be a completely new beast.
Thank you for starting this thread. It’s really great to see all the different talents of fellow forgers!
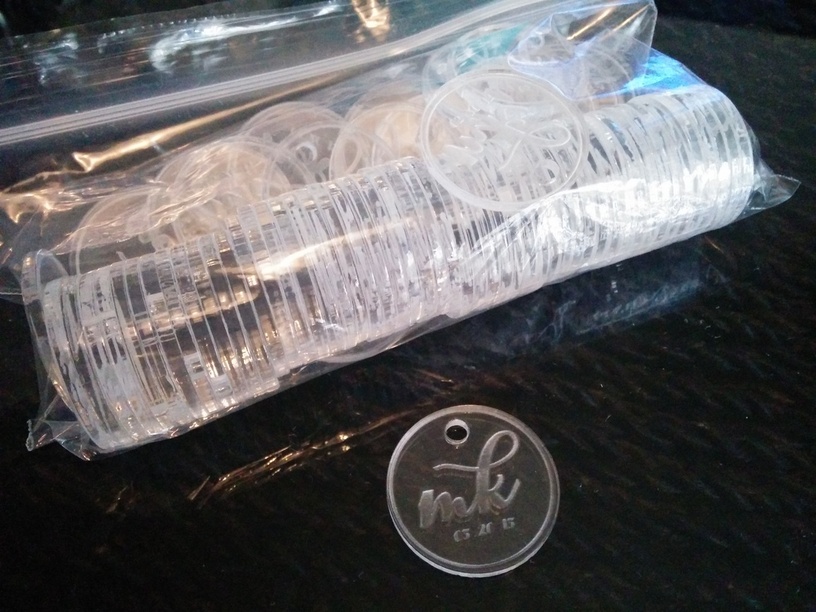
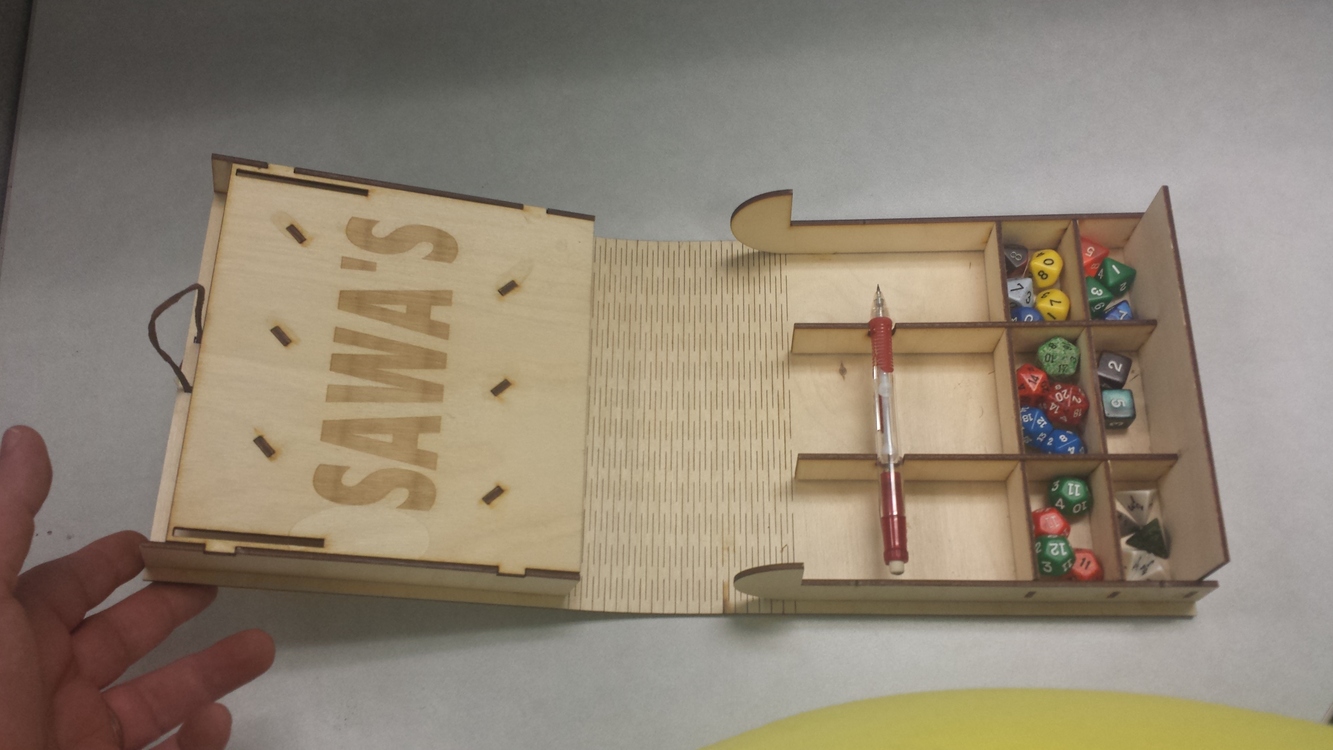
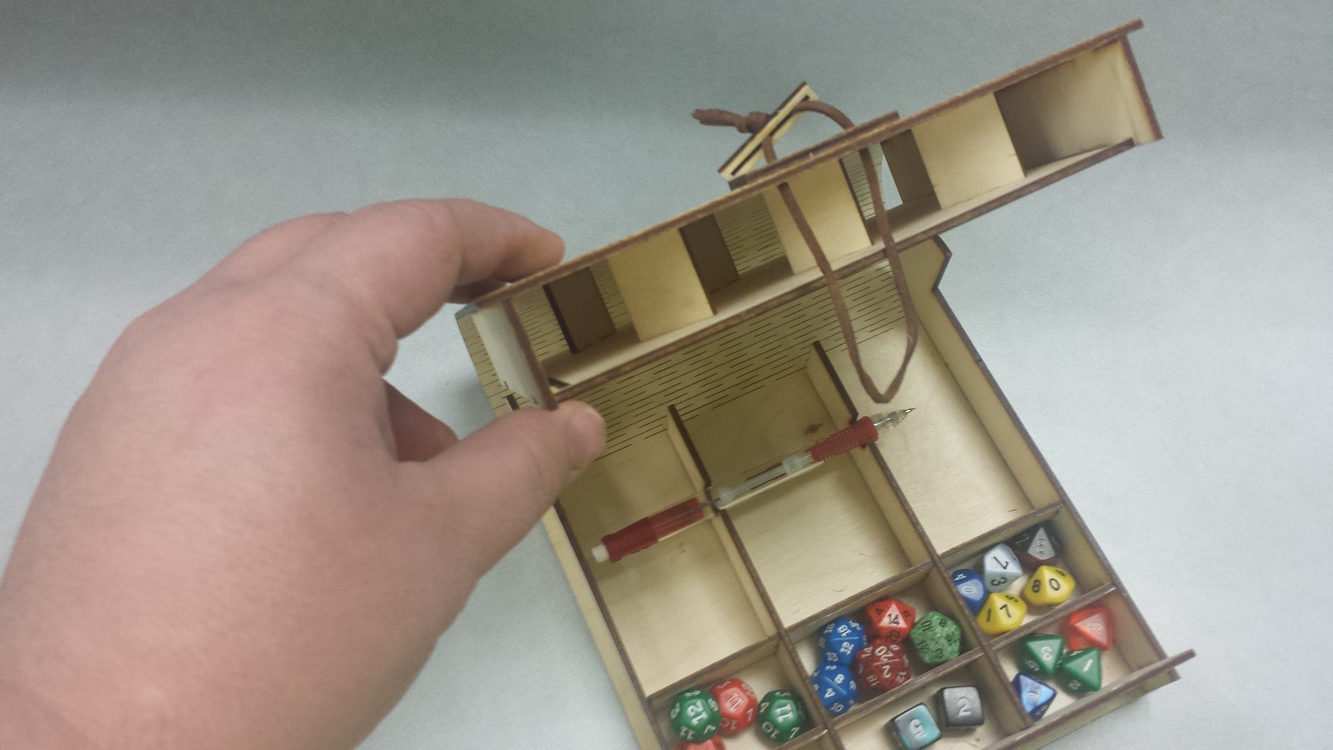
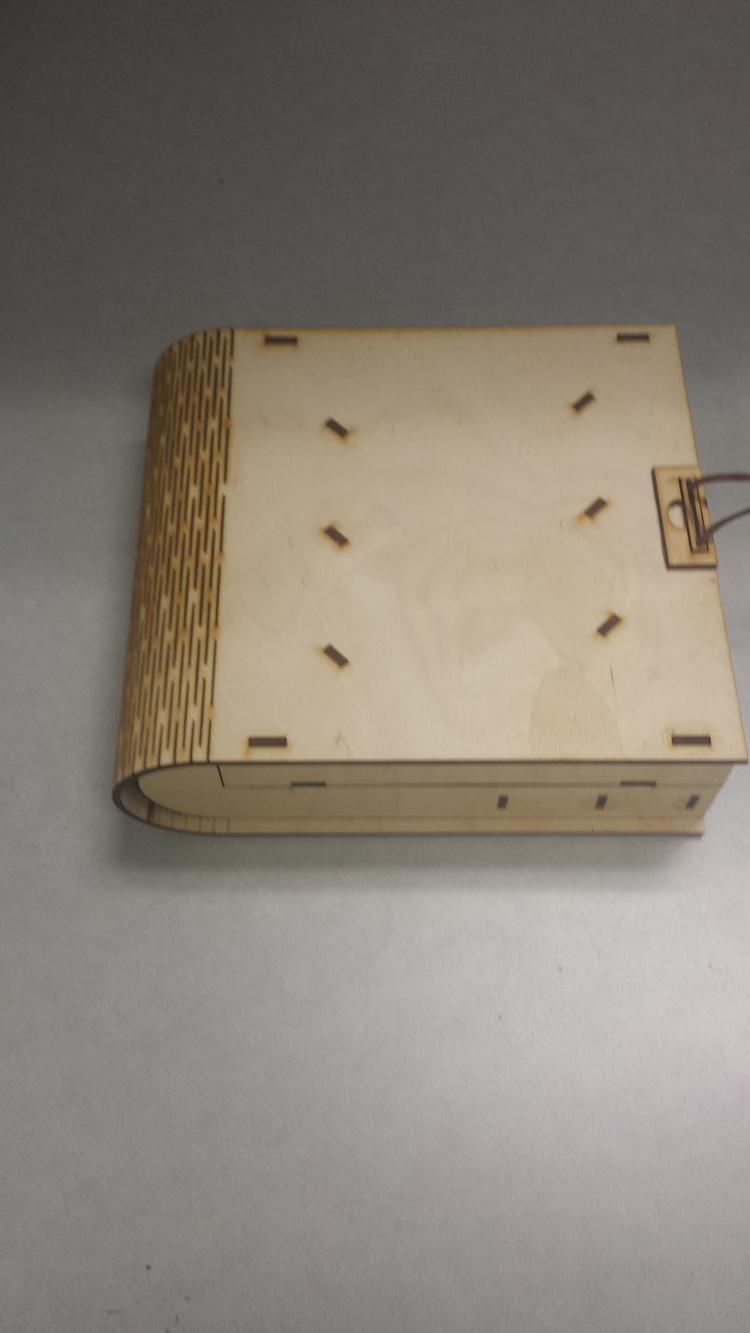
I’ve really wanted to show off my role-playing tilesets I’ve been working on for the past few months. I just got patent pending on them and I have cut about 95% of them from the acrylic, but only about 45% assembled and chem-welded. I also have been working on my website- which certainly can be seen as a culmination of time and effort, but feels barely real yet to me. Let me get a bit more polish on them both and I’ll present ya with some good eye-candy.
@marmak3261 if you cut several times across the bottom piece at what is to be the curved area from the back side, just until you hit the front layer, you might convince the plywood to bend for you. You’ll also have to mount it up on another piece of wood to level it out for the locking tabs on the front.
Knowing nothing about band saws, I wonder about the brazing joint on the blade.
Seems like the flex across what I presume to be a “butt joint” would work harden the bronze and eventually fail?
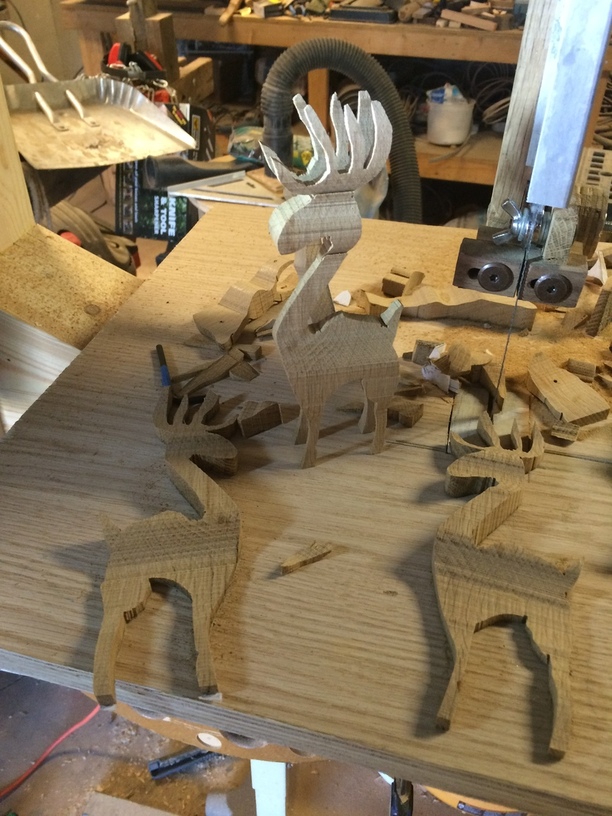
That reindeer turned out well, as well as the matchbox! What’s left to keep you out of trouble until the GF shows up?
BTW, my ideas of where to plant the laser changed several times until finally deciding on a spot, where is yours going to live?
@AnnetteChang - yeah, it’s been great to see the results of the creative passions that so many have shared!
There’s around twenty of us very active around here, and the inspiration of what people have shared coaxed a few more out of the Shadows.
It’s the contributions of the members that make the forum the resource it is, and the more people involved, the better this place gets!
@Sawa - looking forward to seeing your tile sets you’ve been pouring yourself into!
Researching patent applications and the process turned my stomach. Congrats on the pending status -and your dice towers look great!
I watched a few YouTube videos about brazing bandsaw blades and got a small kit from Amazon with the required % silver solder and flux for $12.00. I made a jig out of wood to position the blade in line. I used another jig to grind the appropriate scarf and skew joint on to both ends to enlarge the joint surface area. As to hardening/tempering, that is a question since I heat the blade up to do the braze. I assume the metal is a little weaker around the joint. I filed the joint smooth. The only jiggle in the blade comes from the kink put in when I broke it and not at the new joint; but it works well for anything I need to cut that I might sand smooth after. At least it will will last long enough that I saved some money not to buy a new blade. That’s one reason why I used the hard oak to test this. It didn’t break and it made it through fairly easily. I used a 1/2" blade to cut the matchbox out. There was absolutely no drift during the cut. That’s pretty amazing to me that I ended up getting the wheels true and mounted so precisely. Now the rest is finishing the enclosure and making a mobile base for it. I’m pleased with that little reindeer. I wonder if I can design a nativity set that makes all the figures using this same technique to get the 3D shape like the deer. Seems simple enough to do a side and front profile and then intersect these two in Sketchup like Mathias Wandel did with the reindeer. I need to check out some scroll saw patterns and such for this.
I started taking my Japanese style pull saw with the fine set to score along the bottom for bending around a curve. I think it will work out, but it’s not decent plywood, some old paneling that I had laying around, so it doesn’t take the curve well. I’ll do the matchbox up in thin walnut that I can resaw. This was just a practice to see how it cuts. I’m thinking about making the lines in Inkscape up so that I can get the kerf right, like to do half of the line one color and half another color so that I can cut just up to the line and have a perfect fit. I guess I can make the line much finer and cut up to it. This is exactly the kind of design exercise I need to understand how to figure kerf size in making small objects.
Brazing bandsaw blades does not appreciably weaken them, and if you are concerned with temper then put a piece of firebrick over the joint to slow the cooling and allow it to temper a bit.
I have a 16" doall metal cutting bandsaw with a blade welder, but the welder only works for old style carbon blades. When I need to fix a bi-metal blade I braze it, and so far it has worked great even with the really high tension that the saw puts on blades.
i will be using the forge in every way possible … everything from cut acrylic to cutting foam but mostly going to use it for rapid prototyping leather made goods and such