Hey everyone. it has been a while since I have been able to post, and this is my first Free Design post. With all the craziness in the world, my wife and I decided to add to the chaos and move after 18 years in our home. With the kids out of the house, it was time for a change. Well, that meant packing everything up (including the GlowForge) so I haven’t been able to print for a while and I have been too busy to post. Not to mention when I got to the new home, the window was a crank out window and my setup was designed for a sash window (more on that in a different post).
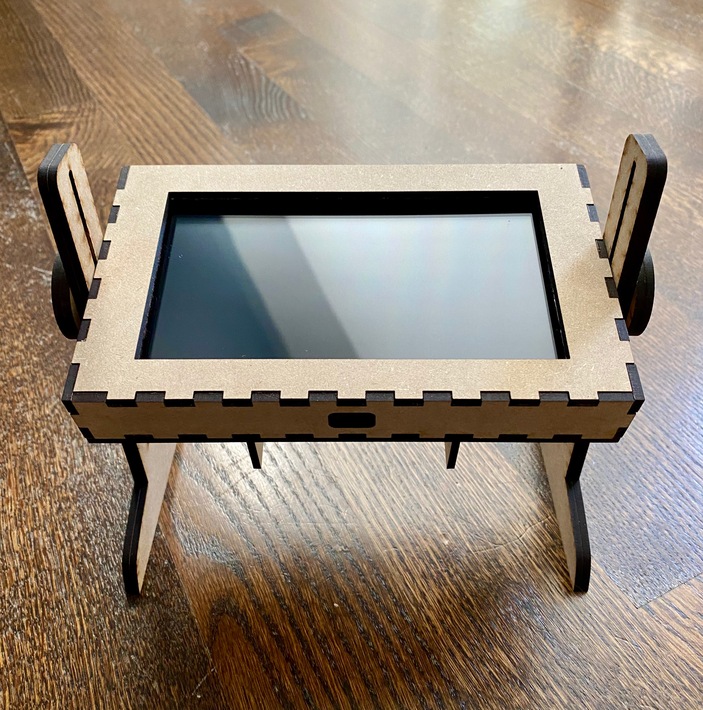
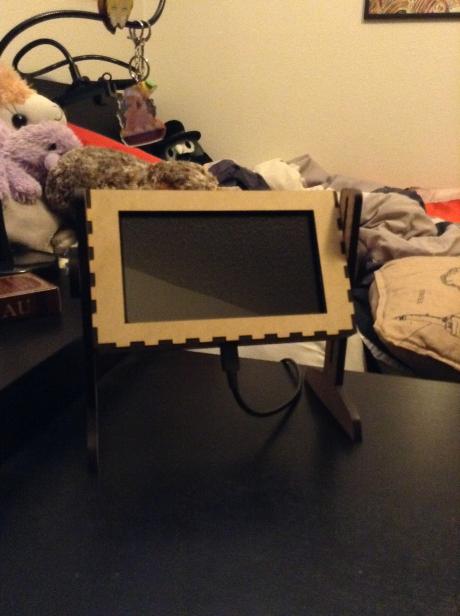
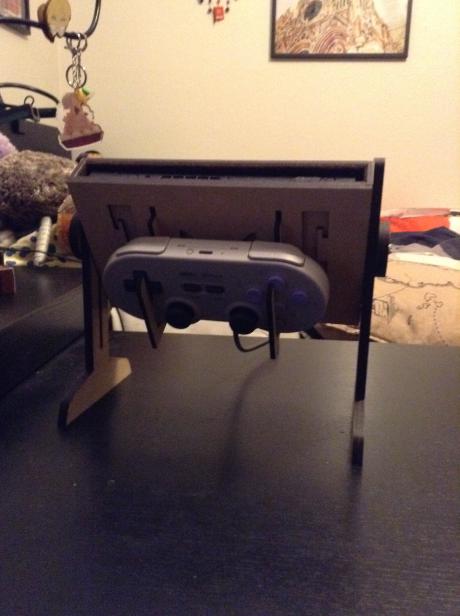
Anyway, after everything settled down, my oldest daughter came to visit and we decided to make something on the GlowForge while she was here. I asked her to think about what she wanted and she came up with the idea to make a stand for her Nintendo Switch. She liked the idea of a wood frame and wanted to make it adjustable height and angles. She also wanted a place to put her extra controller on the back. One thing she chose was to design it not to hold the joy cons. This was a choice, not an oversight. She said when she is using a stand she would never need to have the joy cons attached.
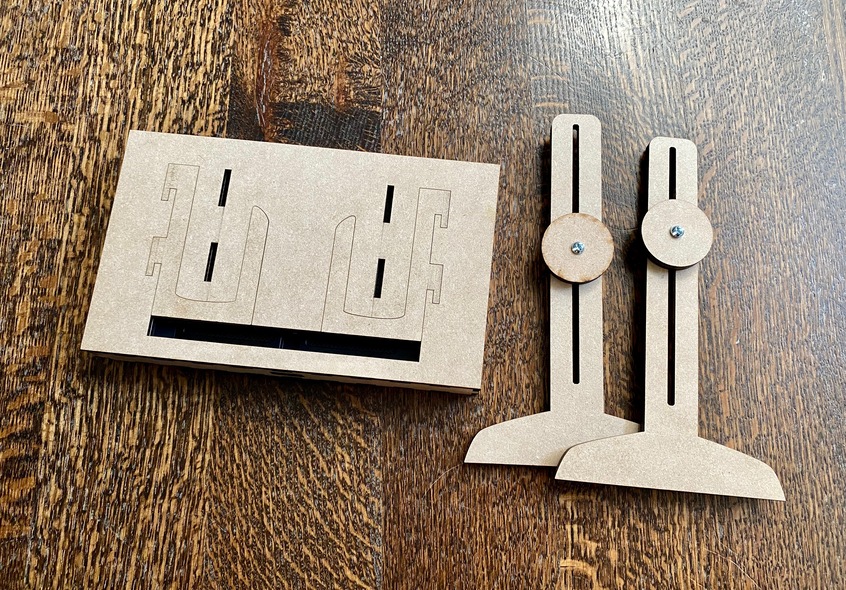
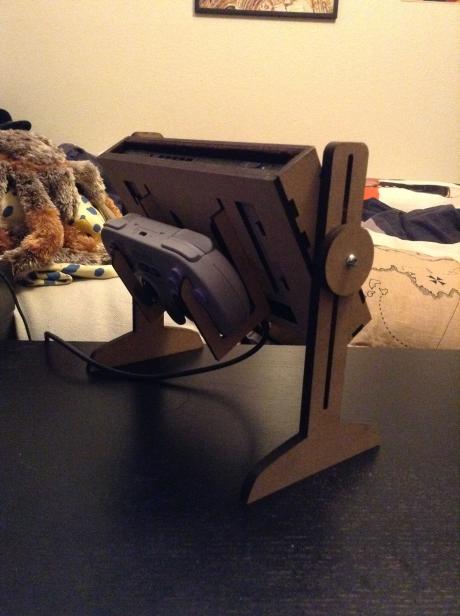
Some key design elements were to make it as thin as possible. make sure it could easily collapse so it could be taken with her and line the inside with felt so that her precious switch wouldn’t get scratched. We were able to make the controller holders fit like puzzle pieces and the sides are fully integrated using #6-32 bolts with wood dials so there is now screwdrivers or tools required to assemble.
One note on the design, we did end up cutting two sets of the legs and gluing them together as they just felt more substantial. We also printed a couple extra of the controller holders thinking they were the most fragile part, but we were pleasantly surprised at how sturdy they were.
The entire process from concept through design and assembly was a single day. it was a great way to spend time together and I think she really loved the outcome.
I figured since it was our design, I would share it with this community. Feel free to update or use any way you wish. We hope you enjoy it.
very nice. literally the only thing I would do in addition to what you have there is to break out the router and bevel the edges around the screen so it’s a much shorter transition between mdf and screen.
Actually thought about that, but my daughter after looking at it really kind of liked the effect of a small shadow. It didn’t detract from the game and added to the the old tv feel she was going for, but I assure you we did consider it. Thanks for the good idea. I love hearing the way others would improve a design.
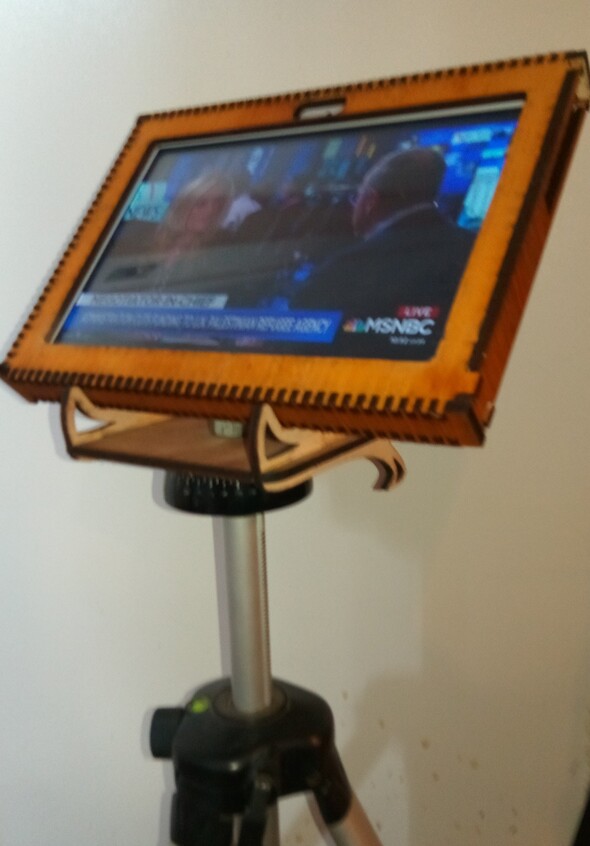
I did design a tablet box for a now dead tablet but did not add an additional support however. I like the entrance from the top instead of the side as I did it, but used a support built in to a tripod instead,
Thank you for sharing! That is a really great piece that I am sure will have a lot of uses. I don’t have a game, but i can thick of really cool things to do with it!
Thanks for the share. My younger two have never been into video games until the switch thanks to Covid. I will have to ask them if this is something that will interest them.
Welcome back and congratulations on the new home. Thank you for sharing. I’ve been looking for a stand for our various iPads. I keep one in the kitchen for recipes and monitoring temp probes.
Ok I suddenly had this vision of a Knob on the front and metal foil rabbit ears when you mentioned the “old tv feel”. Did I just date myself??? I barely remember the rabbit ears from childhood.
I’m going to ask my son if he wants it for his Switch — thus far he has told me he didn’t need anything. Thanks for sharing the file!
Yes, you dated yourself, but I am right there with you. I had a black and white TV and remember UHF. My dad’s TV remote was me, “Chris, go change the channel.” Of course my daughter is 32 so she remembers the old TVs too.


 .
.