So I bought the card wallet design to try my hand at leather stitching…but when I open it in the GFUI, it looks like all the stitching holes are cut in the same direction. There aren’t instructions (or, am I missing that part?), but it looks like the panels should each be folded in half…If I do that, instead of the / / holes lining up, I’d get an X; diagonal one direction on one side, the other direction on the other.
That doesn’t seem right to me, but I’m new to the material. Is there some trick to the stitch that makes that work or is that a glitch in the published design?
I haven’t cut it yet, I’m just looking at the pattern and then sketched it out on paper to make sure my mental folds weren’t playing tricks on me.
Looking at the photo, it looks like you’d take both pieces of material that get cut out, fold each in half on the narrow notches, wrap the small one around the outside, and then stitch through all four panels. Doing that, the cut holes on the top two layers will line up with each other, and the back two layers will line up with each other, but I’d think you’d need the slits on all four to line up…
The top two and the back two layers together will make an X instead of a single direction aligned slit all the way through all four layers of material. I’d imagine it’ll still work, but it seems like you’d want them all lined up for a material like leather. Other patterns I’ve seen generally flip the angle on the fold to line up.
Representing it in ascii, the current hole pattern on both pieces of material, and on both edges (fold on the vertical bar) is:
o / / / / / o | o / / / / / o
So, folded, the slits line up like this:
o X X X X X o
I’d expect it to be something like:
o / / / / / o | o \ \ \ \ \ o
so folded would come out as:
o / / / / / o
But again, first time to sew leather, I may just be making a dramatically inaccurate assumption.
Know what? You’re right. I just didn’t notice when I did mine. I knew my stitches didn’t come out slanted like on the YouTube video I watched on how to stitch leather, but I just assumed I’d done it wrong (I was stitching from memory instead of watching the video while I did it).
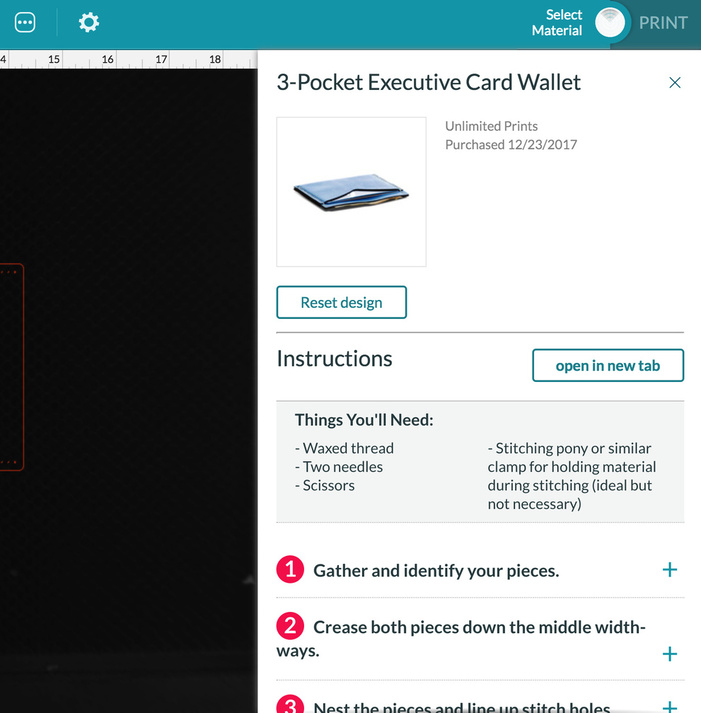
First thing first, for all catalog designs, if you click the little ellipsis/overflow menu at the top of the UI, it will give you instructions (that you can also open in a new tab)
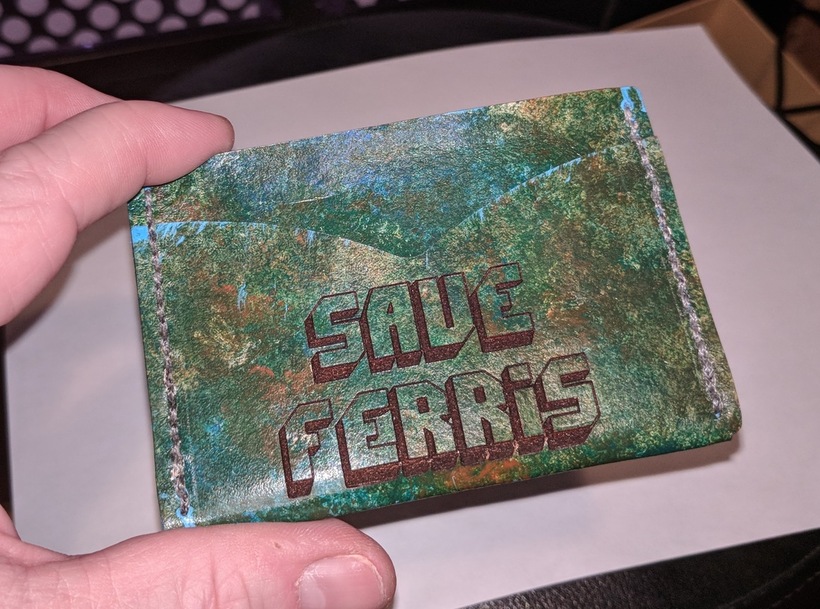
OK, further…I went ahead and printed/stitched one up. Stitching was rough, and after it’s all done, it still seems just a touch too tight; I had to remove my credit card using a needle nose pliers. I’m sure it’ll stretch out in time…but, @dan, maybe y’all should take a second run at this one.
It’s definitely a bit too tight. I’ve been using mine for a couple of weeks now, and it’s just getting so I can get the cards in and out easily, but still too tight to put more than one per pocket. I’m planning to stuff it with old business cards and just let it sit and stretch for a while in hopes that will make it more usable, but I haven’t gotten around to it yet.