Came out fantastic I think! All those little bits on the top layer took some time to align for sure. Nice job!
Thanks! It actually doesn’t take much time at all. You just clamp down the “negative sheet” first, which aligns with all the lower layers. Put glue on the bottom of the piece, and drop it back in it’s slot. Hardest part is keeping track of which pieces goes where, but that’s managable too, with patience. ![]()
3 Likes
I’ve had a lot of success coloring proofgrade with copic markers (alcohol inks). I use a slightly cheaper brand that I really like for wood and leather. I’ll check the name tomorrow. I have tried a different cheaper brand that doesn’t work as well. You could experiment a little and use them to add color now. Would be great to take a sample to the store to mark on. The markers are very expensive and some don’t show up at all. When they work, it resembles colored wood stain as the grain shows through.
7 Likes
Must be a theme with many of us. One of the first things i want to do is one like this of our family’s land here in Oklahoma, made into a coffee table. Either a glass top over the whole thing, or maybe pouring liquid blue epoxy into the water areas (3 ponds on the property) and then filling up the entire model with clear liquid epoxy to make it a solid table.
2 Likes
I was looking for an epoxy that stays clear and resists yellowing for my bar top and came across System Three Clear Coat. It’s VERY low viscosity and will flow easily, so keep that in mind. It appears to be used by a lot of woodworkers to coat projects. It worked beautifully. I accidentally had tiny leaks in my bar top and permanently have drips down the front that look as though water spilled. Cracks me up when people try to wipe it up.
19 Likes
Yes, exactly what i was thinking. I once saw a bar top in Colorado made entirely of clear coat. Guests would leave trinkets, coins, etc. with the owner, and once a year he would put those across the bar and pour another inch of epoxy. After it dried he would saw an inch off the bottom to maintain the same height. You could look down through all the layers year by year like a time capsule.
15 Likes
Are you talking about The Dark Horse in Boulder? Some friends were inspired by it when we were going to school at CU and made their own (encapsulating beer-bottle caps and and BBs). I helped a little bit… and of course the only photo I have of it is from right before we started pouring the Envirotex. It turned out great, although we could have used a bit more product, and as a result the surface was not smooth, but had little bumps where some of the BBs hadn’t been totally covered, so it ended up having some texture; good to stop bottles sliding around, but no good for, say, a writing surface.
here is the before shot: the bbs that sit above the bottlecap level didn’t get covered all the way.
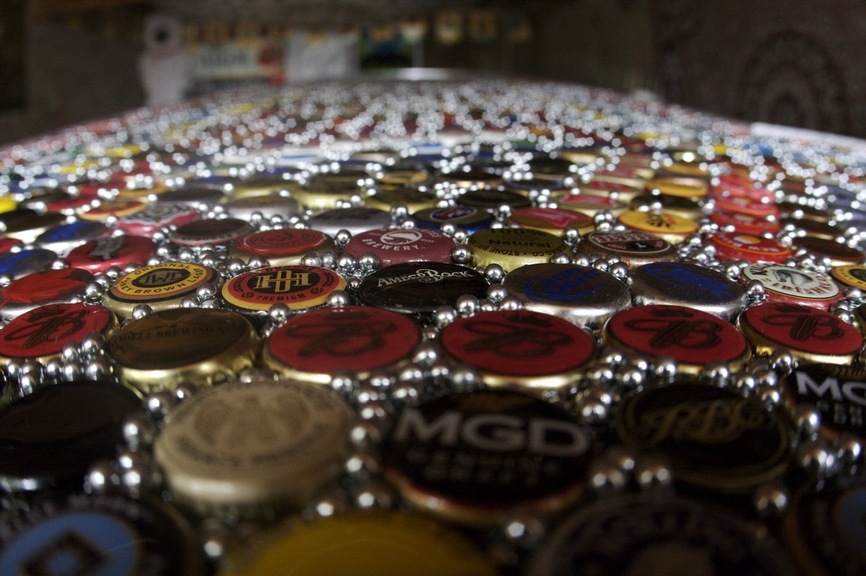
(Yes, those bottlecaps all came from beers that were consumed at that house.)
15 Likes
That’s a wild idea!
Not sure where it was. I was a kid, but I remember it when we vacationed there.
A cool trick I learned today (but haven’t had a change to try); when face-gluing two pieces of wood together, and you don’t want them to move around when clamping, sprinkle a little salt onto your bottom face in the glue.
4 Likes
Really beautiful work. As a fellow Coloradan and low-key bagger of peaks, I’m especially impressed.
Also, I’m a little behind on reading forum posts, but I wanted to be sure you knew you were among some pretty great company here in the state, and to be looking out for future CO-GFUG (Colorado Glowforge User Group) meetings. @dwardio, @PrintToLaser and I met yesterday (and just missed @PFI-Guy), and it was a lot of fun. Please consider yourself a CO-GFUG member and don’t hesitate to reach out.
3 Likes
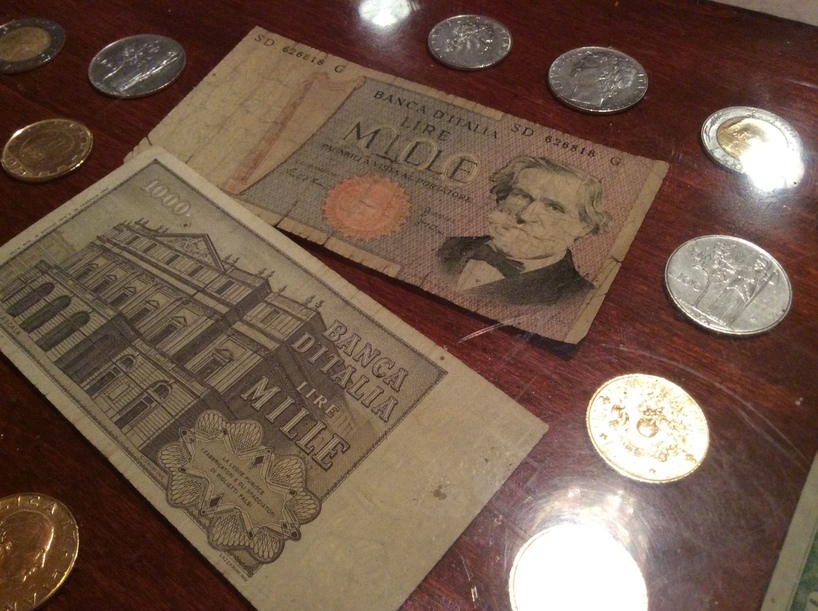
I know that this is off track… I had problems with the coins sinking and the bills floating. I wanted to have everything suspended. So I poured a first coat and let it cure until rather solid but still tacky. Then I put down the coins and paper and immediately poured another coat so that it would merge with the first coat. The coins slowly sank due to weight and the bills floated up with some extending above the surface due to curling. My guess is that the new coat resoftened the lower coat or maybe I just didn’t wait long enough on the first cure. I ended up having to wait until everything was cured. Sanded down the tips of the bills and poured another layer. Progressive sanding and buffing and the result meets my hopes.
3 Likes
So who is going to be the first person to combined layered relief with 3D engrave?
1 Like
Works better with traditional yellow wood glue. The salt grains can be taller than the new glues that only require a very thin coat.
1 Like
The brand I like is Premiere by Nicole. They look a lot like the Prismacolor premiere markers but are slightly cheaper. I think they have a slightly heavier pigment load than some of the other off-brand copic markers. They’re not cheap. They’re just cheaper. I haven’t used the Prismacolor brand markers; however, I ONLY use prisma color colored pencils and I bet they’re as good as Copic brand. The brand I don’t like is Art Alternatives. It’s a really weak pigment load.
5 Likes
Amazing work! What type of glue did you use that had a hard time? I ask because elmers wood glue isn’t very strong but tightbond 2 wood glue is pretty amazing most of the time from my experience.
1 Like
Thanks!
Yeah, it was just Elmers Wood glue. I was also not applying a ton of it because I didn’t want it to squeeze out in to the negative pieces that I use to position everything. I found that it would delaminate quite easily, and then I could peel the glue off of the finished surface quite easily, kind like how it peels off your skin after it dries. I’m happy with how a medium viscosity cyanoacrylate works for this application though.
1 Like
way to salvage the project. And Interesting, I’ve never used that type of glue for wood projects before. I’ll have to try it out some time to see how it compares to tightbond 2 in terms of strength. Thanks for the tip.
I now have my GF and am doing what you have talked about learning by doing. From my past, your idea of registration holes that you can use as you stack the layers seems to be a great idea, and a great way to keep your parts correctly positioned.
You produced a beautiful project, congratulations on a job well done. Prototypes are a great way to learn, and improve.
1 Like
I also want to make some of those. I have been thinking of using Fastcap 2P-10. I use it a bunch on wood projects, jigs, templates, etc . It is a two-part ten-second adhesive. Put the adhesive on one side and spray the activator on the other then stick and hold 10 seconds. It is specially formulated for wood and while i am not sure exactly how it works it does seem better than other Cyanoacrylate glues for wood. You can ever put a few drops of it on the wood and then use regular wood glue as well. “no clamping gluing”
I also think I will stain the sheets before I cut them .
Keep letting us know how you are coming along with this.
1 Like