A different spiral bowl

Here’s a slightly different wooden spiral bowl:

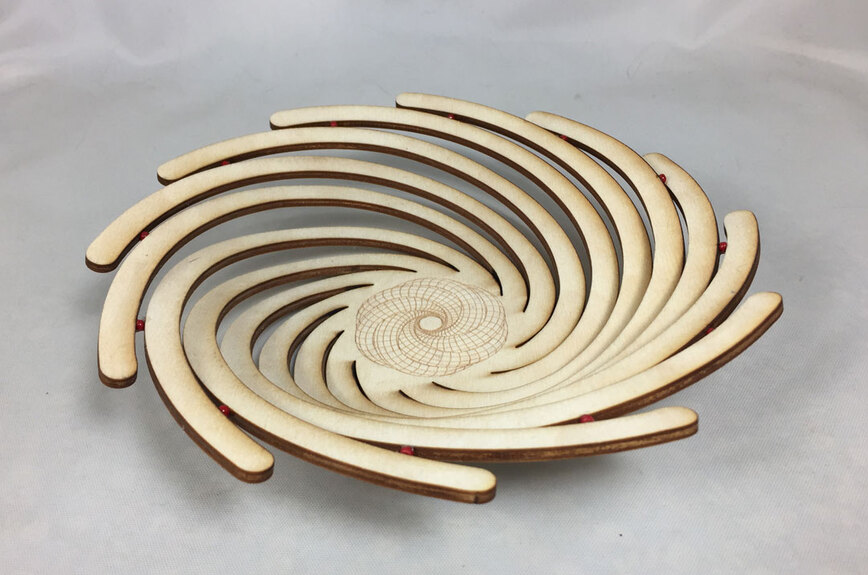
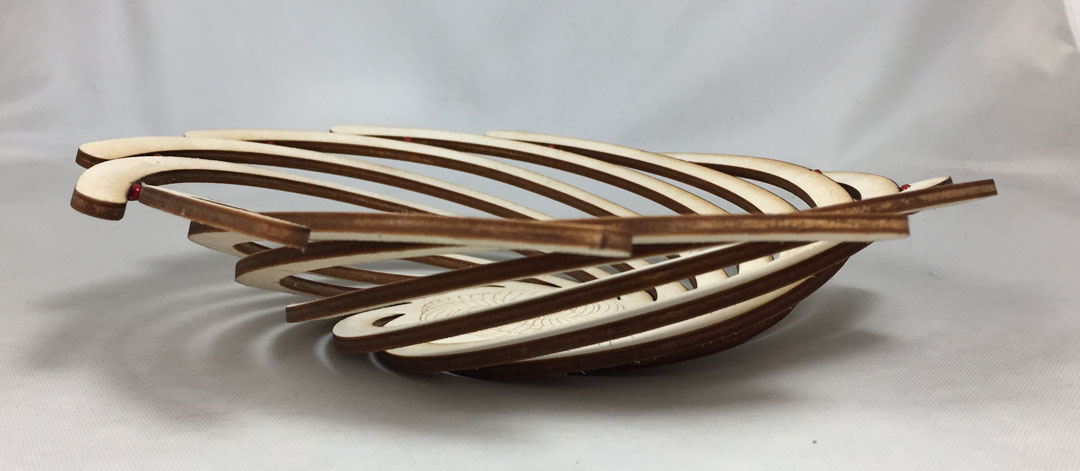
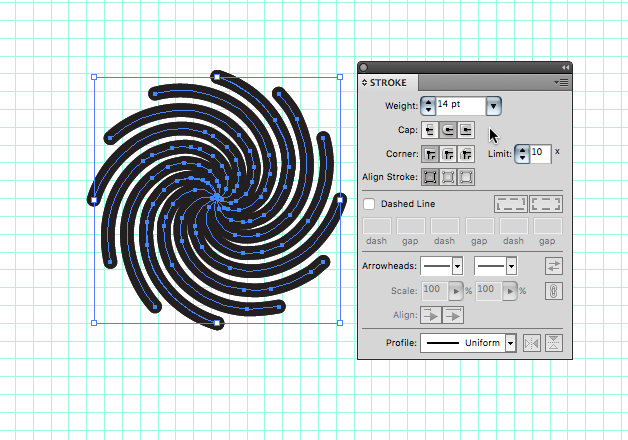
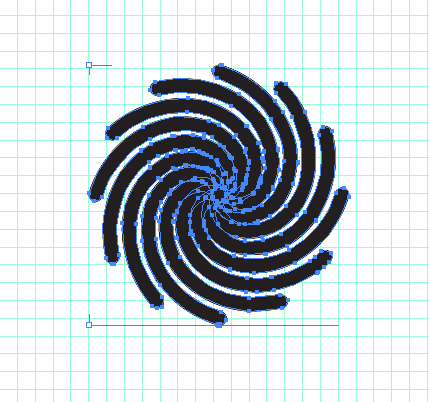
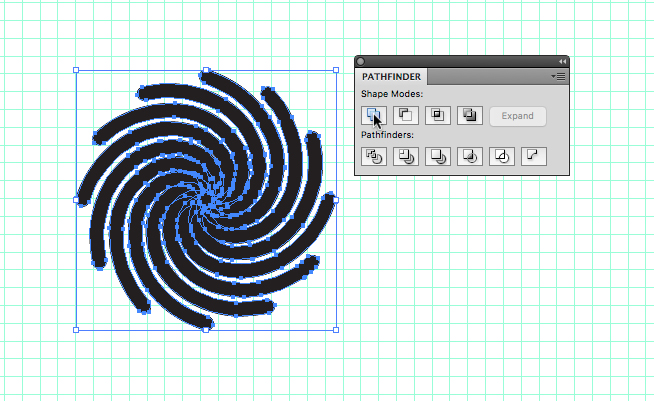
I was inspired by this bowl on Thingiverse but I wanted to design my own from scratch. I did it in Illustrator (I’ll put together an explanation if there’s interest) using the Transform effect, then cut it out of Baltic birch (I’d love to use Proofgrade but it wouldn’t work with the water). Then soaked the piece in water for about an hour, then put in between two bowls with a weight on top and let it dry for a few days. Glued the red beads between each outer arm. That was pretty challenging. I’ve got an idea about how to make it better next time.

78 Likes

Neat! Looks like a whirlpool! :grinning:

2 Likes

I’ve got an idea about how to make it better next time.

AKA The Maker’s Motto.

Love the bowl, btw.

5 Likes

Wow! That’s neat! You formed it, almost like people do to leather!

3 Likes

Really great technique and looks great too. And really efficient use of material. :+1:

…You could say I’m bowled over…

2 Likes

Beautiful :heart_eyes:

1 Like

It turned out lovely! Very artistic!

So creative!

Wow, that’s really nice! Makes me think of a spiral galaxy (with an orange for the gravitational well at the center)…

1 Like

That is awesome!

Everyone is getting so much better and experimental. I love it!

And I would also love to read a write up of the design process when/if you have the time.

Okay @jamesrgraham, your wish is my command:

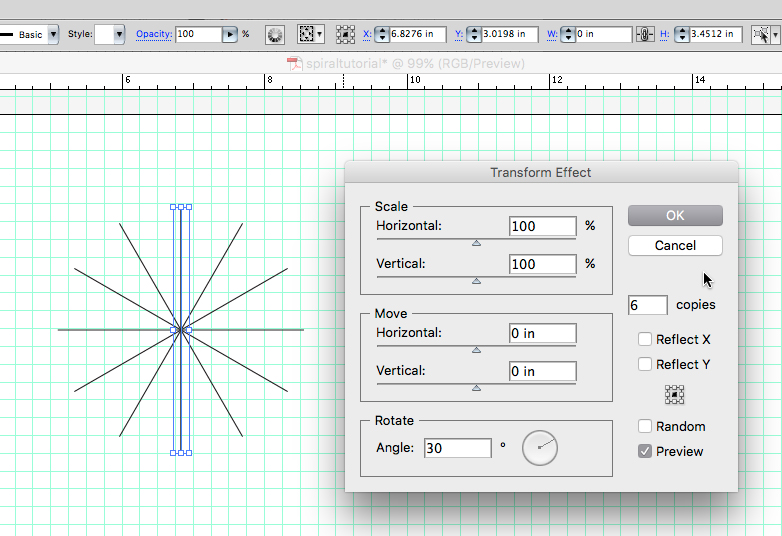
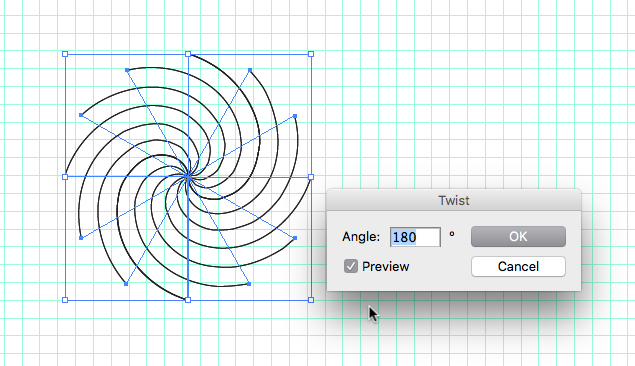
  1. Create a line with the pen or the line tool. With it selected, go to Effect…Distort & Transform…Transform menu. To make a spiral with 12 arms, I chose 6 copies with an angle of 30 degrees:

  2. Go to Object…Expand Appearance to get this:
    step3

  3. Change the Stroke to black (or any color) and the fill to None.

  4. Go to Effect…Distort & Transform…Twist and choose 180 degrees (play around with this to get the effect you want:
    step4

  5. Go to Object…Expand Appearance. You should have this:
    Step5

  6. Change the stroke to have a round cap and very wide stroke (you can play a bit here as well):
    step6

  7. Go to Object…Path…Outline Stroke to get this:
    step8

  8. To combine the arms into one figure, from the Pathfinder window choose the Unite option:
    step9

  9. At this point I chose to do the Object…Path…Simplify command to delete a few extra points:

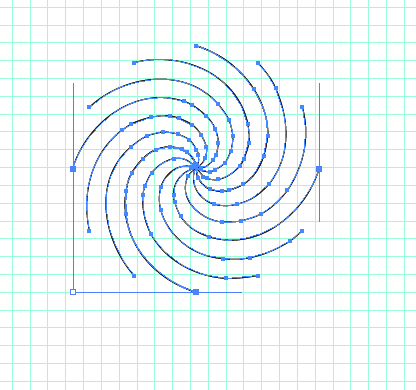
  1. Change the Fill to None and the Stroke to black. Final result:
    Step11

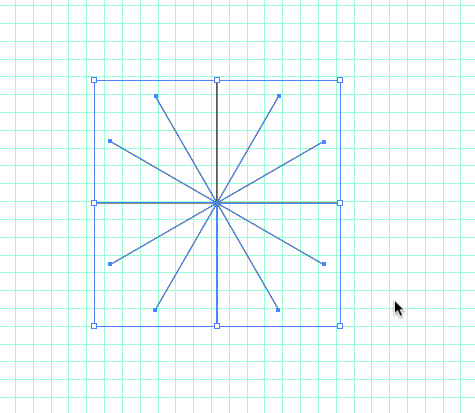
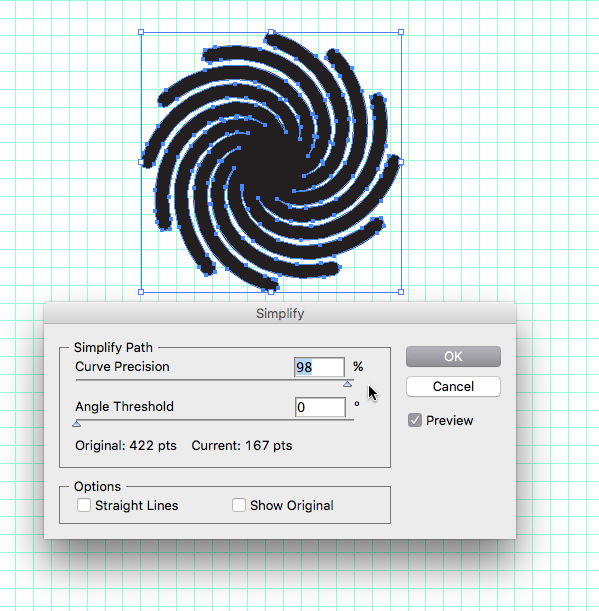
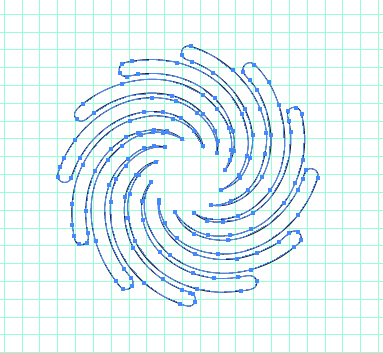
One thing I noticed is that the distribution of points is not even. Maybe it’s because I have a very old version of Illustrator and they have fixed this in recent versions–I have no way of knowing. But I found that I could fix some of it by, after doing Step 4 above, scaling up the figure as large as possible and rotating it about 15 degrees before doing the Expand Appearance in Step 5. Then I got this after Simplifying, which I think looks better:

23 Likes

Great writeup @cynd11 ! (Gonna link that in the matrix.) :grinning:

Really unique, and a wonderful explanation of how you did it.

Absolutely amazing

Sweet. And nice technique.

Thank you!

How did you do the final shaping? Just soak in water and hold in the desired shape until dry?

Yep! I described it in my original posting.

That is awesome. I have to try making one of these.