As a number of my project do, this started with getting asked some questions and inspiration from elsewhere. A friend bought her husband a ring for Christmas, and was looking for ring boxes. She then asked if I could laser engrave the ring box.
“Well, that depends a lot on the box, but probably.”
She then spotted things from around and about that she wondered about.
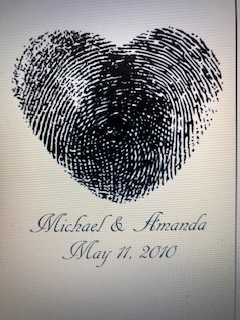
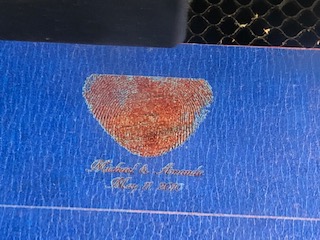
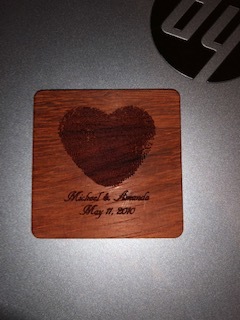
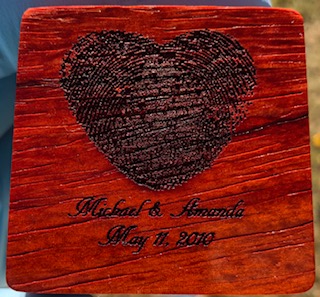
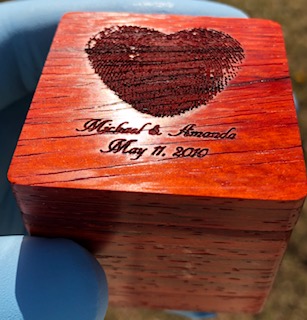
“I saw this design with a fingerprint heart, can you do that?”
“Did you seriously ask that? Get me the fingerprints and get ready to be blown away.”
As some parts of the design came together, the question of the box was big. I was browsing various sources for wood boxes that I could engrave, when I had this conversation with myself.
“Self, there are a lot of boxes, but some are pricey, and I cannot be sure to get them in time to finish everything out.”
“That’s true, Self, but look at all those beautiful wood options. Man, I wish I could get hands on some of those boxes quickly.”
“Wait a minute, Self, you have some amazingly beautiful woods in hand right now and a freaking Glowforge! Make the box instead of buying it.”
“Self! That is brilliant! Why didn’t I think of that? I’m glad I keep you around.”
Yes, I do talk that way at times. The cats are used to it, and it keeps the neighbors from complaining about what I might do otherwise.
Taking inspiration from some designs I saw here, I wanted to do the box in stacked layers, approximately as a cube. Design ideas started flying through my mind.
“Design away, dad, as long as I don’t have to move.”
Tricky, but away we go.
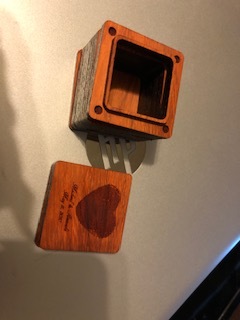
Design: Cube-ish, in stacked layers.
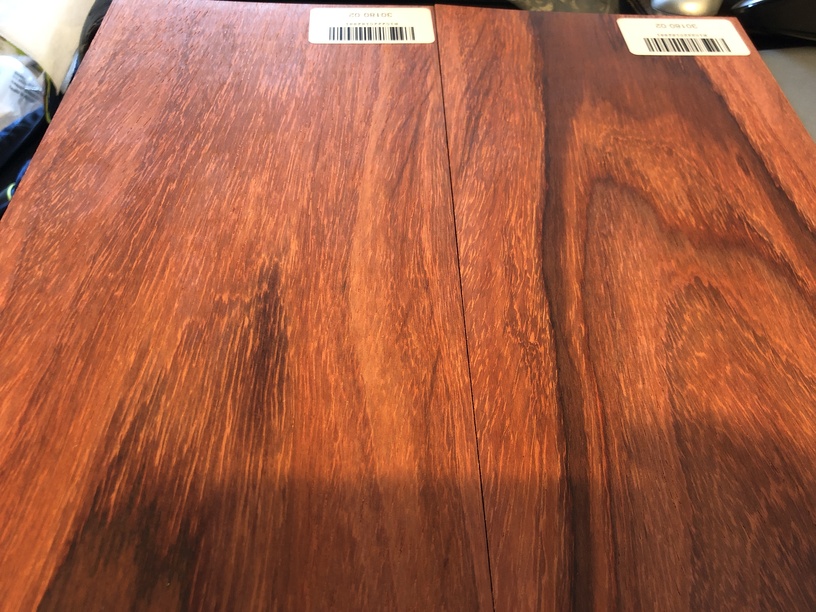
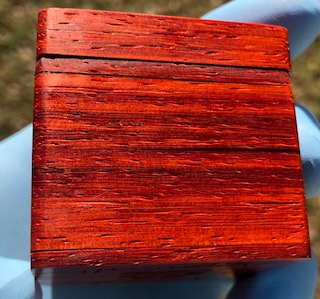
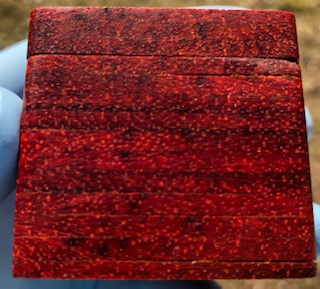
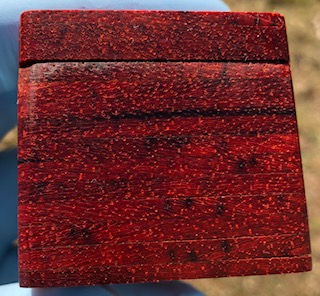
Wood: Wait! That’s the perfect time to try out my Padauk!
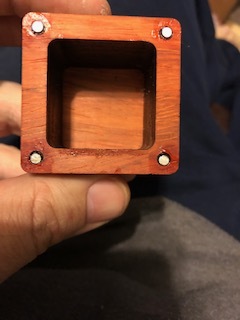
Lid: Attached with magnets, lip to help hold in place.
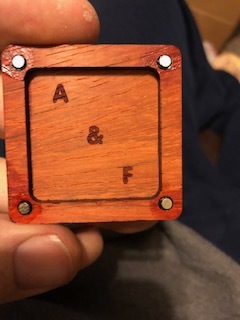
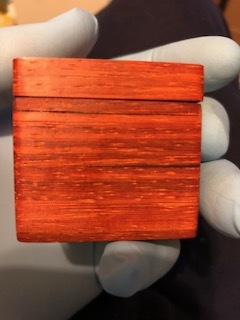
Engravings: Top, Bottom, Inside of Lid
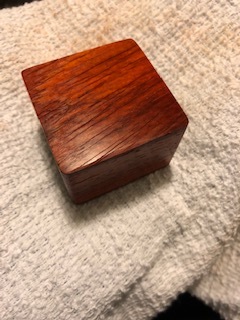
Finish: Keep the laser char inside, sand the outside to reveal that beautiful orange and treat with cutting board oil. (Different? Sure, but so am I.)
Step 1: Design
I took measurements of the board (courtesy of Inventables), and worked out the math on the layers, dimensions, pegs for inner layers, notches for magnets, and where to engrave. I double checked everything, and naturally made a couple mistakes, but nothing I couldn’t take in stride.


“That’s what you get for overthinking it when you could be paying attention to me, instead.”
Step 2: Preparation
With every design element more or less ready, I had to prepare for the laser.
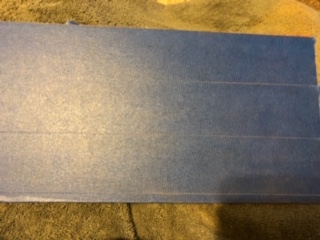
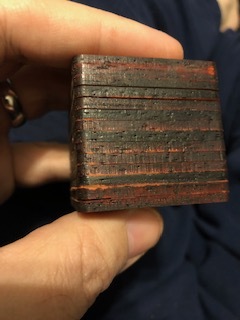
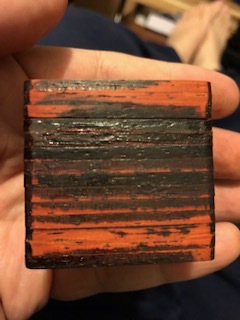
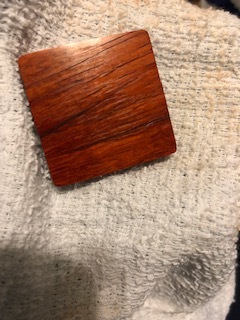
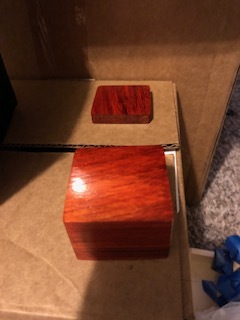
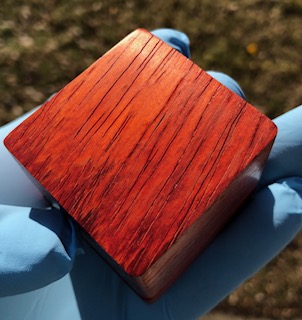
The Padauk had been pressing between 2 tiles under some weight for about a week, but I wanted the perfect surface. Sanding… Oribital sander at 220 grit, chased by 2000 grit hand sanding. Got it so smooth you almost couldn’t touch it.
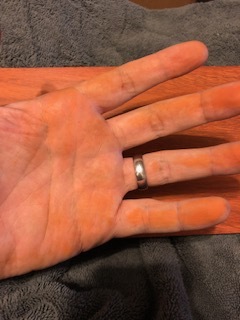
Side note: Sanding Padauk makes you look like a Cheeto.
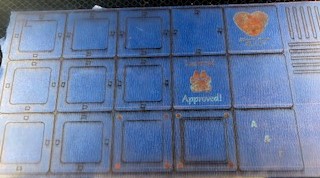
Masked the sucker and put it in the laser.
For maximum protection, it is masked front and back.
Step 3: LASER TIME!!!
Minor mistake (Mistake 1): I started with engraving. In the case of this box and what I had in mind, I should have only done cuts and engraves specific to the box construction itself, then put the finished box in for engraving. Live and learn (and sand a lot).
Then engraves for assembly (magnet holes, etc), cut, cut, and cut some more.
Mistake 2: I didn’t pin or mark for location, so I had to make sure everything was done before touching the wood, or I had to start over with another board. Major stress point there.
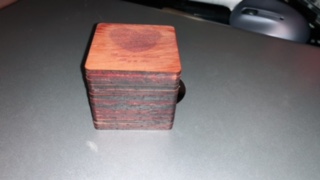
But removed from laser, and started removing masking, stuff looked great.
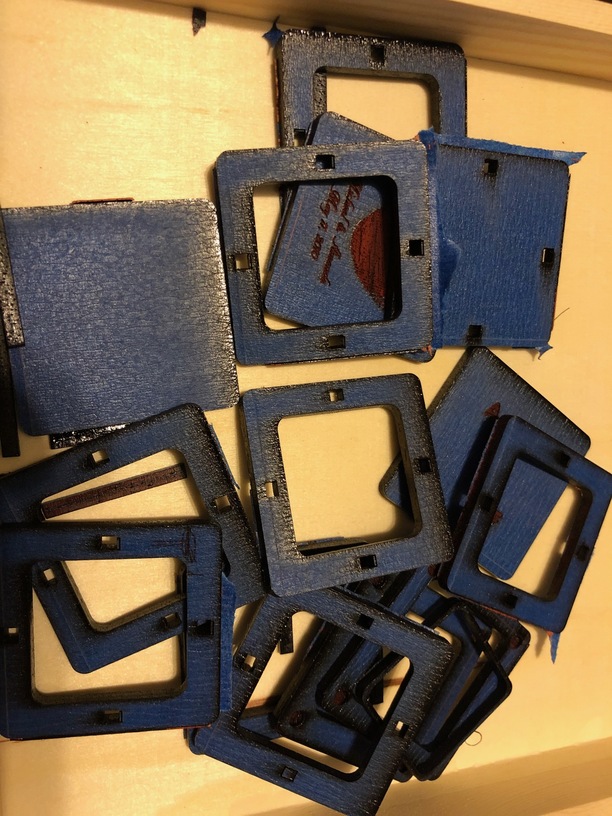
Step 4: Assembly
Enter some dry fits, glue, rubber bands, and binder clips. Aside: I really need to get a few actual clamps.
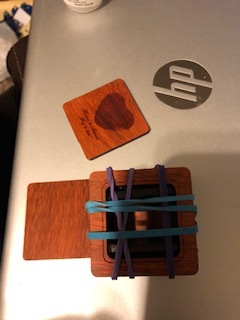
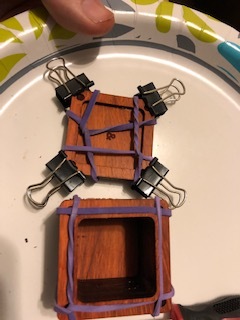
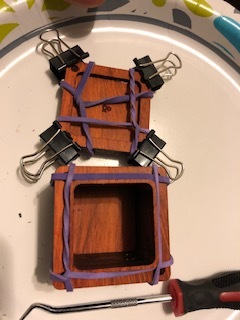
The really tedious process? Glue in 8 magnets so that they all align perfectly both in position and polarity.
Step 5: Finishing
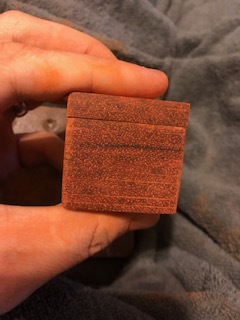
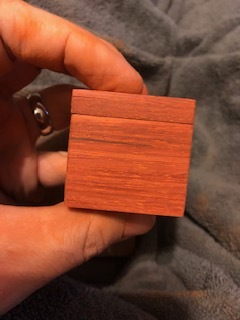
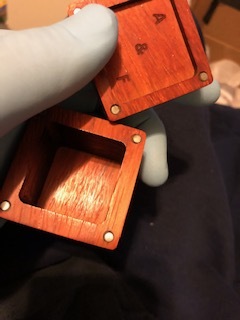
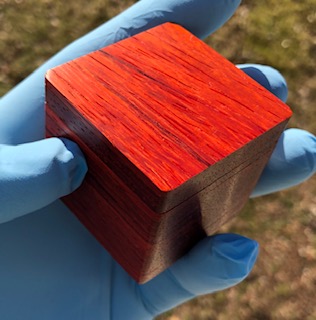
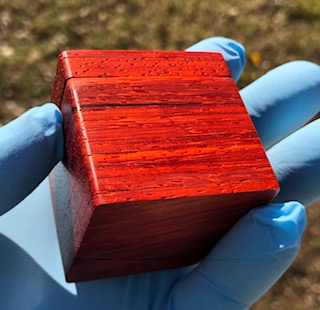
I wanted to preserve the laser char inside, while cleaning up soot that could transfer. On the outside, I wanted to bring back that beautiful orange grain that gives Padauk so much character. Insert sanding. During this step, I gave up on the lip and left it to the magnets to hold the lid. (You can read that as I accidentally broke it and did not cut another since the magnets hold the lid quite well. Mistake 3: I should have kept the lip at least until sanding was completed as it would have helped keeping box and lid sanding consistent.)
Revisit Mistake 1: When sanding, I discovered how much holding and maneuvering the box was affecting the engrave, on top of detail being messed up by the masking. So I committed to sanding off the top and bottom engraves to put it back into the laser when done.
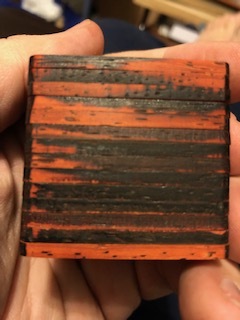
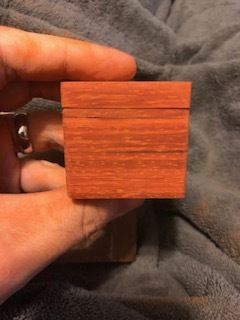
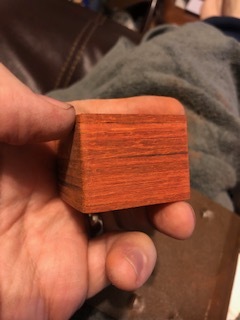
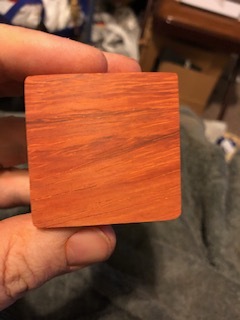
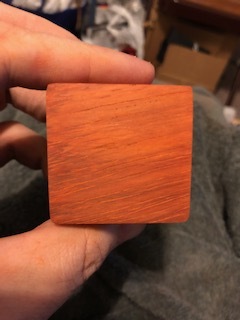
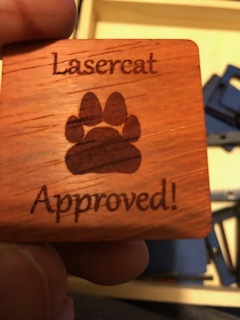
Once it was cleaned of soot on the outside, I committed to really smoothing it perfectly (as much as can be done with a wood.) At this point, I donned gloves, and the only touch it received was cat noses from inspection times. (Lasercats review most of my projects.)
How obsessive did I get?
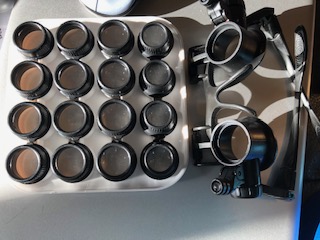
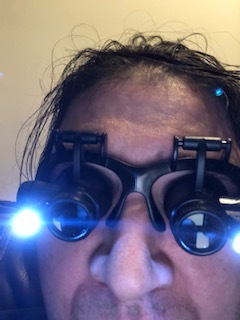
Inspection under 25X magnification, and 2000 grit sandpaper pretty much stopped removing any wood
Insert several coats of cutting board oil, with 20-30 minute soak times between application and removing excess.
Then I let it sit overnight. One last inspection before it goes back into the laser.
I could have made it 7% better with having a woodshop for some of the tasks, but I don’t have that space or money right now.
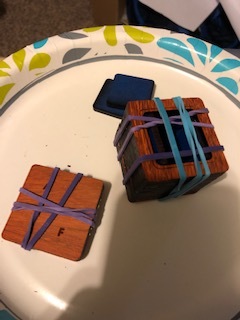
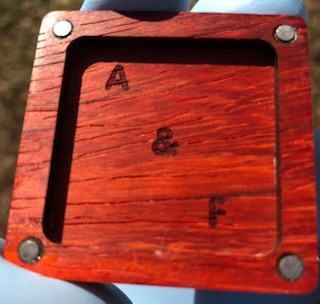
Back in the laser for the final engraves:
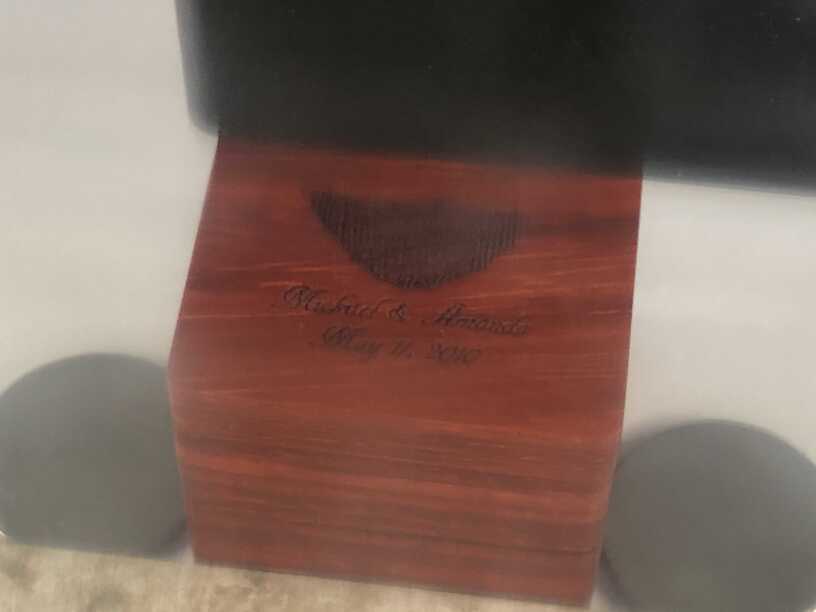
One more wipe down with oil, and it is glamour shot time:
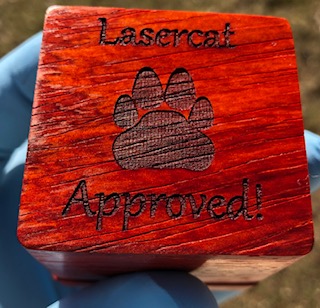
And the crowd goes wild. Now I have to make some more.
I have to sort through my woods. Potentials on the block right now:
Zebrawood
Walnut
Cherry
African Mahogany
 )
)

