Hi all - thanks in advance for your time and help.
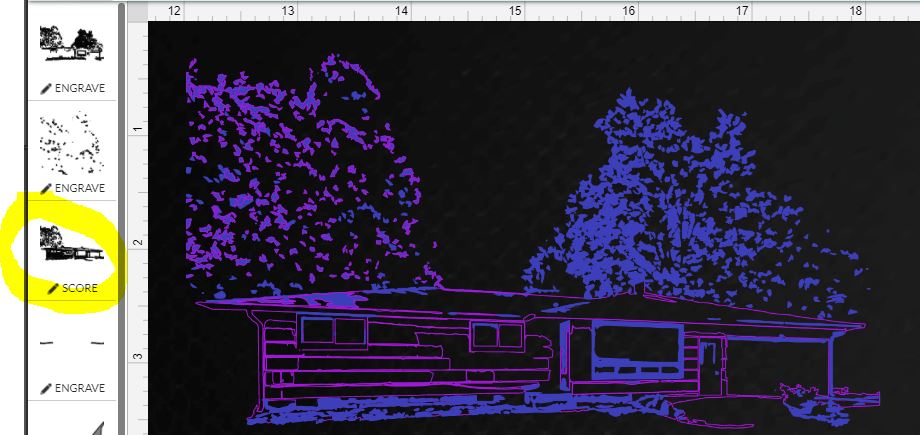
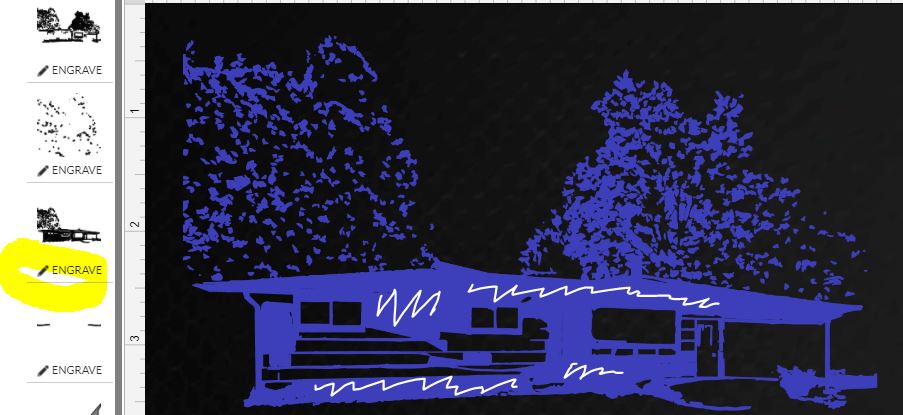
I’ve created an image in illustrator and saved it as an SVG file. After uploading it to app.glowforge I noticed that depending on if I select engrave vs score the image is altering so that a dark fill area is added. Please see the example photos below (image #1 = score vs image #2 = engrave):
I’ve added white squiggle lines to highlight the areas that are becoming filled in. Could anyone help me understand how I can use the engrave setting for this project without creating that added fill area? I’d like to retain more of the details like I see when score is selected. Thanks!
I’m not an engrave expert, but I’d suggest editing the image so those two sections are different colors This will allow you to select “engrave” for one, and “score” for the other.
Thanks for your advice. You’re probably right that I could successfully score the entire piece (or part) and that would keep me from losing the details. However, my goal is to engrave the entire item.
One thing to note: If this is a vector image, Glowforge wants to fill the vector areas on an engrave. If you are going for an “image-like” engrave, then a raster image (png, jpg, etc) is better.
I agree with @shogun. As Tom Lehrer said: rasterize, rasterize, rasterize! You can do it right in Illustrator before you save an SVG copy. Or, my favorite, apply a rasterize filter, which leaves the original editable.
I was surprised there’s not a good explainer on this, so I tried to make one without my usual habit of fussing over it for so long it never gets finished.
I’ll leave this here, though as I write this, YouTube is still processing the video, so it’s kind of blurry. If you come back later, it should be in HD.
Great help all - thanks!
I lost detail/added noise to my image with rasterize, so I may need to better learn about using that method. Doing a bit more digging related to everyone’s comments and learning more about the fill vs path issue helped me find the right answer.
Ultimately the steps I followed in illustrator to prepare my upload correctly were to:
Select all > Object > Flatten transparency (high res)
Object > Path > Outline Stroke
Thanks everyone for your help!
PS - along the way I came across this other thread that didn’t fully solve my issue, but I wanted to include here incase it helps anyone else coming across this issue. How do I engrave a path with stroke but no fill?