Yes, This is a problem every time one sets up. Yes the GFUI needs to accurately say where it intends to print and not over an inch away. The workaround is to sacrifice something to see where it will actually print and fool about till it actually prints where you want it to. I spent quite a while this morning doing that workaround and looking at the zoomed image that illustrated exactly how far it was off I took the picture and posted it.
Thanks to the workaround I am getting good prints but the time is already gone and the destroyed sacrifices mean that it still needs fixing, but not while it is accomplishing what I set out for (though if I had confidence I could easily reset everything I would be doing them 4 times faster)
I’ve spent far too much time myself messing about with test cuts to get the position just right.
Rather than sacrificing good material, though, I put masking tape over the material I intended to use, then did my test cut a full speed and minimum power. That’s just enough to mark the masking tape without cutting it, so my good material is safe. Once the position is good, I just peel off the tape and do my final cut.
Many times that is the best answer but not so much on card paper etc where it is not thicker than masking tape, and the adhesive tears the paper apart.
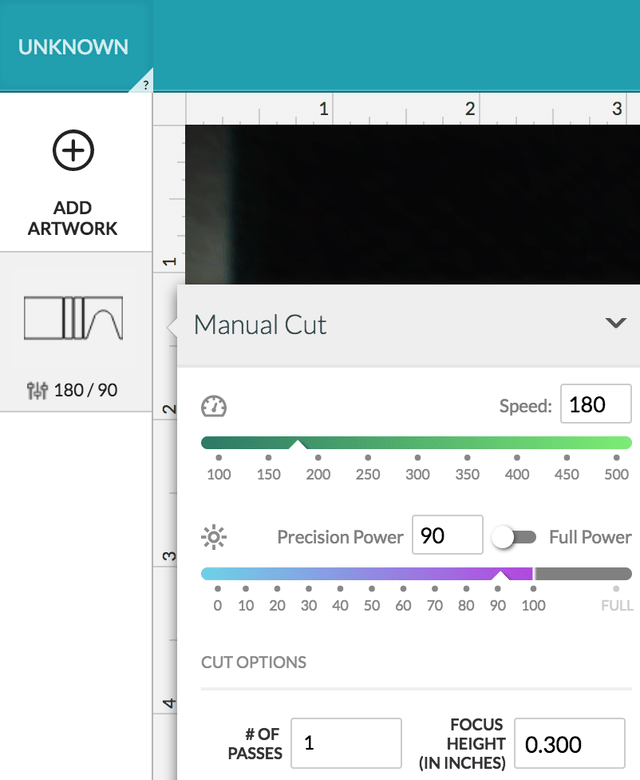
If you want it fixed, please go ahead and cut/engrave something on material using its associated setting. For this test it might be best to use approximately the center of the bed (under the camera). Please post a screenshot of that result including the on-screen rulers as well as the date/time/timezone of the job.
That would be very nice if I could reproduce the problem at will, I could put some proofgrade in now, but it is already off and so not really focusing on the problem that happened at 5:00am this morning and been off ever since.
I think a few people here have glossed over this, but when you’re using non-PG materials and enter the thickness at the ‘unknown’ button, even though it sets it, it does not then show up unless you open the specifics settings box. So, taking a photograph that shows ‘unknown’ does not necessarily mean that the thickness has not been entered.
I would like to have a stable and predictable interface. If I could predict when it would be unstable by some action of mine, or I could do something like reboot the computer or Glowforge that would be a workaround. But I know that episodic problems are the hardest to resolve but there is one (of many I am sure) in the GFUI that is not related to my operating systems as I have Windows 10 and two different Android versions all seeing the same issues
I’m off topic here but you absolutely do not need to enter material thickness if using PG materials. I know that the UI is not clear in how to operate everything but if you enter material thickness there the S/W will assume you are not using PG and change other settings such as Speed and Power depending on last used or other steps.
Your problem seems to be different than any other posted here. Though placement is supposed to be accurate to within a 1/4” (when the very accurate height is entered) the error for everyone else tends to be very consistent and reproducible.
All it’s doing is taking the height entered and dewarping the image based off of that height; 0.03” should use the same dewarping algorithm each and every time.
It’s tough to figure out without knowing exactly what you are doing to try and get perfect alignment. What things you are changing. If you’re changing multiple things at once. Etc.
Running a job over and over should run in the exact same place unless you are manually (accidentally or purposely) moving the gantry, or have some kind of binding or something else hindering the movement of the gantry causing it to lose steps, and therefore it’s assumed location.
I’m so sorry your prints aren’t showing up where you expect. We’d like to have you try a few troubleshooting steps for us so we’ll all be on the same page:
Turn off your Glowforge.
Check for small pieces of debris or dust.
Check the lower door to make sure it closes all the way. It may require some force to open, but open it, wipe any dust off the edges, and close it all the way.
Remove the tray and clean any dust or debris from the surface underneath. Pay careful attention to remove all debris from the four dimples where the tray rests.
Check the lid to make sure it closes all the way. Small particles of material, such as dust or debris, can prevent it from closing completely.
Check the surface your Glowforge is on to make sure it’s flat. Ensure it is not twisted slightly and that there is no debris propping up one side of the machine.
Turn your Glowforge back on.
We included an extra piece of Proofgrade Draftboard with your materials shipment for troubleshooting. Place the Proofgrade Draftboard in the center of the bed and print the Gift of Good Measure using the default settings.
When the print finishes, leave the lid closed and wait until the fans stop and the picture updates. Without moving your artwork or your material, take a screenshot of the Workspace to show us the difference between the artwork placement and the actual print placement. Make sure to include the rulers in your screenshot and show as much of the bed as possible.
Mac: Press Shift-Command-4 and click and drag a box around your image. You’ll find the screenshot file saved on your desktop.
Windows: Click on the Start Menu and type “snipping tool”. Open the Snipping Tool > New then click and drag a box around your image. Click the Save icon and name and save your file.
Send us the screenshot along with the date and time of the print, and we’ll investigate.
Did all that and sent it by message board. along with three pictures. As noted above the problem I have is consistency, and taking your steps did not address that issue.
I have some of those cards and the engraving quality is really poor compared to some other anodized things I have. I suspect those cards are coated with some kind of ink, not really anodized. The colors even look like printer’s cyan and magenta.
Since the screenshot shows the Gift of Good Measure printed with very little alignment error, I believe the inconsistency is coming from the material thickness you are entering in the app for the uncertified materials.
The lid camera uses a wide angle lens to take a photo of the entire bed. The software uses the height of the material to correct the image so what you see in the Workspace matches the print placement on the actual material. That said, it is important for the height to be correct and accurate.
Like @Tom_A said, you should be able to enter 0.03 in into the material thickness field. You mentioned you are using an Android device to print. Our mobile and tablet support isn’t quite done yet, so I recommend using your computer to enter the height manually for uncertified material. If the height is correct, I expect you’ll see more consistent alignment.
Are you seeing inconsistent results on proofgrade or only with other materials?
Yes. I am not using a lot of proof grade as yet as if I am going to create a mess I would rather it be what I care less about but I do measure carefully and make sure of where it is cutting. I now routinely run a slight score first for location, and once I have that location then run one or multiple copies as I did with the business cards. When such multiples are done, having the tablet there at the Glowforge saves much wear and tear having to go back and forth. It would certainly improve matters to be able to use both at the same time.
In any case the liklyhood of accurate reading of location is independent of the material, but it is the recalculating and change that is most damaging, as accurate or not the same tests ate needed as to where the plot will end up.
I think I have solved a source of the problem! Every so often apparently the GFUI believes the Glowforge is offline. there are no noticeable glitches but the Glowforge recalibrates and apparently never recalibrates exactly the same no matter if proofgrade or not. if you are depending on an exact repetition of the previous cut you will not get it! it might be a half millimeter change or an inch depending on how far it was off before or not. but it will not be exactly the same. If your previous cut was not all the way through you cannot just do another cut. not matter the need and depending on how much variability your design can tolerate that will be a problem perhaps as well.
Thanks for letting us know about that. It sounds like you might be having intermittent Wi-Fi issues.
The most common solution to Wi-Fi challenges is to restart all the devices involved in connecting to the internet.
Turn off the computer, phone, or tablet that you’re using
Turn off your Glowforge
Unplug your modem
Unplug your Wi-Fi access point
Wait one minute, then plug everything back in and turn them back on
If that doesn’t work, we have two more suggestions that often make a big difference:
Improve the signal path between your Glowforge and your Wi-Fi access point
Wi-Fi signals need a clear path. Remove physical barriers, and move devices closer together:
Move your Wi-Fi access point up high and make sure it’s in an open space. Avoid locating your Wi-Fi access point on the ground, under a desk, in a cabinet, or in a corner where its signal can be blocked.
Relocate your Wi-Fi access point closer to your Glowforge
Move your Glowforge closer to your Wi-Fi access point
Install a Wi-Fi range extender closer to your Glowforge
Run an ethernet cable and install a second Wi-Fi access point next to your Glowforge
Reduce electronic and Wi-Fi interference
If your unit is near other devices that use Wi-Fi or a large number of electronics, temporarily turn off other electronics and devices in the area.
If you run into this problem again, could you please run one more test? This test requires a laptop or desktop computer. For the most accurate results., try these steps from a laptop computer placed on top of your Glowforge (and on the same Wi-Fi network) while the Glowforge reads “Offline”, if possible.
Run the test
Mac: Open Finder/Applications/Utilities/Terminal, then type the following command, and press the return key: ping -c 50 app.glowforge.com
Windows: Open the Windows Run dialog box by pressing the Windows key + R
In the dialog box, type “cmd”, then “Run” or “OK”
Type the following command, then press the return key:ping -n 50 app.glowforge.com
Allow the test to finish. When it is complete you will see results under a “ping statistics” header.
Take a screenshot of the results
Mac: Press Shift-Command-4 and click and drag a box around your image. You’ll find the screenshot file saved on your desktop.
Windows: Click on the Start Menu and type “snipping tool”. Open the Snipping Tool > New then click and drag a box around your image. Click the Save icon and name and save your file.
As I mentioned it was the intermittent changes that are the biggest problems. When it said the Glowforge was offline, the Glowforge itself did not seem to think so. As it happens the computer is very near the WiFi but getting at the WiFi is no small feat. And moving it is not possible, or it would not be where it is. The Glowforge itself is not at its home that it would be at if I had a filter I was able to use.
This morning it was about an inch off and as I was not yet committed to a location to cut I turned the Glowforge off and back on again and it was more accurate but still off a couple of mm so I had to play about to get it spaced in.
Why does the GF require this when all the other devices on the network are working fine? Seems more like you should restart your cloud servers when they start saying a machine that is clearly on line is not.