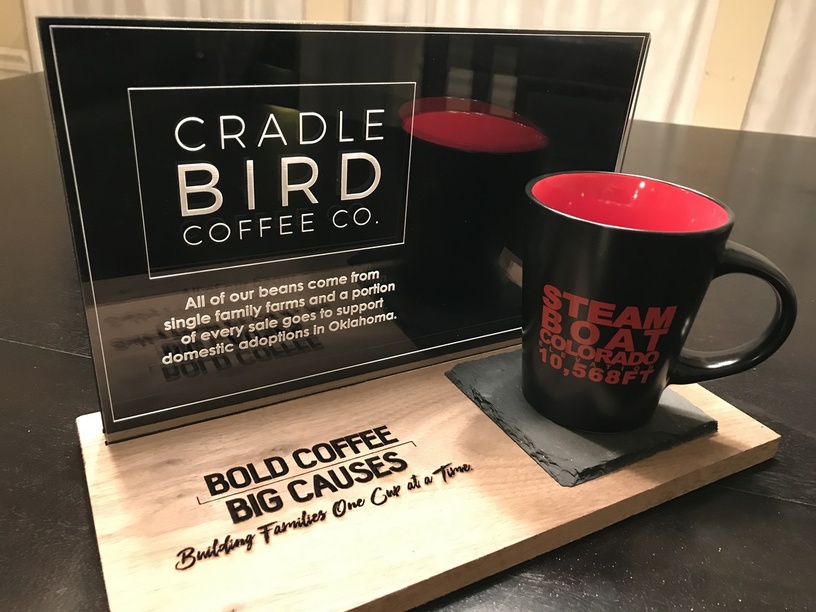
Made a display for a client today. This is the first iteration, but it came out pretty nice I think.
Where the mug is will often be a bag of coffee (second picture). I don’t have a bag here, so i used a mug from my cupboard for the sample. The client may swap the bag for one of his branded mugs from time to time as well.
I’m going to make another one and add some details to it like engraving an image of steam in the right half of the black acrylic behind the clear piece, enlarge the “Bold Coffee” a bit and rotate it counter clockwise to give it more of a branded look, etc.
The bottom piece of wood is 1/2” walnut from Inventables. Of course I can use other wood in its place - just wanted to see how it worked here.
No glue. I engraved a slot that the acrylic pushes into. Took quite a bit of trial and error on a smaller piece to get the size and depth right, but I’m more or less there. A router would do a much better job more easily, but I don’t have one, so I put the laser to work.
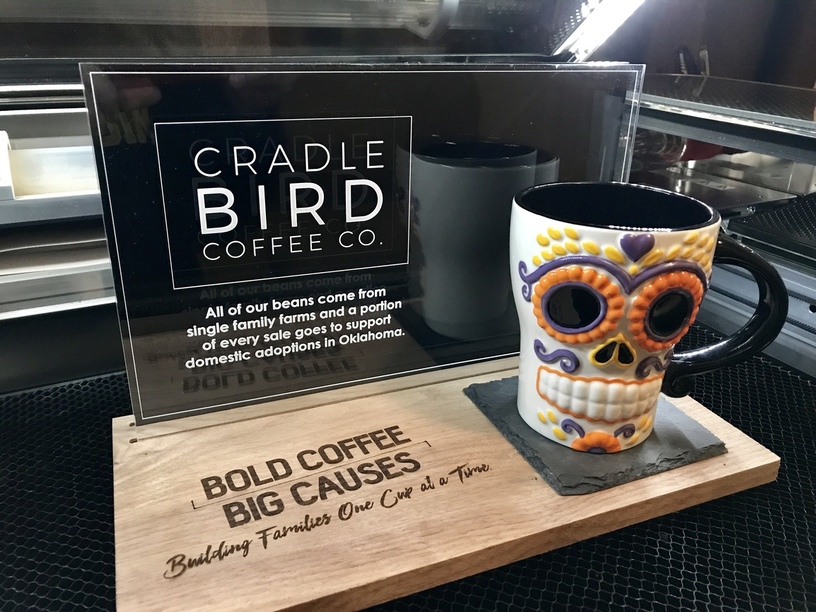
No, I didn’t engrave this one. I am still considering it. I don’t want to overdo things and I think it might be better to leave it as-is. I may change my mind though…
Right now they are actually in two different slots about a 1/3 of an inch apart to give it some depth - but my photo doesn’t show that well.
Right now I don’t own a router, so I made the slots with the GF - but that turned out to be a pain in the butt since this walnut is 1/2" and takes forever to cut through deep enough to make the slot. I am thinking about redesigning the base out of two pieces of something I can cut through for now so I can make the slot more easily…
Really nice job! I just ordered some of this 2-color acrylic from Inventables for when my Glowforge arrives. I like all of the different materials you incorporated.
Here’s the “final” version (until it isn’t final, of course. You know how that goes).
Everything is the same, I just routed the slots for a great fit and engraved the phrase using better settings so it didn’t burn so much. Delivering to the client today.
The only thing I’m going to improve on for next time is to use 4 standoff screws between the black and the clear to give it even more rigidity and a touch more of a finished and professional look.
They really are. What’s important to them is to let people know that they are supporting the adoption of kids right here in the state where they live. I love the heart of this company.