Continuing the discussion from Glowforge's Trace Functionality:
This technique is used to create a “white space” around the image that one is engraving, before cutting out.
(Like a sticker sometimes has.)
Illustrator is a little bit more difficult to use to create an Offset Path, not because the process is any different, but because I suspect that everyone at Adobe thinks that we all enjoy a good Easter Egg hunt to liven things up when we’re working. ![]()
Seriously, the program offers so many options that it is bloated. You frequently have to find what you are looking for hidden inside multiple palettes, so it takes longer to get familiar with where everything is.
In addition, since Illustrator has its own way of doing things, some of the things I do might not make sense when I show them here, but they are necessary to get around the way Illustrator does things internally. If you need more explanation why I’m doing something, just ask in the comments, I want to keep this writeup as lean as possible.
Some drawing tips:
(These apply to all of the drawing software, so you’ll see them at the front of each tutorial.)
-
While you are preparing your drawing, try to create as much contrast between the paper and the lines as possible. Black ink on white paper will give you a better result than pencil on parchment. Light colors are not going to scan well; most auto-trace programs cannot differentiate well between pale yellow or pink and white.
-
Smudged lines are going to give a very messy outline when the item is traced. You want to create a clean crisp delineation between the black and the white for the auto-trace function to pick up.
(There’s a reason why they use markers for the Glowforge demos.) -
The higher the dpi (dots per inch) that you scan with, the better detail you are going to get in your scan, but the larger file size might crash the drawing program. It’s a trade-off.
Stuff you screen cap from the internet is 72 dpi, low resolution, and you generally don’t get a very good trace from it. Try to scan in the 100-300 dpi range for a better trace.
-
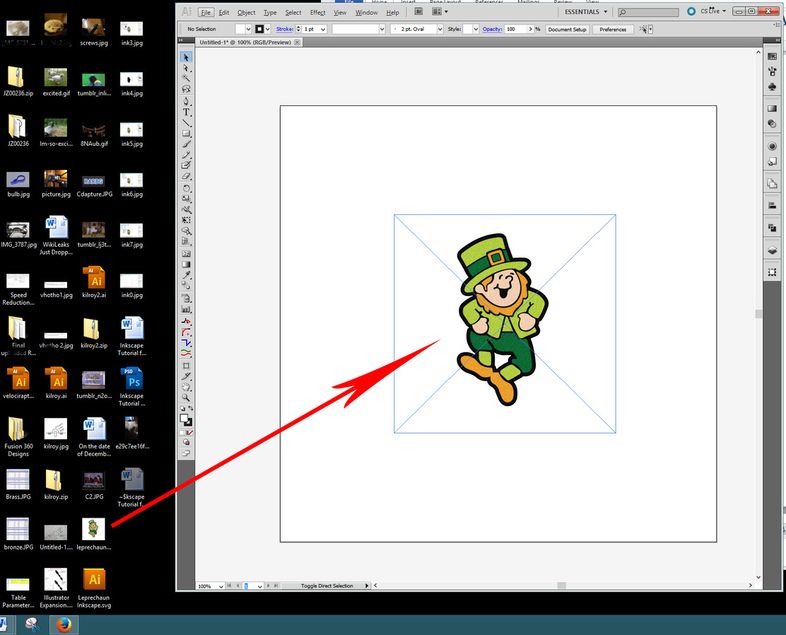
Scan your image and save it as a jpg file to your desktop.
-
Open Illustrator and create a new file. File > New > OK
-
Click and drag the jpeg file from your desktop, and drop it onto the artboard.
.
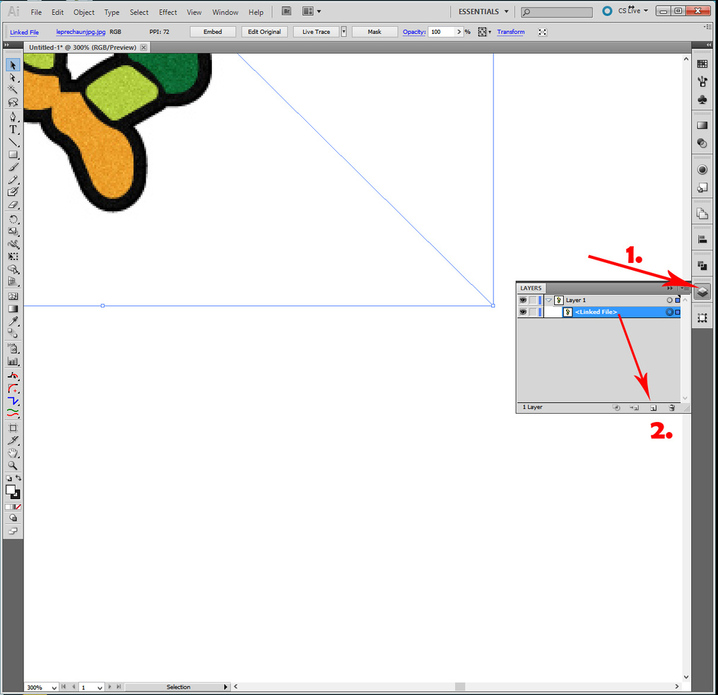
Create a duplicate of the jpeg and hide it:
(This is one of those steps that AI makes necessary because it destroys the original
in the trace.)
-
Open the Layer palette by clicking the icon
-
Drag the image layer down to the Create New Layer icon and release it
.
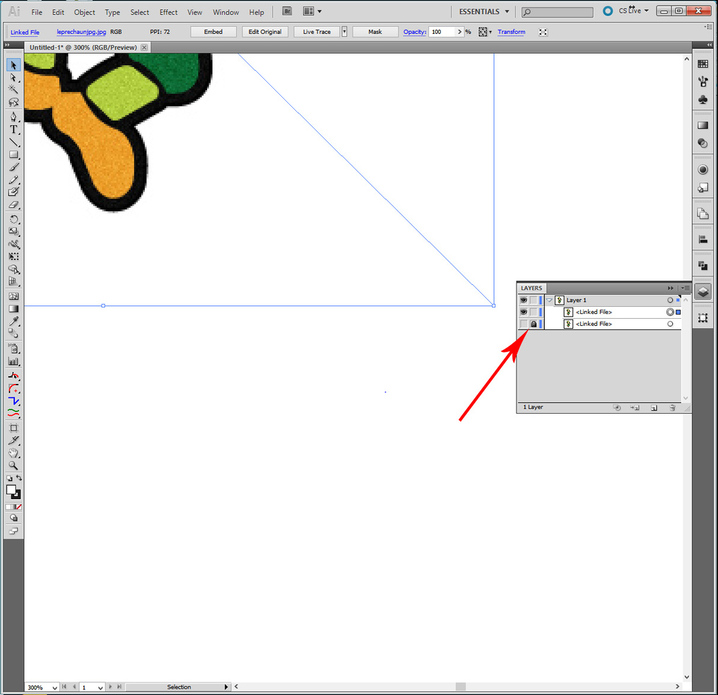
Lock the bottom copy of the image and turn off visibility by toggling the 2 boxes at
the left.
.
.
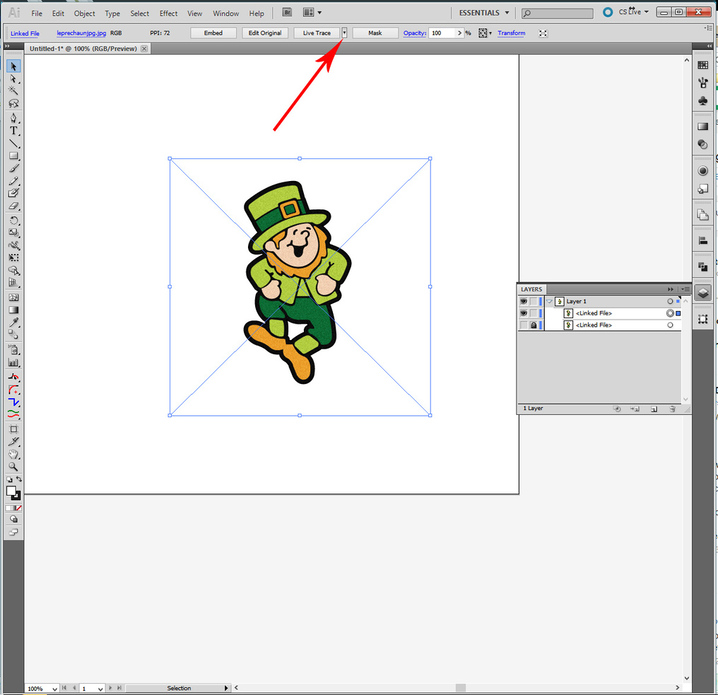
Trace the image to produce a vector path around it:
-
Click the black selection arrow, then click anywhere on the image to select it.
(The buttons across the top of the artboard are going to change when you do.) -
Click on the Live Trace button in the top row.
.
Adjust the Threshold slider and click on the image to see the changes.
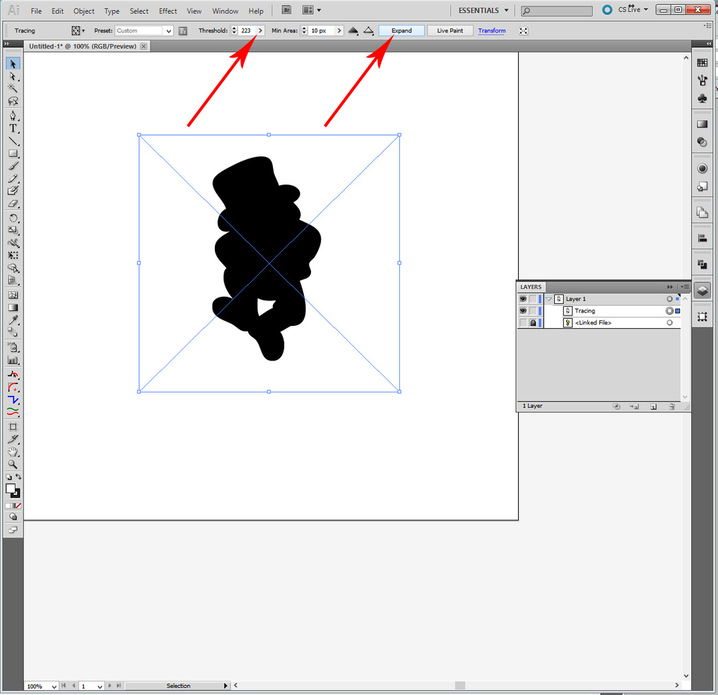
You want to start with a Threshold of about 220-230 for a multicolored image. Drag the value higher to get rid of white areas inside the silhouette. Drag the slider lower to get rid of black junk outside of the outline.
(Although it’s called Live Trace, you do need to occasionally click on the image itself to see the changes.)
The idea is to get a neat silhouette of the image.
When you like the results, click on the Expand button in the top row, to create the vector paths.
.
.
Clean up the Trace:
(Illustrator duplicates a lot of paths during its Live Trace. You’ll want to get rid of the extras.)
Notice that the upper image has been replaced with Grouped trace results in the Layer palette. That needs to be broken up and the individual path(s) that we need to use picked out.
The more interior holes your original image had, the worse this is going to be, so you really need to develop a system for dealing with it.
FWIW…This is what I do:
- Click on the trace results on the board to select it.
- Right click and Ungroup.
- Look in the Layers Palette.
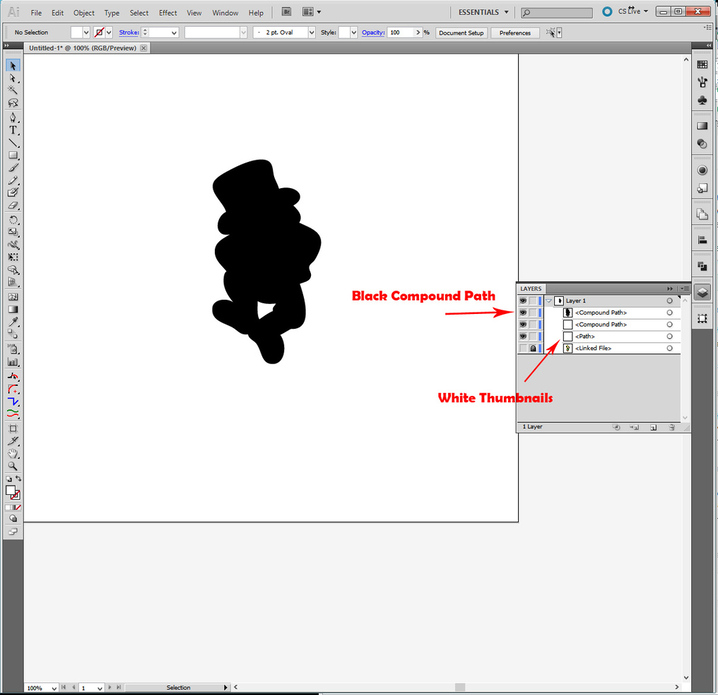
You will typically see one or more Compound paths that have black thumbnail images at the top, followed by a bunch of individual Path thumbnails that look all white.
Generally you can just delete those all white thumbnail paths by dragging them down to the trashcan in the lower right corner of the palette because they are duplicates, but if you want to check them first, just toggle the visibility with the little eye icon next to each path.
If you toggle one and the image on the board doesn’t change, you don’t need it and can delete it.
But…To delete a bunch of them at once:
First lock the Compound Path that has the paths that you want to keep (usually the top one) by toggling the LOCK, (not the eye), then select everything on the board and hit the Delete key. It’s quicker than getting rid of them one at a time.
When you’re done Unlock the Compound Path.
.
To make the vector path(s) visible:
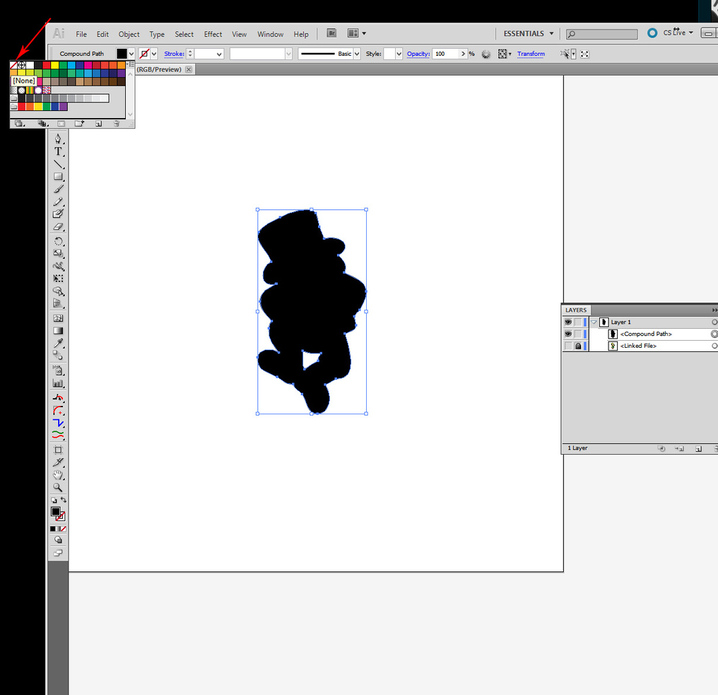
Click the Compound Path on the artboard to select it.
Change the Fill Color to null.
.
Set a Stroke Color to whatever you choose, and turn the Original Image back on by toggling the eye. (Bottom thumb in the Layers palette.)
Now you can see the trace. Notice how lousy it is? That’s a low resolution image culled from the internet. (That can be cleaned up some, with a lot of additional work or a manual trace, but that would take another tutorial.)![]()
It will be fine for the purposes of illustration though.
(Kind of makes you appreciate the dead-on accuracy of what we’ve seen from Glowforge so far though, doesn’t it?)
.
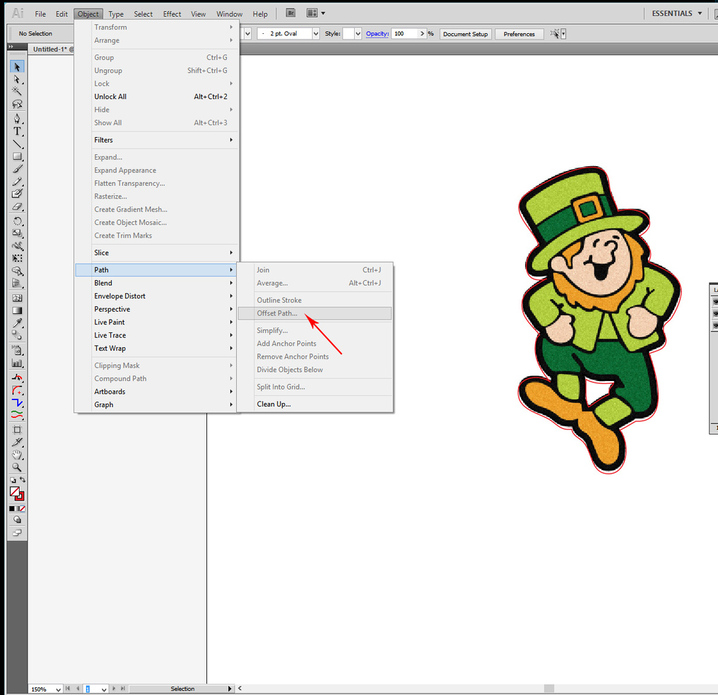
Offset the vector path away from the image:
-
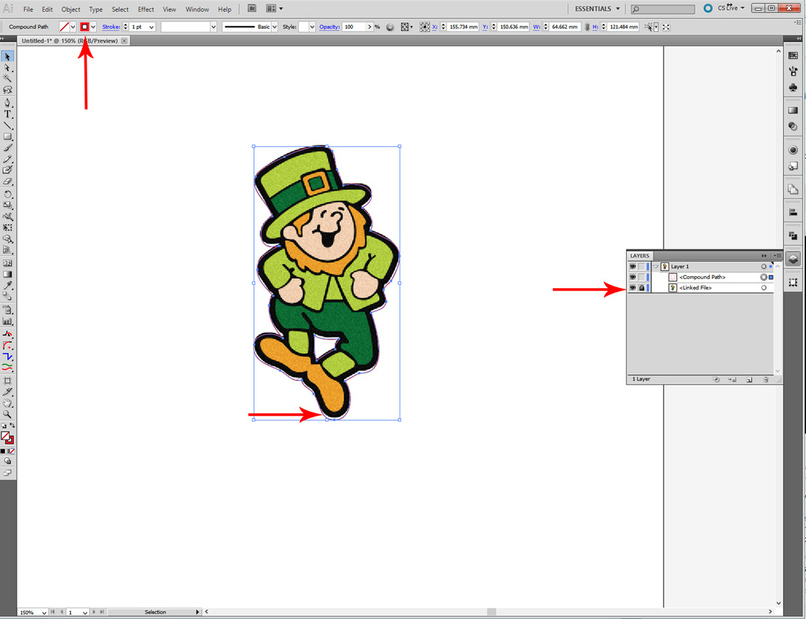
Click the path to select it.
-
Click on Object > Path> Offset Path.
-
Enter the value you want to shift the path out. (Positive shifts it out, negative shifts it in.)
.
Last step before saving is to select the interior vector line and Delete it.
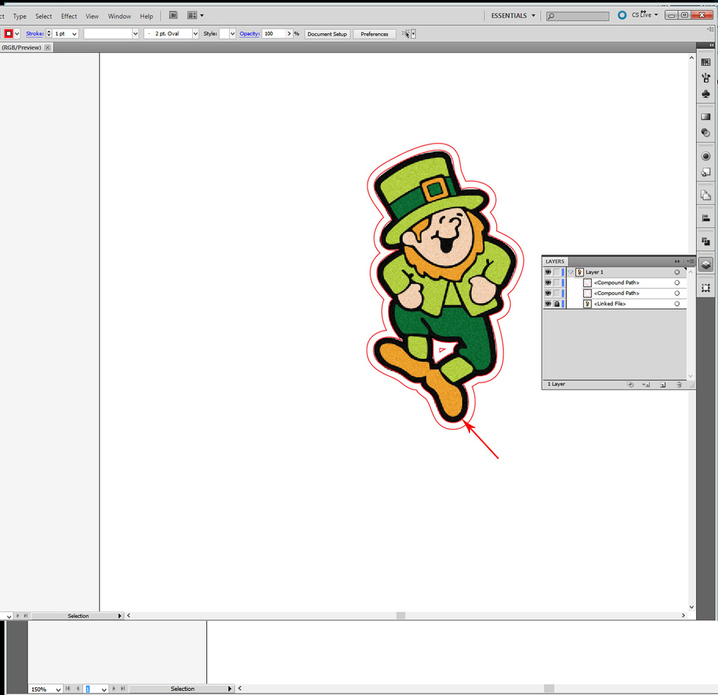
Save the File:
File > Save As > SVG.

