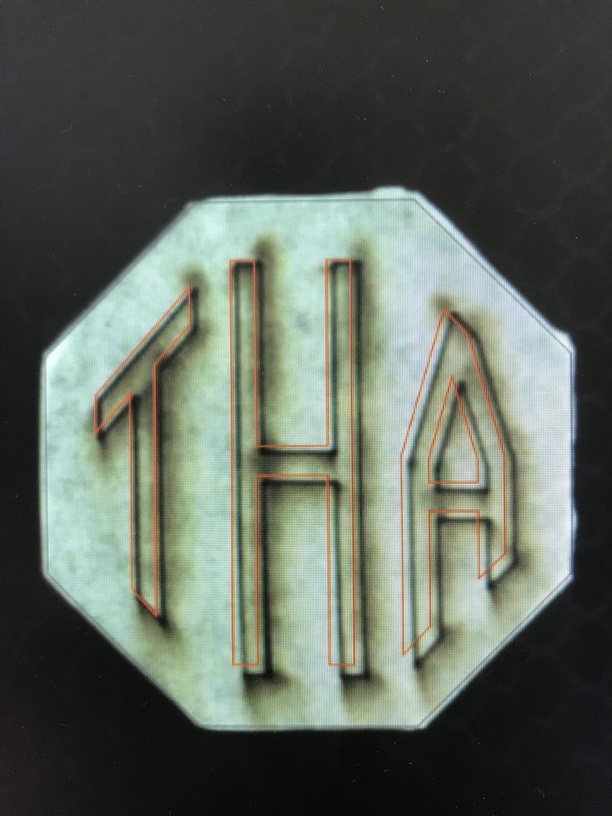
I have the image lined up perfectly on my product (octagon shaped leather), but after laser cutting I get this. It’s offline. And each one is a product/revenue loss for me when this happens. This happens 75% of the time. What is wrong? The swatch is attached with double sided tape to ensure it does not move. It does not move.
Unless your object is directly under the camera, things can be off by up to 1/4". Best way to avoid misalignment is is to have your octagon and initials in the same file; load it into the GFUI, ignore the initials and cut the octagon shapes out of a piece of cardboard, then take out the cardboard octagons and stick in the ones you actually want the initials on, without moving the piece of cardboard. Then in the GFUI, ignore the octagon cuts and score the initials. At each step, make sure your material height is set correctly, for best alignment.
Is that leather?
If not, did you accurately measure the thickness of the material and input that thickness?
At this time alignment can be off up to .25". Typically the farther from under-the-camera, the disparity will be greater.
Yes it’s leather. Yes, thickness was measured perfectly. That’s disheartening to hear about the .25” off and that’s just how it is…
The swatches are custom and were professionally cut (100’s of them). Worst case - if i can’t get this right I will have to have them send me 12x20 sheets and cut my own file (shape+initials) from a leather “sheet”
The camera is not accurate enough to place artwork with precision, and to make it extra fun, the degree of displacement varies across the work area… at least on my unit. Get in the habit of using the camera only for rough placement of cuts. For your specific task, I would use the technique @geek2nurse outlined above.
^^^^
+1
I also ‘print’ the file on a sheet of paper as a first step in any alignment problem I have, then drop the work piece on top for cutting, and reset the thickness from paper(~ 0.006) to whatever the work is, and speed/power to appropriate settings.
Oh! sorry, I’m a newbie if you can’t tell no, not proofgrade (I wish!). I’m going to try the scoring of the octagon (first) with initials file, then place the swatch directly over the shape to cut initials. a little more tedious, but makes sense. cross my fingers!
Hi… I just tried this, but I used an entire sheet of proof grade medium draft board as my backstop so it was snug and not move. I uploaded the file… ignored the initials, scored the octagon, open the lid, placed my leather swatch set back down and it scanned again. shifted again. initials off alignment.
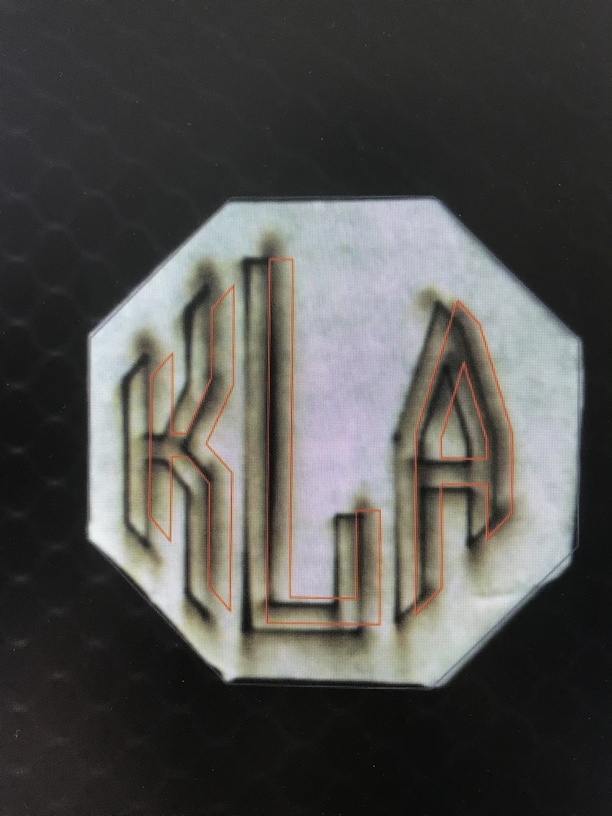
Next, I used printer paper. same thing… made sure all measurements correct and all assets snug, to not move. it was better, but shifted again? also placed swatch as centered with camera as I could.
I think you’re missing the point. Either that, or you have the only GF that can’t repeatedly cut in the same place with no input file changes.
I have rulers cut from a full sheet of draftboard, and it sits snug against the front and sides of the tray edges.
Although the camera is nowhere near close across most of the bed, I know exactly what rule marks on the edges of the UI match up to my cut/scored rulers. If I put an object in a precise location, and re-cut from there, it is a perfect match.
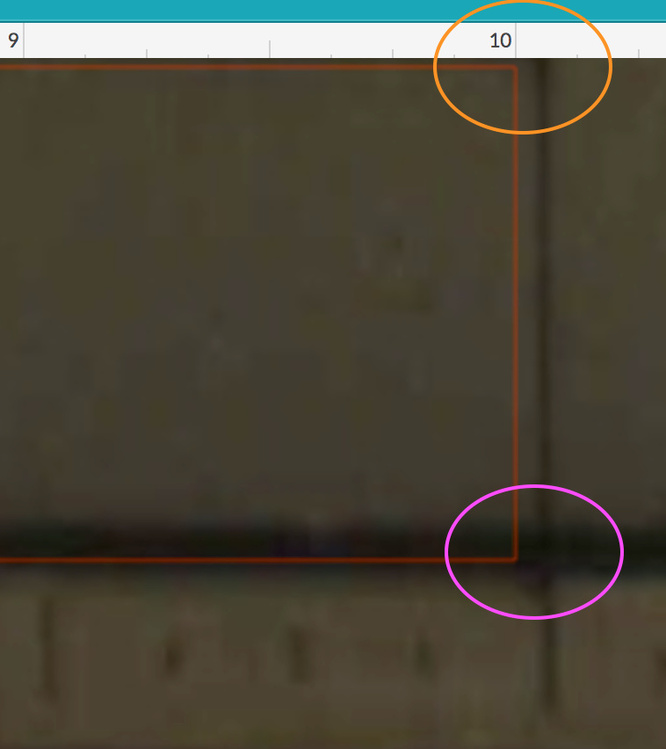
Look at the orange circle - I aligned the source image exactly at the center - 10" mark in the UI. The resulting cut is nowhere near in the camera image, but if you look at where the cut meets the ruler, it is exactly in the right place on the bed.
If you cut a jig and locate your pieces relative to the jig IN THE UI, ignoring the camera, it will always be perfectly aligned.
If you’re making a lot in quantity, then have a template image that cuts many shapes from your jig material, then ignore that cut image when you add the engrave, and align to the image in the UI, NOT the camera image from the bed. Sometimes I do my alignments with no material on the bed, because the black background makes it easier to see the lines…
Oh good! Yes, I should have explained that about the camera view. As @eflyguy explained, the camera view will shift and be off just a bit after running an operation, but the GF will cut/engrave in exactly the same spot. In your original picture, it would engrave right over the top of the other engraving as long as you don’t move the leather.
@kchiassonaz I’m sorry you are having trouble with your print alignment, and I’m glad you found some solutions!
The software on your Glowforge is responsible for ensuring that the print lands on the material in the same place as the preview. When you’re done with a print, let a new image load. If the print appears on screen far from where it was supposed to go, you may have an alignment problem.
Most alignment problems come from the material being closer or farther from the camera than expected. While the software is still improving, you can take these steps for the most accurate alignment results:
Use Proofgrade™ materials.
If you don’t use Proofgrade materials, use a precision set of calipers to measure your material, and enter the thickness in the “uncertified materials” dialog.
Use material that is not warped or tilted.
Place your design near the center of the bed.
Clean the area underneath your crumb tray, particularly the four indentations on the floor.
Reboot the machine. Alignment can drift over time, particularly if you bump the head of your Glowforge while removing material.
Should you finish all of these steps, and find that you have an alignment error of more than 1/4", please contact us so we can investigate.
I’m going to close this thread If you have any other questions, go ahead and post a new topic.

 leather?