First off, I LOVE the Glowforge! It’s incredible! After about a week of successful printing, I had my first issue today
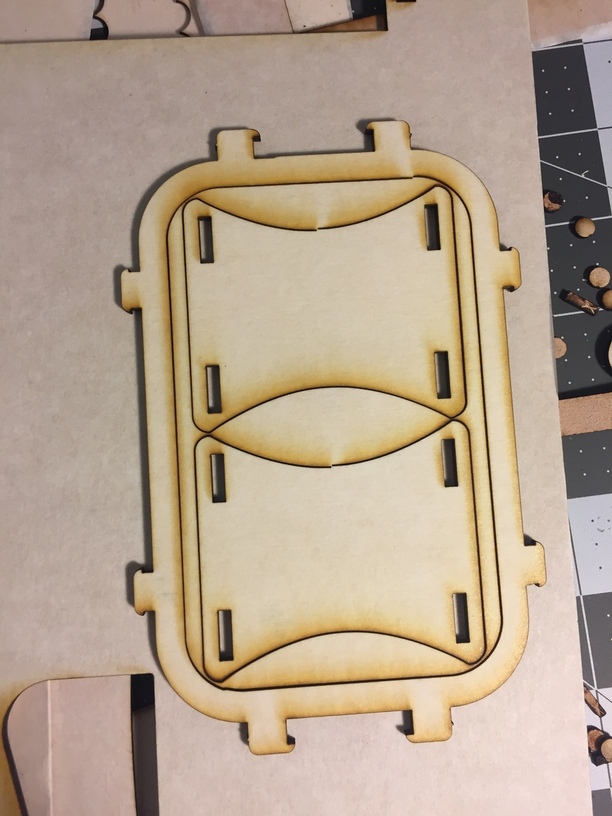
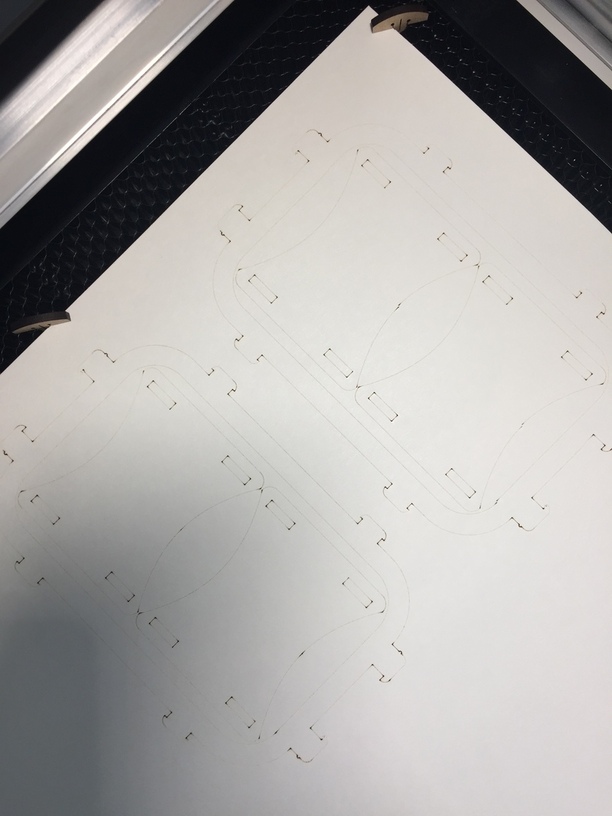
I had an issue printing the better together clutch earlier, then had a similar issue printing the keepsake box at 6:23pm EST. Side note: I had printed the better together clutch several times and not had any issues, (it pretty much takes up the max space available in the bed. The issue occurs in the right section of the material towards the center. The example shown below was after I cleaned the crumb tray, dimples and lenses per the cleaning instructions. I was using non-PG baltic birch.
I then found a topic in support that seemed to be a similar issue, so I followed the below troubleshooting from Rita:
I’m sorry you’re having trouble! Would you please:
Turn off your Glowforge (this is important to avoid damage to your unit)
Check for small pieces of debris or dust
Check the lower door to make sure it closes all the way. It may require some force to open, but open it, wipe any dust off the edges, and close it all the way.
Remove the tray and clean any dust or debris from the surface underneath. Pay careful attention to remove all debris from the four dimples where the tray rests.
Check the lid to make sure it closes all the way. Small particles of material, such as dust or debris, can prevent it from closing completely.
Open the lid and, using both hands, gently roll the laser arm to the center of the bed, and then back and forth about 3 inches in each direction.
Continuing to use both hands, gently move the laser arm to underneath the lid camera
Gently move the head under the lid camera
Turn your Glowforge back on
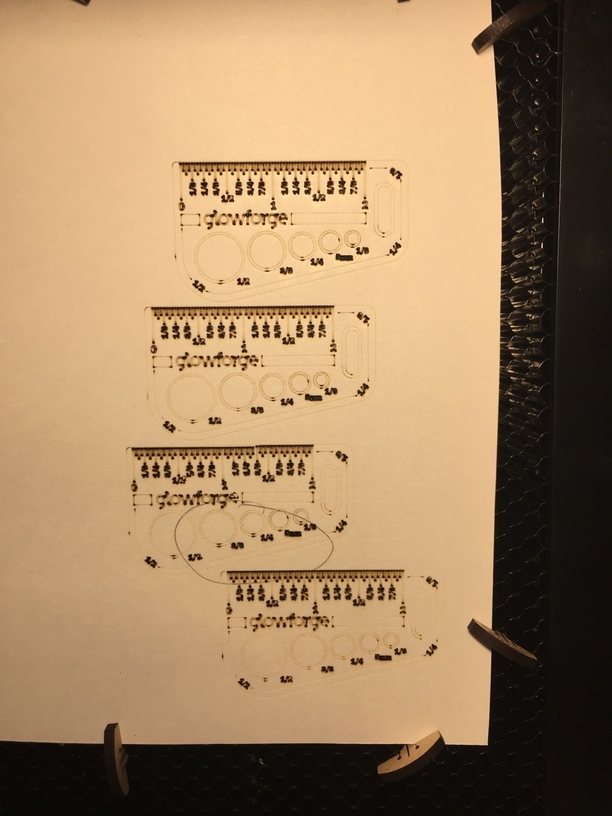
We included an extra piece of Proofgrade Draftboard with your materials shipment for troubleshooting. Place Proofgrade Draftboard in the bed and print the Gift of Good Measure in the front right corner.
Send us a photo of the resulting print.
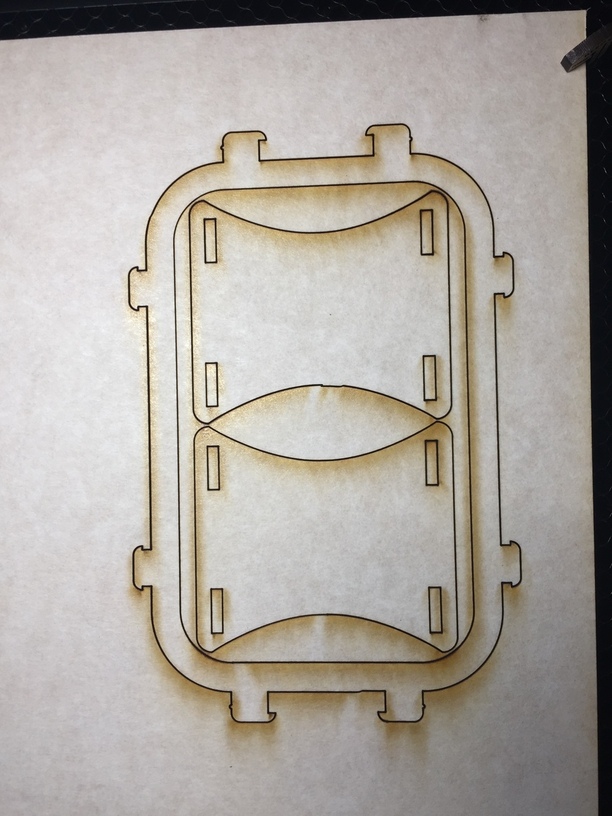
I printed 2 copies of the gift of good measure on PG draftboard in the area that had the issue (right side, center) and they came out ok. I then reprinted the part of the keepsake box that had the issue in the first photo, leaving it in the same spot using PG draftboard and the print looked “better” but the alignment was still off by a hair in a couple places. That print took place at 7:18pm est.
I don’t have an answer for you, but I’d just like to say kudos to you for making the effort to investigate your issue and be proactive about it. You deserve a gold star!
Thank you! I worked at helpdesk for my former employer, so, I know how it pays to do your leg-work up front! Thank you and the other regulars for all your awesome advice on the forum! There is SO much info here it is super cool and helpful for us newbs!
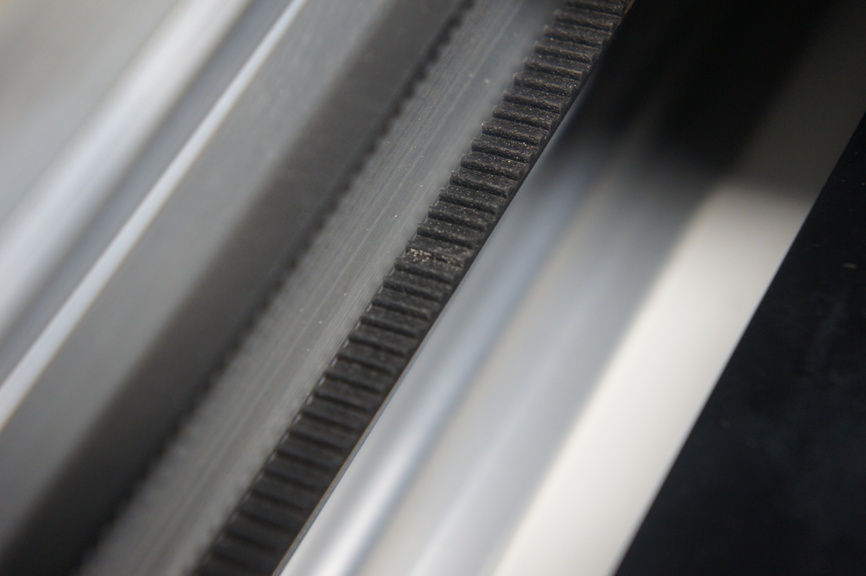
I’d second that suggestion. If you have a mirror and a flashlight you can do a little inspection of the belt under the gantry (with the machine off for safety) and check for a worn tooth or something that sticks out.
@lairdknox@Jules - Thank you both. I broke out my nerdy magnifying glasses and inspected the 3 belts using a mirror and flashlight and the only thing that stood out was a bit of maybe some leftovers and/or a bit of degraded area of the belt on the left side of the gf, aka “The Cheese Machine.” The picture doesn’t do it a whole lot of justice. Do you have suggestions for cleaning up the belts? Toothbrush?
I am treating this thing like a delicate flower! From what I’m reading, it is pretty durable and hard to break, but with zero laser experience, and the wait…(oh the wait) I’m so happy it is here and so nervous I’m going to break it! Thank you!!
Crud. Did you ever get a good print of it? Like by moving it out further away from that edge and trying to print it elsewhere on the board? (It might just be something in the file itself, but I’d check it using a light powered score on something like a sheet of posterboard or cheap plywood instead of continuing to eat through the draftboard.)
Yea, I’ve printed it with no problems on other areas of other PG and non-PG materials. It is only in this area of the bed I’ve had issues with two of the catalog designs that had previously printed successfully on PG and non PG materials.
Weird. Cleaned the pulleys also (just checklisting)? The smoke stains look different right around the areas where things are going wrong, so… (I don’t know, but it seems as if it might not be a coincidence) Yet another thing to clean is the wheels and the aluminum that the wheels run on…
OK, so I copied the part of the file that was having the issue and tried your posterboard suggestion @Jules (first time using posterboard, and still BLOWN away every time I try something new on this thing) - I know, small potatoes, but exciting still - here, you can see side by side the same part of the file, no issue on the left, and on the right, still an issue. I’m going to try wiping down more of the parts of the track, wheels etc, then reset the design all-together and try again, but, something isn’t right for sure…near as I can tell. It’s odd to me that on the non-PG the line fails to meet entirely, and on the PG, it meets, but sloppily. I hope the support gods have some good news for me.
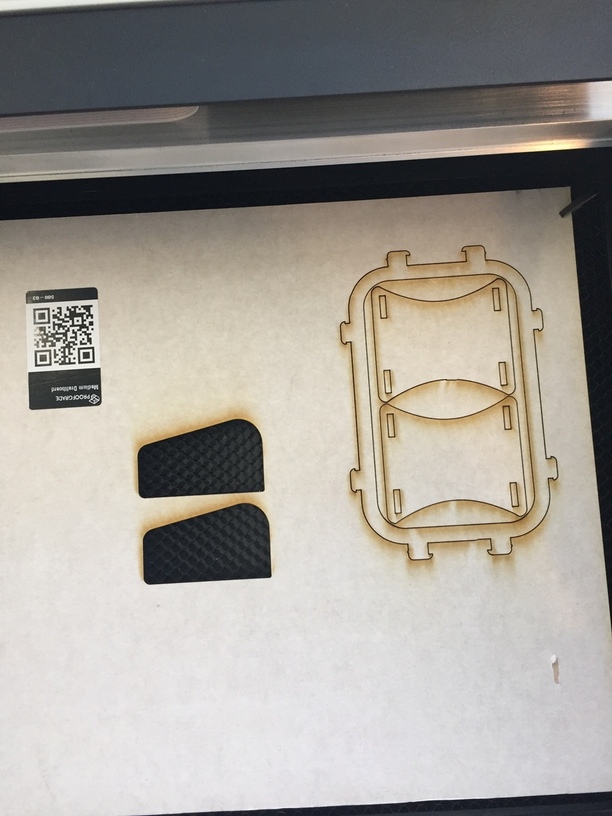
Further testing: 11:29am est, I loaded the gift of good measure and placed several copies of it in the areas of the bed exhibiting issues. Before printing, I circled an area on posterboard that previously had a line that didn’t meet up, then changed all lines to score. Below is result, as you can see, the “e” in the third from the top is off as well as the ruler on that print.
I agree that there’s an issue with one of the belts on your unit. The good news is, I’m sending you a replacement part! When it’s on its way, I’ll follow up via email with tracking information and replacement instructions. I’m going to close this topic, but don’t hesitate to let me know if you have any other questions.