Does anyone know how to fix an alignment issue that is WAY off? It appears the cut is shifting approximately 1" to the right from what I see in the UI. By the way, this is my replacement Glowforge that I JUST received 3 DAYS ago (no issues Thursday or Friday). My last Glowforge had to be shipped back after having it only 8ish months - I got the purple button and it would NOT WORK AT ALL. I’m very frustrated to say the least!!
I assume you have the correct thickness plugged in for material (if its not proofgrade) so the camera correction can work properly right?
I recommend posting a photo of what you see in the UI after the cut.
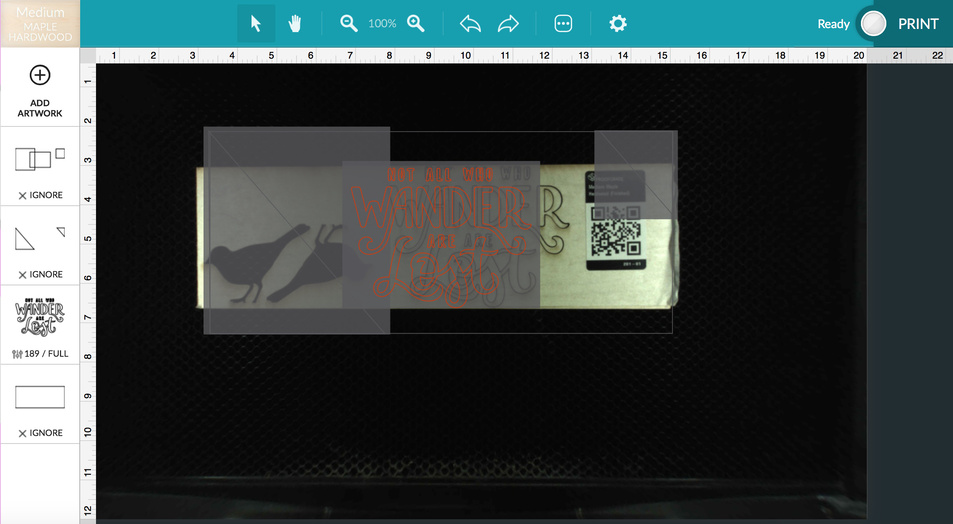
Hello, I’ve used Proofgrade and non-proofgrade this morning - issues with both. I measure all my material down to the hundredths of an inch with calipers. Photo below.
That’s definitely more off than it should be especially being near the center of the bed.
Hopefully the support team can help you resolve it.
Do let us know how this issue is resolved please. 
I’m sorry for the trouble, and thank you for sharing that screenshot. To start, we’d like to have you try a few troubleshooting steps for us:
- Turn off your Glowforge.
- Check for small pieces of debris or dust.
- Check the lower door to make sure it closes all the way. It may require some force to open, but open it, wipe any dust off the edges, and close it all the way.
- Remove the tray and clean any dust or debris from the surface underneath. Pay careful attention to remove all debris from the four dimples where the tray rests.
- Check the lid to make sure it closes all the way. Small particles of material, such as dust or debris, can prevent it from closing completely.
- Check the surface your Glowforge is on to make sure it’s flat. Ensure it is not twisted slightly and that there is no debris propping up one side of the machine.
- Turn your Glowforge back on.
- We included an extra piece of Proofgrade Draftboard with your materials shipment for troubleshooting. Place the Proofgrade Draftboard in the center of the bed and print the Gift of Good Measure using the default settings.
- When the print finishes, leave the lid closed and wait until the fans stop and the picture updates. Without moving your artwork or your material, take a screenshot of the Workspace to show us the difference between the artwork placement and the actual print placement. Make sure to include the rulers in your screenshot and show as much of the bed as possible.
- Mac: Press Shift-Command-4 and click and drag a box around your image. You’ll find the screenshot file saved on your desktop.
- Windows: Click on the Start Menu and type “snipping tool”. Open the Snipping Tool > New then click and drag a box around your image. Click the Save icon and name and save your file.
- Reply with the screenshot along with the date and time of the print, and we’ll investigate.
Vee,
Thank you for your message. After turning on the machine this morning, the alignment issue is resolved. I didn’t do any of the steps you mentioned above (just turned off the machine last night and turned it on this morning). Does that give you any clue as to what the issue could be (so I know for next time)?
I’d still do the steps. It looks to me like the head got bumped or moved while the machine was on, throwing off the alignment. Could have been human error, but also could have been debris on a track or belt, etc. Turning off and back on would re-align it, but if there’s debris somewhere that caused it in the first place, then it will happen again.
6 Likes
Thanks for the answer, @geek2nurse, that’s right. I’m going to close this thread - if the problem reoccurs, go ahead and post a new topic. Thanks for letting us know about this!
1 Like