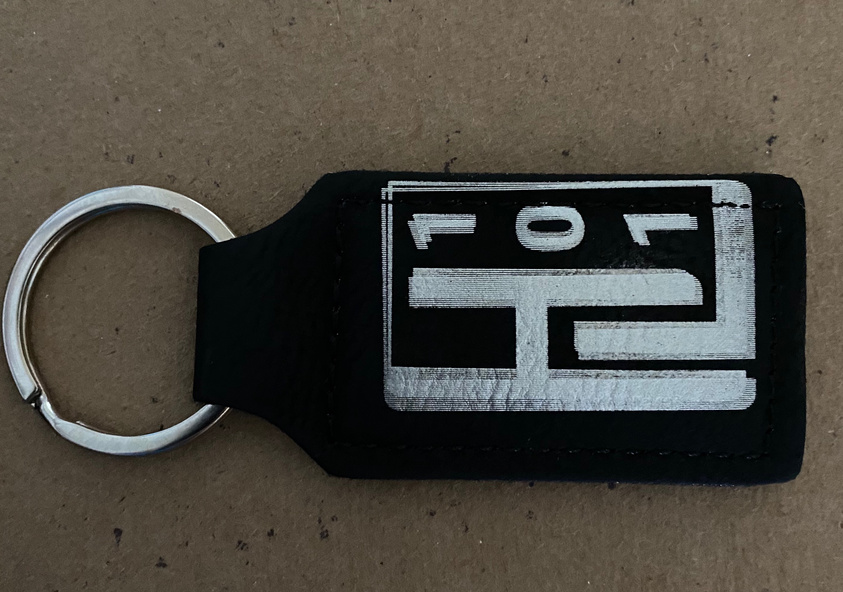
Hi Everyone - we are attempting to engrave several preliminary test items by engraving/scoring a few items. Currently, we are trying to engrave a Johnson Plastics Plus leather keychain with an SVG logo file. Pretty straight forward.
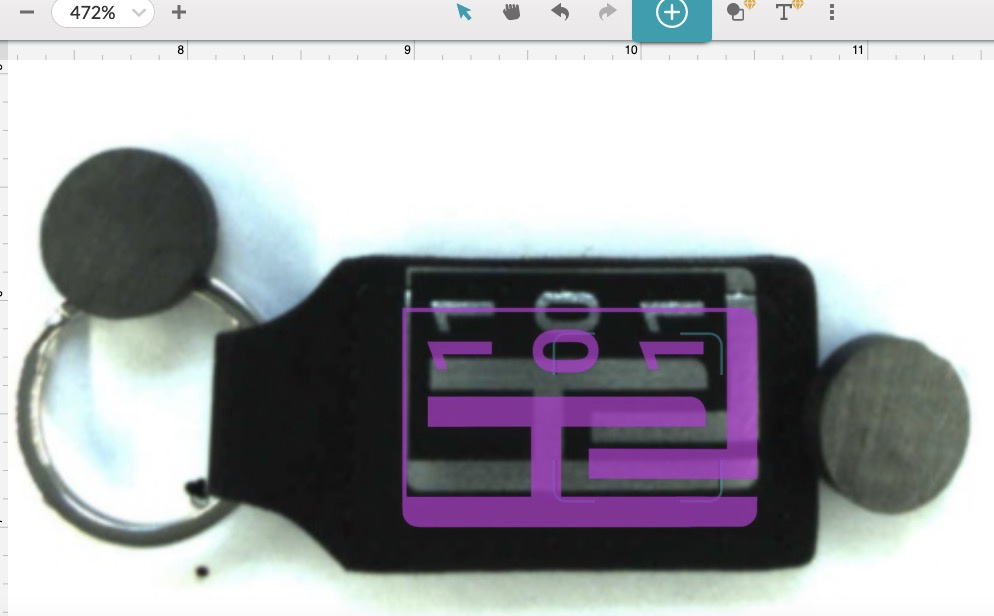
However, when we compare the placement/alignment of the logo on the screen before printing the file to the keychain, the logo is almost 1/4" off from where it was intended to be placed. When you consider the small size of a keychain, a quarter of an inch is way too much variance and the logo is nearly off the keychain let alone inside the stitching. As new Glowforge parents, this is both irritating and frustrating.
Yes, we’ve run the camera calibration (twice now). We’ve also tried the logical combinations of setting material height, making and using a template on cardstock for placement purposes etc.
When I use a paper template and score the design, everything looks perfect. But when we put the keychain in and run everything, it’s off again. I suspect this has something to do with the slight “puffy” middle of the keychain and the heigh difference it creates… but the differences can’t be so severe that it causes this much distortion/placement issues. Anybody have some insight??
(Pictures show 1) the screenshot of the artwork as placed versus the artwork engraved – the lid was never opened, focus adjusted,etc) 2) the repeated engraving of the file making slight adjustements that still result in the artwork distorted/misplaced.
This is one of those rare use cases that might require a little extra prep on your part.
What happens when the auto-focusing happens right before a print is…the head moves out to where the design is placed, and a little red beam of light gets flashed at the material for a split second. That red dot is taking a height measurement, and it’s used in an algorithm to calculate placement.
If you are placing something thicker than paper on a paper jig, the height differences can sometimes cause the placement to be off when you put the thicker small item on it to be engraved.
There are a couple of things you can do…
Use something for the jig that is roughly the same thickness as the keychain…maybe corrugated cardboard or a scrap piece of wood. Once you cut the hole out of that, when you drop the keychain in, the resulting engrave should align right on the money. Paper just isn’t a good choice if there is a significant difference in thickness with the keychain. The red dot needs to either land on the keychain or on something of similar thickness.
You can over-ride the focus height on the Engrave operation in the thumbnail column. If you do that, you have to go into Manual Settings and set it for the actual thickness of the material. When you do that, it over-rides the auto-focus.
I’d just try experimenting with a thicker jig material…it might be enough to resolve the problem for you quickly. (Usually easiest until you get used to messing with the settings.)
Welcome to the forum.
Even the smallest variation in height makes a difference as you will discover whenever you have a very slightly warped board. For these keychains it really matters where the focus beam hits. You didn’t mention whether or not you are using the set focus tool before aligning your artwork. If you aren’t, you should be. If you are, you must make sure that the beam hits in the middle of where your artwork will be.
I’m so sorry to hear that you’re running into trouble with your Glowforge, but I appreciate you posting so many great details.
As @Jules pointed out, this may require some additional prep work due to the materials you’re printing on, and the offset you’re experiencing when printing. I hope the information @Jules provided is helpful.
I’d like to take a look at a specific print on Proofgrade material so that we can ensure that everything is performing within specification.
We’d like to have you try a few troubleshooting steps for us:
Turn off your Glowforge.
Check for small pieces of debris or dust.
Check the lower door to make sure it closes all the way. It may require some force to open, but open it, wipe any dust off the edges, and close it all the way.
Remove the tray and clean any dust or debris from the surface underneath. Pay careful attention to remove all debris from the four dimples where the tray rests.
Check the lid to make sure it closes all the way. Small particles of material, such as dust or debris, can prevent it from closing completely.
Check the surface your Glowforge is on to make sure it’s flat. Ensure it is not twisted slightly and that there is no debris propping up one side of the machine.
Turn your Glowforge back on.
We included an extra piece of Proofgrade Draftboard with your materials shipment for troubleshooting. Place the Proofgrade Draftboard in the center of the bed and print the Gift of Good Measure using the default settings.
When the print finishes, leave the lid closed and wait until the fans stop and the picture updates. Without moving your artwork or your material, take a screenshot of the Workspace to show us the difference between the artwork placement and the actual print placement. Make sure to include the rulers in your screenshot and show as much of the bed as possible.
Mac: Press Shift-Command-4 and click and drag a box around your image. You’ll find the screenshot file saved on your desktop.
Windows: Click on the Start Menu and type “snipping tool”. Open the Snipping Tool > New then click and drag a box around your image. Click the Save icon and name and save your file.
Send us the screenshot along with the date and time of the print, and we’ll investigate.
Once the print completes, please let us know how it goes! We’ll review the log files, and ensure everything is performing as it should.
It’s been a little while since I’ve seen any replies on this thread so I’m going to close it. If you still need help with this please either start a new thread or email support@glowforge.com.