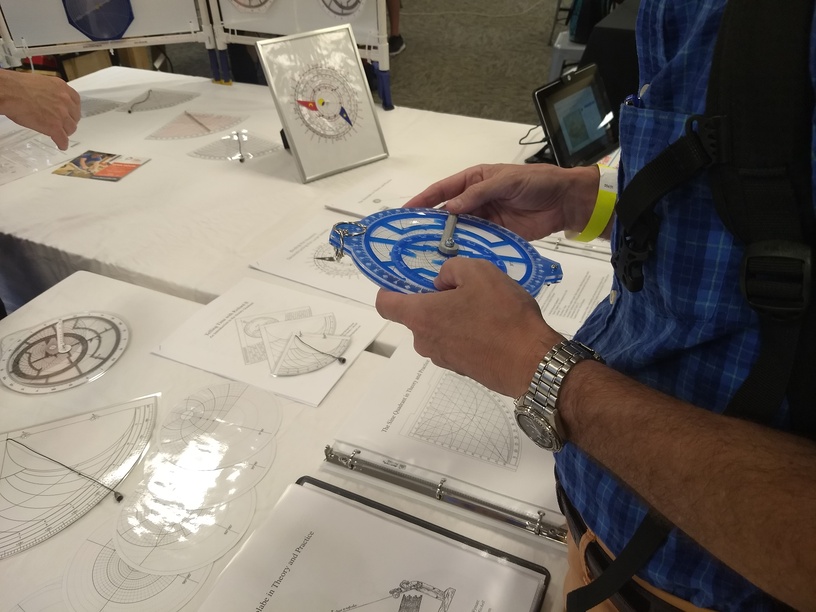
Went to the NOVA MakerFaire at George Mason University a couple weeks ago. Same event where @shop was busily demonstrating the Glowforge. His tent had a lot of traffic and interest.
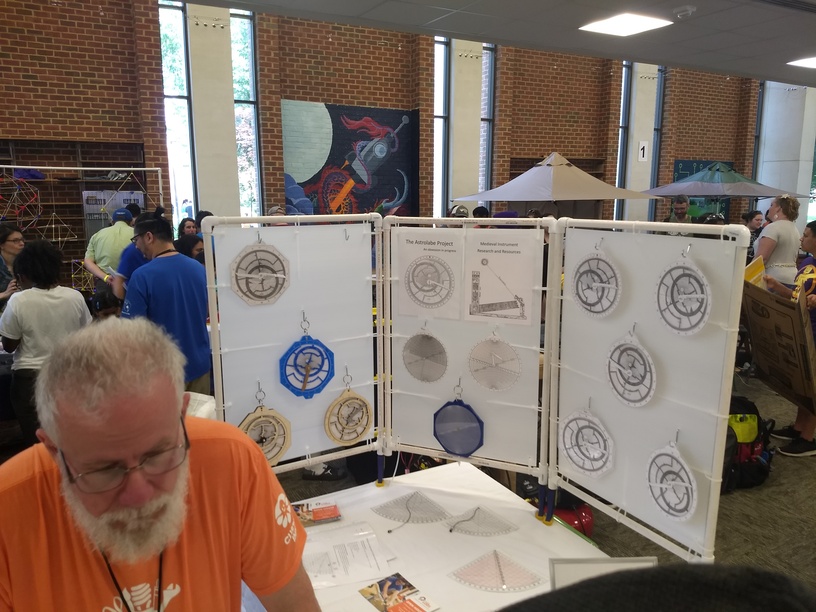
Inside the main building, a table with a bunch of astronomical-slide rule looking contraptions immediately captured my eye. The associated display explained that these devices were Astrolabes, Lunar Volvelle, and Sine Quadrants. I’ve heard of Astrolabes but mostly from obscure reference to Ancient Greek or Islamic civilizations. But these were functioning precision instruments on the table. As a collector of slide rules and an amateur astronomer this was science nerd heaven. And it was immediately clear that every component could easily be made on the Glowforge.
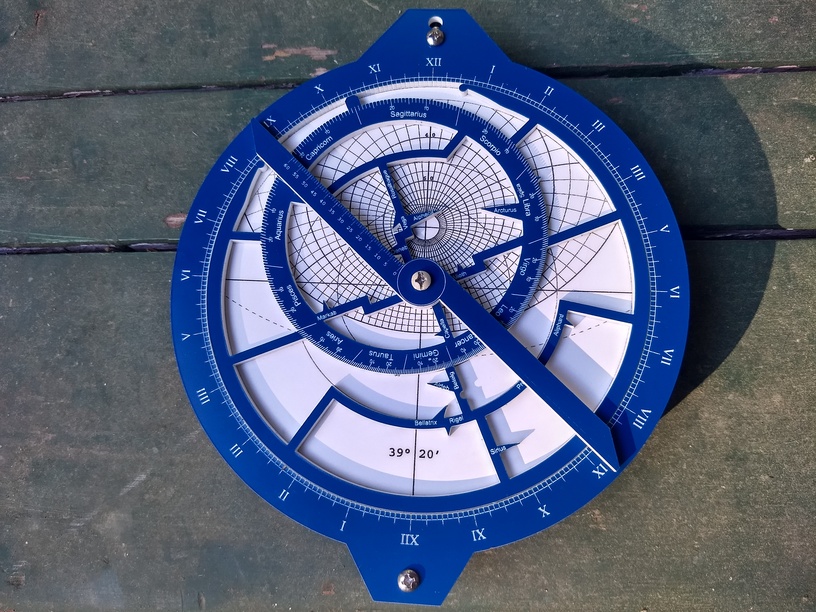
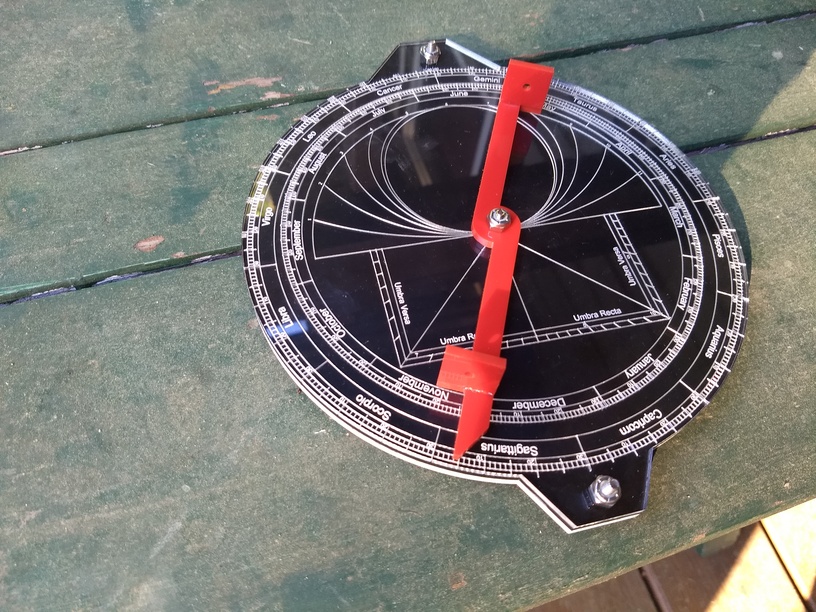
The presenters have developed the Astrolabe Project. AstrolabeProject.com Their web site includes everything. Detailed manuals, class handouts, digital simulators of the devices, and cut files all available for free. Here’s the front and back of the Astrolabe I made today for my specific location. Everything except screws were cut and engraved on the GF.
The AstrolabeProject clearly represents years of work and I’m in awe of their efforts.
I would suggest interested makers go to the AstrolabeProject.com website and get a basic understanding of the devices. Print the manuals. Then go to Thingiverse to get the free files under Creative Commons attribution license. Remember to credit the developer, Timothy Mitchell (wymarc)
Last week, wymarc posted an advanced version of the Astrolabe on Thingiverse. The back panel seems more complex. Both versions have way too many functions for me to understand yet. Here is the new advanced version. Astrolabe Advanced by wymarc - Thingiverse
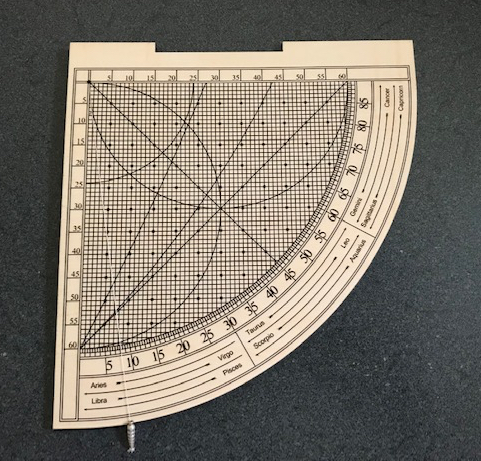
So far I have built a functioning Sine Quadrant and Astrolabe. The lunar Volvelle will come next. I needed to tweak the cut files a little. Mostly small stuff. A couple stray lines. Decided to reverse engrave one component and shrink a couple holes to fit my bolts. Also needed to convert one component (Alidade) from 3D print, to 2D laser cut and glue. Made several parts out of 2 color acrylic for better contrast. But all in all it was pretty easy. If you have any questions about construction I will be happy to help. Be aware that I still haven’t explored 10% of the functions as of yet.
Way over my head, but it just goes to show you never know when you are going to happen upon something life altering. One day you don’t know that Astrolabes are a thing and the next you are making your own. For the folks who love slide rules, this is a major rabbit hole. Thanks for sharing.
Have carried a slide rule around in my truck console for years. Not sure why. Just in awe of them. Can’t imagine how the ancient Greeks came up with the design for an Astrolabe.
For reference: " An Astrolabe is an ancient tool used in solving problems that involve time and the position of the Sun and stars. Astrolabes can be used in timekeeping, surveying, geography, and astronomy to name a few disciplines. One of its most well-known uses is navigation."
I’ve only been able to figure out one of the functions so far.
So I downloaded the Astrolab Generator, set everything the way I want. But have trouble downloading/saving. Did you run into that too? It won’t let me pick a file format to save or zip. With the moto of “don’t let the computer win” I reverted to print and save to file, which worked for the front and back, but the rest of the views all come up as a page of rules and not the rete, etc. I know you wouldn’t know about the program, just curious to see if you ran into any of these issues.
Yeah, that confused me for a moment too. Selecting the save option only allows you to choose where to save 4 user specific files in .eps format, not the name or file format. There are a number of programs that can open Adobe .eps files. I used Photoshop. From there I could save it in the format of my choice. The included Rete files are OK given the accuracy of the engraves. I am at 39 degrees latitude so only one degree off of an included Rete.
It wouldn’t let me pick the 4 specific files either, so effectively no save option at all. Opening the basic rete file in the GFUI it showed the inner circle as a score, not as a cut, so I’ll have to separate that out from the rest of the scores so it can cut that part. Meanwhile there seems less to fix on the sine quadrant, so am printing that right now.
Yes I had to fix a few lines here and there. I started with the SineQuadrant too. In addition to determining elevation angles, Sines and Cosines, etc, it has lines that allow calculations for the direction of Mecca and start/stop times for mid-day prayers. Although historically accurate I didn’t need those and decided to delete them making the engraving a little less busy.
When I selected the save it allowed me to select the location but the file name area was blank and did not allow me to enter a name or select anything. I just hit the “Select” button and four files named AstrolabeFront.eps, AstrolabeBack.eps, AstrolabeRete.eps, and AstrolabeRules.eps, magically appeared in the files location.
BTW: You need to decide how to build the Astrolabe in layers. There are options for including or not including the mater and including or not including the throne. The Astrolabe generator creates a completely different throne than the one in the free files so it doesn’t stack properly. I created the location specific climate engrave and manually embedded that with the included blank panel as one. Don’t forget to place a cut hole in the climate panel.
Front to back my layout was:
Rule
FrontRoman ring
Rete
Climate (site specific) engraved on the blank panel
Back panel
Alidade
Make sure the Rete and outer ring panel are the same thickness. Do a test check on the center hole size to make sure it is tight enough around the screw to not wobble but loose enough to turn.
Yes, thanks so much for the additional tips. This will be tomorrow’s project and clearly i should not rush it, so might take more than a day too. I may even wait a few days as I gave my hubby a strong hint I wanted two colored acrylic for my birthday, which is next week, and it would look so much better too. The sine quadrant printing now will show I did something today when he comes back in 4 hours… as if.
 .
.