I put a piece of 0.063" thick acrylic on the bed of my glowforge. I told it I was using unknown material of 0.06" thick (only 2 decimal places supported in that dialog box.)
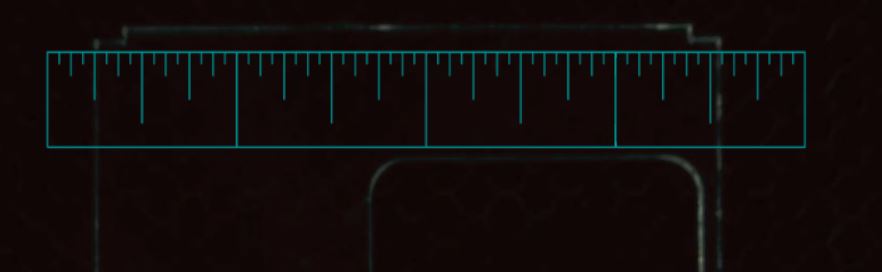
I then uploaded a picture of a 4" ruler into the app, and aligned one of the inch marks with the edge of the material.
I’ve attached a screenshot of what it looked like in the app.
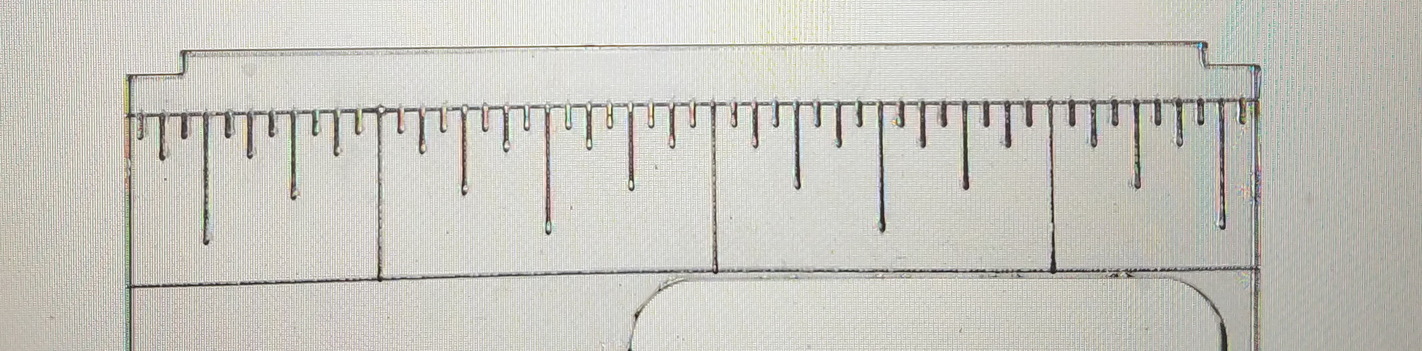
Then I printed. And I’ve attached a photograph of the finished cut.
The image is about 1/32 shifted left and about 1/32 shifted down.
My material was near the center of the bed.
Is this inline with what is expected? Or should we be able to place better than that?
Also, it prints where it said it would, just after your print, it offsets the lines from where they were. If you touch nothing you could recut in the same exactly place despite the image lines being off. So if you need to go back and add on to a cut after it’s run, align to the computers lines, not the ones on the material.
As stated, this offset is due to improve over time.
I would never rely on the lid camera for accurate placement of artwork on an existing piece you plan to etch/engrave. If you can, generate the artwork so you can cut/engrave all in one setup.
I do rely on the camera for “well thats good enough for me” placement.
Unfortunately, this is an extra step, but relatively quick. Put the border of your artwork on a different color. Ignore everything else, place a piece of paper on the crumb tray, held down with magnets. (Or use a tacky mat). score at 1000 speed, 12 power. It takes only seconds. open the lid, place your art. don’t move anything on the screen as much as it will be eating at you. Un-ignore everything and press print. Voila.
If you can’t see through your material - in my case I did a phone, then stretch out the boundary to where you can see a line, to align with an obvious point on the material. (doesn’t sound quick after all, but well worth the alignment time.)
Not sure I understand the 2 decimal place limitation you observed in the dialog box. I typed in 0.063" and it took it just fine. When I went back to the box it showed 0.063" and it also showed that number in the focus height.
(I’m sure someone here will want to beat a dead horse and rehash the focus resolution discussion. Personally not interested unless there is new info. Just talking about the numeral entry resolution.)
Replying to wesleyjames: No, it didn’t print where it said it would. It printed ~ 1/32" offset in each direction. Neither of the photographs I provided were what the camera saw AFTER the print. One was the app screen before the print, and the other was the actual print.
That’s exactly the answer I needed. Bottom line, never place your artwork within 1/4" of the edge of the material, and your print won’t fall off the edge. Thanks!
rpegg: You are correct. When opening that box, the default shows 0.00, so I assumed it wouldn’t accept or remember more than 2 decimal places. But you are correct, if 0.063" is typed in, it is retained.
Thanks for the help in this thread, all! The software on your Glowforge is responsible for ensuring that the print lands on the material in the same place as the preview. When you’re done with a print, let a new image load. If the print appears on screen far from where it was supposed to go, you may have an alignment problem.
Most alignment problems come from the material being closer or farther from the camera than expected. While the software is still improving, you can take these steps for the most accurate alignment results:
Use Proofgrade™ materials.
If you don’t use Proofgrade materials, use a precision set of calipers to measure your material, and enter the thickness in the “uncertified materials” dialog.
Use material that is not warped or tilted.
Place your design near the center of the bed.
Clean the area underneath your crumb tray, particularly the four indentations on the floor.
Reboot the machine. Alignment can drift over time, particularly if you bump the head of your Glowforge while removing material.
Should you finish all of these steps, and find that you have an alignment error of more than 1/4", please contact us so we can investigate.