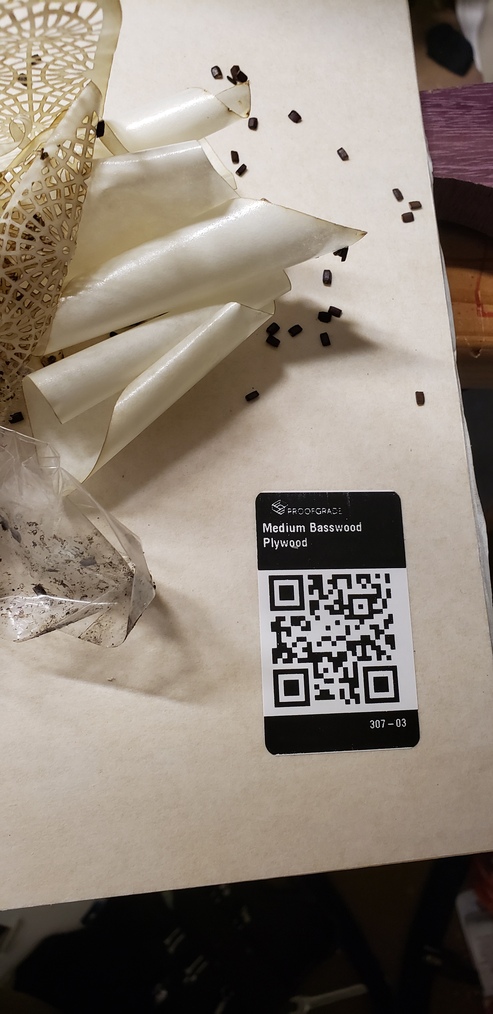
I’ve only had this for like a week maybe. I thought making this pencil box from the designs provided would be cute and used a proof grade wood. The draft board i cut my first good measure from didn’t have the qr code work, but this one did.
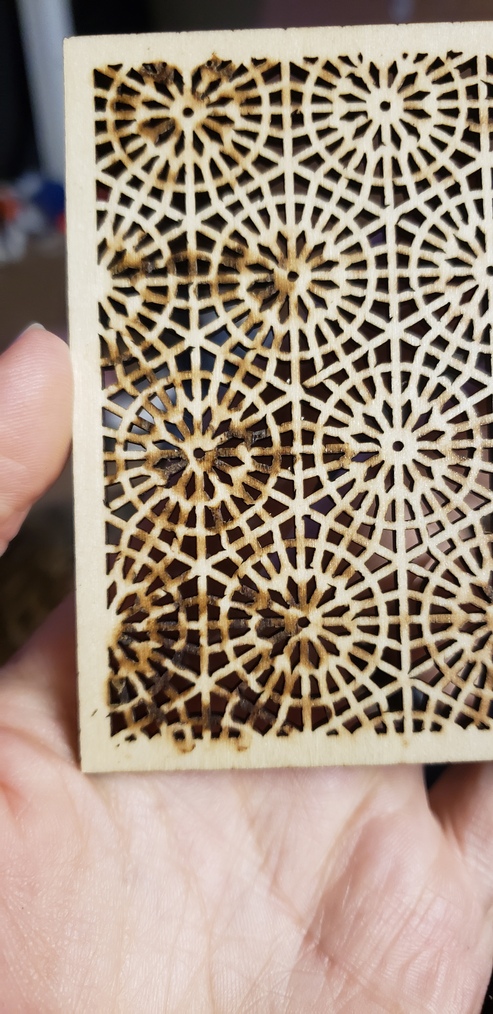
Tried peeling the mask off the back and in places the stuff had melted or combusted charring the wood. The top looked and peeled off great.
So i have provided materials, settings, and design. Are these the best results i can expect?
If I had to guess I’d think the material wasn’t quite flat. Maybe it was warped?
Alternatively, you mentioned draftboard, but this is basswood… I wonder if it didn’t actually catch the QR code.
Did you finish peeling the masking off the back of the cut? (It’s there for a reason, because flashback will stain the back of the wood, so the masking is sacrificial.)
If you need help getting it off, press some Gorilla Tape down really firmly, then pull back from the corners. The masking will come off on the tape.
I did no peeling until it was complete. In the black places there was melted adhesive and it was just icky, but the cleaner places is where it came off more nicely.
Unfortunately the MDF if solid or between the layers of basswood is very subject to dissolving from most solvents but you can rescue them with 400 or 600 grit sandpaper. I tried cutting that design and had similar problems.
As it is a pencil box there is no reason to cut all the way through and a deep engrave can work very well.
For what you have just make the nice side the outside and you can have a very nice piece.
If that is the back side and there is no masking, then I would ask if the back was masked? If not you can mask it in the future with something like this https://www.amazon.com/gp/product/B07DF7TDSF/ I find that roll there has just enough tack to mask but loose enough to weed after.
Just eyeballing it here but you may try light sanding to remove the burn.
It was proofgrade and had making on both sides. Picture is after masking was removed from back. Thanks for the link. I’ll get some when I get the hang of this machine and want to try other materials.
Just a bit concerned about the amount of burned wood i got using Proofgrade materials and Proofgrade settings. I thought it was supposed to be a bit more foolproof.
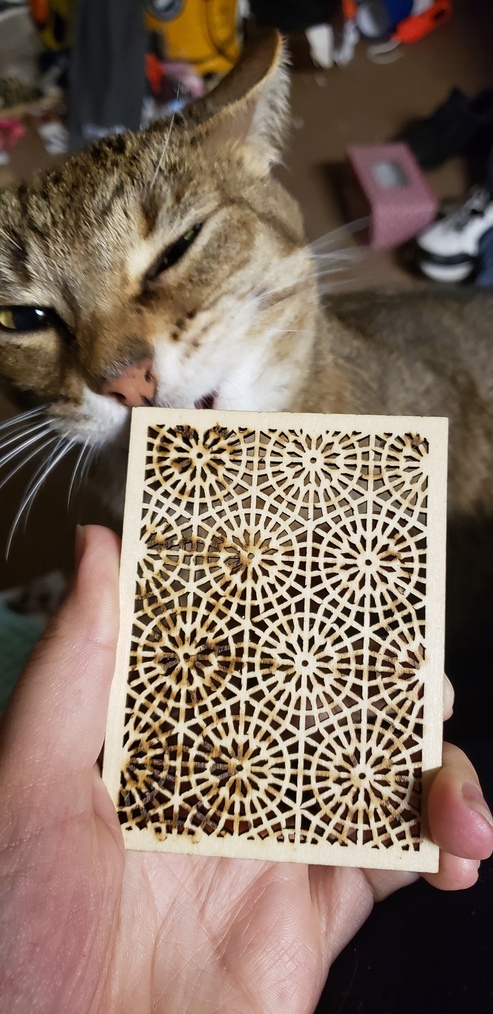
Photo was after peeling off what masking which hadn’t been burned or melted. I actually have a piece of the packing tape in my qr photo which i was using to clean the places where the masking tape had burned off and left only the adhesive.
I haven’t cut that design, so can’t tell you what the backside normally looks like after it’s done, but for designs like that one in general, the kind that have a lot of closely spaced cuts and intricate details…it’s very possible to get some overburn in places.
To avoid it, there are a couple of things you can do…the burning on the backside is caused by flashback, which is fed by air… you can reduce it by sticking sheets of masking tape down on the bed itself, and making sure that the material is perfectly flat on the tray. (I’m not talking about it “looking” flat…you have to make sure. Even 1 mm of warp is going to affect the results and increase flashback.) There are some free pins designed by @eljefe4 that you can cut here to force any warp out of the material…they help a lot.
So your original question was whether that was the best possible result you would be able to get using Proofgrade, and a Glowfirge file, and pre-set settings. The problem with flashback can occur on any file, and it has to do with the nearly imperceptible warp that can appear in wood of any kind, unless you know how to deal with it. We do that by keeping the material perfectly flat on the bed to cut down on the air feed underneath.
The next time you cut it, you might not see the same results. So no, it can look a lot better than that. Make sure the material is pinned down completely flat, all around, and for detailed cuts, it can help to block the air in the cells of the tray.
I’ve never had flashback burn thru the backing like that. It looked that way before removing the masking, but was clean after.
What’s really bothering me is that some parts of that piece are just fine, and some are heavily burned. Natural materials vary across the sheet (draftboard, being manufactured like MDF, is very consistent) but (again) PG materials are usually pretty good and that kind of result is unusual.
I know support will simply ask you to try the “Gift of Good Measure” on draftboard, and it’s a handy test to know if your machine is working within specs, but what’s happened here is most unusual and the only thing I can think of is that this particular piece of ply had very little density in the areas that are burned.
I had actually just printed the metric “Gift of Good Measure” five minutes before doing the piece in question because I had just finished wiping off all the lenses and bits for the first time and wanted to make sure everything was still good.
I’m sorry about the trouble when trying to print this design. When you ran the Gift of Good Measure print, did you notice any similar discoloration on the back of the finished print after the masking was removed?
Well, I’d now say your results are actually expected/typical, and I was wrong about not having that kind of flashback thru the masking.
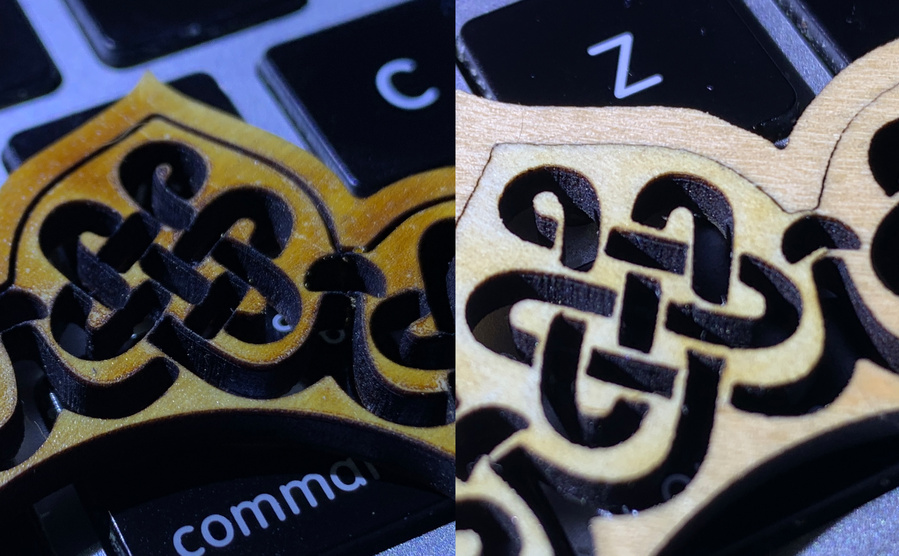
These are pics of the back and front of a design I cut early on. It’s PG Maple ply using PG settings, masking was used and then removed. You can see I have a significant amount of scorching on the back side, although the front looks great. I cut this piece some time in early 2018, not that I think that matters. I usually take pics on my keyboard for scale, detail looks similar to that lid.
Thank you for letting us know. With this information in mind, the trouble could be due to the complexity of this design, and how close much of the intricate cuts and engravings are. If the same trouble occurs with other prints, please do not hesitate to reach out to us directly at support@glowforge.com
@eflyguy thank you for checking that print. I do agree that this behavior may be present on this particular design.