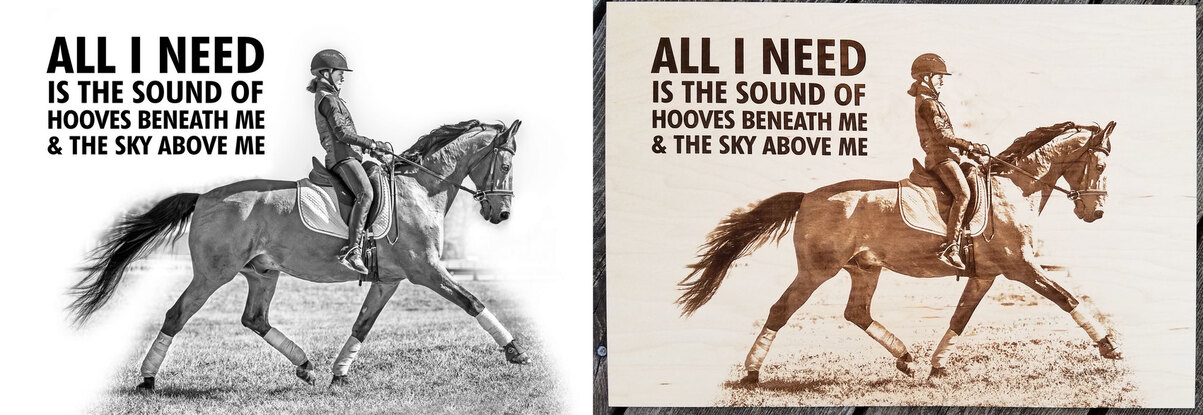
My biggest photo engraves to date… both are 11" x 16" and shown next to the original photos I took (I’m also a pro photographer) that were converted to black and white. Most of the backgrounds were removed and text added, by request of the customer. They each took about 1.5 hours on SD engrave, 1/8" PG Maple Plywood. The customer was VERY satisfied!!! I can’t wait to create a couple more just to show to people because the texture and quality are incredible!!! I LOVE LOVE LOVE this machine!!!

65 Likes
Wow! I’m looking to do that kind of work. So crisp!
2 Likes
Great detail on those! 
3 Likes
They look great!
3 Likes
Exquisite detail!
3 Likes
Wow, amazing! Well Done!
2 Likes
Great job on these! The font is so classy with the photos too!
2 Likes
Would you be willing to type up your steps for doing this? Thanks!
3 Likes
Great engrave
2 Likes
Yes - and your settings too please! Amazing results!
3 Likes
Ok, here is how I did it… it’s really simple.
- Start with the best photo possible: well exposed, high resolution and as sharp as possible.
- In Photoshop, convert to black and white by decreasing the saturation to 0 or just converting to grayscale.
- Lighten the shadows and darken the highlights slightly (in Photoshop, it’s under “Image” then “Adjustments” then " Shadows/Highlights"). You don’t want any extreme dark or light areas.
- Mask away any background by using a soft brush at a large size around the image, creating a sort of vignette.
- Export as PNG.
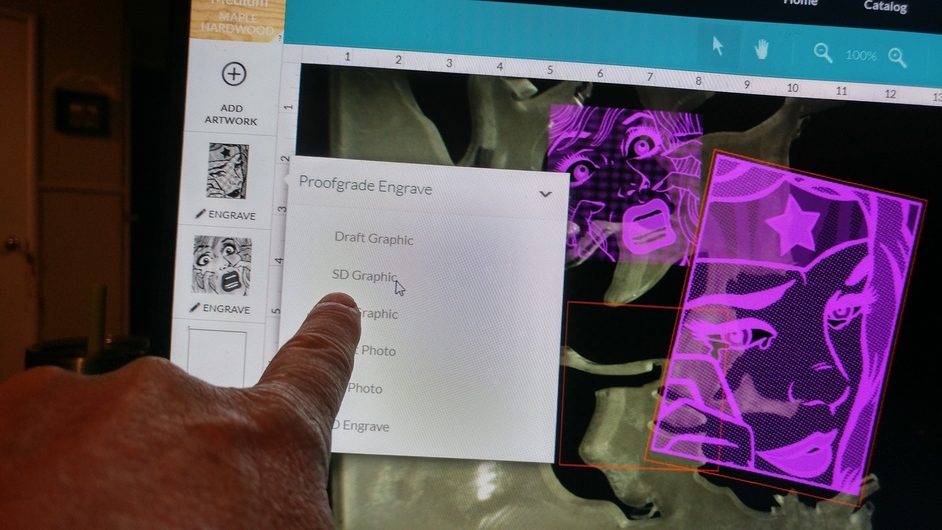
- In Glowforge program, use SD Graphic setting - Material I used was PG Maple Plywood 1/8"
I think the key is having the best image possible to work with. I am a pro photographer, so I make sure everything I shoot is tack sharp and well exposed. I also shoot in RAW and process the RAW image in Photoshop, which gives you the best quality and options with post-processing.
I hope this helps!!
15 Likes
One suggestion.
Make a thin frame to glue on this 0.125 sign, for strength and prevent warping.
A good coat of clear poly would prevent it from sucking up moisture, but even so, I have made either a frame or a complete backer board for the thin stuff.
Silver lining to the frame --> the edge is now thick enough to put a small brad or screw into for mounting hardware.
4 Likes
Really lovely engravings. Thanks for sharing your process!
Holy smokes, those are some awesome Photoshop skills! Your customer must be over the moon.
1 Like
How do you change it to SD Graphic Setting?
“SD Graphic” is an option available under the proofgrade engraving settings. It becomes available whenever the GF automatically recognizes proofgrade material or you manually select PF material.
1 Like
Really nice engraving & photoshop work.
How do you get all the masking material off after engraving?
Most of it was burned away, however, where the tape was burned and not the adhesive… I used a dull exact knife on its side and scraped away the adhesive without scratching the wood, as well as pressed on strips of ducts tape to help get the adhesive off.