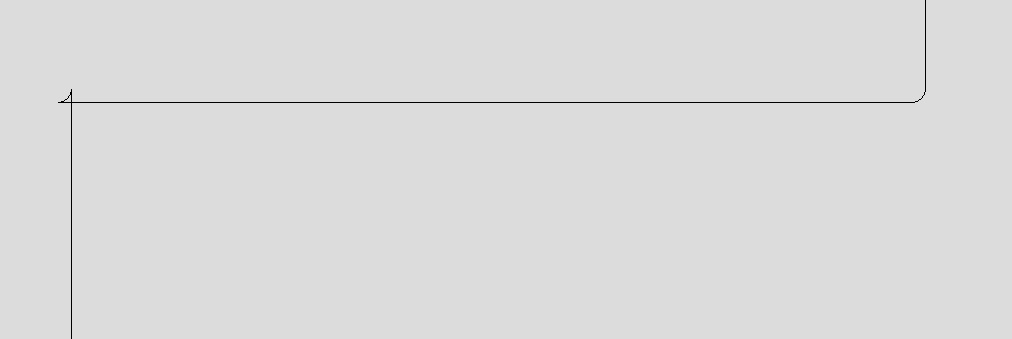
I’m working on a box design using the type tray module of boxes.py. When I go to look at the generated SVG file, I see that the tabs on the box have funny details. The outer corners are filleted, which is OK, I guess, but the inner corners have little details like maybe you’d use for a drag knife vinyl cutter. Zoomed in, it looks like this:
What setting in boxes.py turns this feature on/off?
Is there a benefit to cutting the file like this? I can see the outer corner fillets making it a little easier to put together, but what’s the benefit of the inner reverse fillets?
Not as far as I can tell without changing the source code.
Not sure. Maybe it reduces the over burn by not having the laser stop at the same crossing point. Could be a bug in the fillet algorithm. Or perhaps it overcomes the small natural fillet from the kerf (CNC calls them dogbones).
I haven’t touched them and still got the result I wanted YMMV
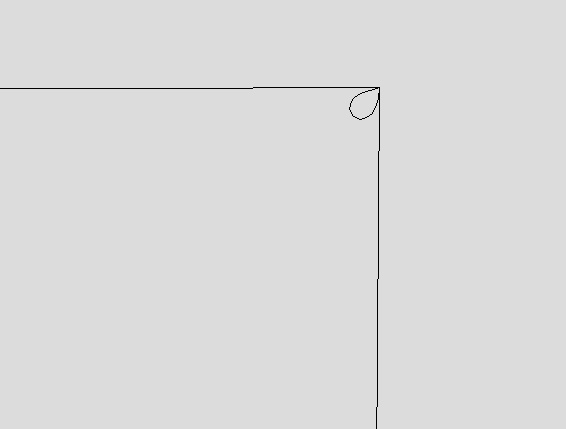
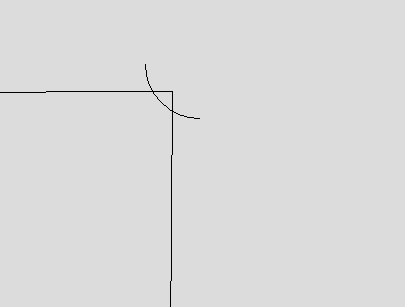
So it turns out, on closer inspection, that there are three different types of artifacts. There are the ones like I zoomed in on before, and also little teardrop shaped ones, as well as little quarter-circle arcs.
I’m not sure how it works as burn correction in this case.
The other thing that is kind of weird is that the lines aren’t perfectly aligned in X and Y. As you can see in the closeups, the lines are at a very slight angle to the axes. In a part that is about 15" long, it drifts about 0.003". Doesn’t seem to make a difference that the part is ever so slightly rotated, but it makes post-editing a pain when your drawing program wants to snap to horizontal/vertical.
Not complaining too much because it is a very useful tool and free to use, but just trying to figure out how it works.
One other question: I put the box together with the default settings for “burn”, which as I understand is supposed to deal with the laser kerf. Everything went together very tight, which is OK for the sides and the dividers, but I want the lid to come off and on more easily. I was going to offset the entire lid vector inwards by some amount to allow for a sloppier fit. My original guess for this value was going to be 0.002" but I wondered if anyone had any other suggestions before I go using up all of my material supply with trial and error. Understood that a simple offset of the entire vector is not really what I want, as it will make the outer reaches of the tabs shorter than need be. I suppose the other option would be to re-run the box generator with new settings and then only grab the lid vector to cut.
Great idea. Doing the offset of the lid vector didn’t really work. Also tried setting the focus at halfway through the material, which had some positive effect. Fewer tabs and the extended radius tabs is much cleaner. Is there a box generator that allows different lid settings from the sides.
I dont know of a box generator that has separate settings for the lid. For boxes.py, you can also use the “play” setting to add extra space around the tabs. I hate to say it but it take some experimenting.
You could also create 2 openbox style boxes with boxes.py and use one as the lid. You just have to have the lid’s inner diameter a smidge bigger than the bottom’s outer diameter.
Just curious if folks had success with the default boxes.py settings and the GlowForge kerf…or did you manually set the kerf setting before creating the design?
I setup a drawer divider yesterday to use Medium Draftboard (3.2 mm thickness), but once it was done cutting only a few of the pieces would fit together. And I had to use a mallet at that. Anything with tabs would not fit at all.
On second thought, I wonder if I have a slight scaling issue. The drawer insert didn’t fit the width of the drawer exactly…it was maybe 1cm too narrow. Once imported into Inkscape I did set the canvas size to 12x20 as recommended in another thread…
I used the default kerf settings in boxes.py and found that the parts I was putting together (1/4" mdf from home depot) needed a mallet to go together - they were very snug fitting - did not need glue. But all the tabs fit ok, which sounds different than your experience.
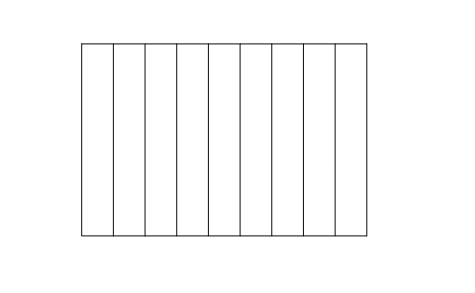
Elsewhere on this forum, I followed some advice to measure the kerf of the Glowforge by cutting out a series of 9 rectangles (10 vertical cuts) from a larger box. (so it looks like a ladder). Then measure the 9 rectangles (all smushed together) and subtract that measurement from the overall opening left in your material. Divide the result by 10 and that’s the kerf.
I haven’t used this kerf measurement in boxes.py but I did use it in Makercase and it seemed to work well in that application.
Although I did not use Inkscape for this application, I did not have any problems with scaling, so expect your problem might lie there?
Just used boxes.py to make a small box that needed a removable bottom to access a battery. Material was PG MDF with default setting for Burn for all parts except bottom. That was made with Burn 0. Assembled with light tapping with mallet for everything but bottom. Bottom easily lifted out so Burn settings worked.
Interestingly, the Burn 0 generated pattern was shown as a light gray, not black as was default Burn setting pattern. But both worked fine in Inkscape. Using a negative value for Burn, i.e. -0.1, also will generate a light gray box pattern but I haven’t not used or compared it to other Burn choices.