I have a neat SVG of the Escher lizard. It has a couple of curvy lines on its back. Cool!
The problem is that the app renders said curvy lines as closed paths; it connects the end to the beginning. If I’m scoring, it cuts through the material along with path without closing. For engrave, though, it closes the path by drawing a straight-line from beginning to end.
Yep…if you tell it to engrave, the GFUI tries to close open paths. If the line is open, you’ll want to Score it.
You can convert those curved lines into closed shapes by using a tool in outside drawing software (Inkscape, Illustrator, CorelDraw, etc.) that Expands the Stroke. It will then become a very thin engraved shape, and will be engraved along with the rest of the lizard.
It’s faster to Score the line though, you can instead just change the color of those two curved lines in your drawing, and treat them like Score lines, and the rest will be engraved as usual.
I get deep cuts with scoring using PG settings myself but it’s a PRU so I don’t expect the settings to be dialed in. I always convert them to a manual score and drop the power by 20 pews even with PG.
There is a Draft Score setting that should work without cutting through, or if you just want to engrave it, you can Expand the Stroke into a filled shape.
(Or convert the whole thing into a bitmap (raster) image. (In Inkscape or Illustrator, or just export the file as a JPG.) That will cause engraves to happen even on the individual lines.)
If you want to convert an open path (which would typically be cut or scored) into an engrave, do it in your design program. the GF software will make its best effort to close paths, and it won’t be pretty. (I got hit by this a few months back, posted, but I guess it’s the kind of thing that gets lost in the volume of forum stuff.)
Terminology mismatch. On the Glowforge score and engrave have very specific meanings:
score means to fire the laser while moving the laser along the path. Just like a cut, but not going all the way through the material. The depth of the score is defined by the speed and power levels. Lines that are scored will be only the width of the laser’s kerf.
engrave means to rasterize the path and engrave it by scanning the head back and forth on the X axis while rapidly changing the laser power to draw the image line by line.
engraves can be done using either closed vector shapes (where the entire shape is engraved to the same depth/darkness) or by using a raster source image like a PNG or JPEG in which case the Glowforge can either dither the image like a newspaper photograph or vary the laser power based on the gray levels of each pixel.
There are some other reports of score cutting too deep. I think (not an expert with the UI here, but something like this should work) you can select the open path, select proofgrade score, then select manual. That will tell you the speed and power being used for that proofgrade score.
Then increase the speed and/or decrease the power and it will score less deeply. So you can try that if you want single-kerf wide lines “engraved”. In SVG you can specify a stroke width, but the Glowforge ignores that. If you want wider lines, either use the tips above to turn the paths into expanded long skinny closed paths, or stack multiple scores next to each other.
Score seems to trying to cut half way through the material, which is what you’d want when scoring to fold material (like heavy paper or cardboard). But on most materials, what I’d want is more like “vector engraving” meaning to draw a line, like an engrave, but by moving the head directly along the path rather than by raster scanning the area to draw a line. This is very useful because it’s much, much faster.
Perhaps GF should have a third term for “drawing a vector path” in addition to cutting and scoring?
It is simply scoring with a lower power or higher speed. Higher speed gives more overburn in the corners so lower power is preferable for shallow scoring.
Unfortunately GF have conflated both speed and power changes between Quality and Draft score modes but there is no reason why quality has to be deep / dark. Just keep the same speed and reduce the power.
To follow up in this thread, it appears my GF is not managing power levels at all correctly.
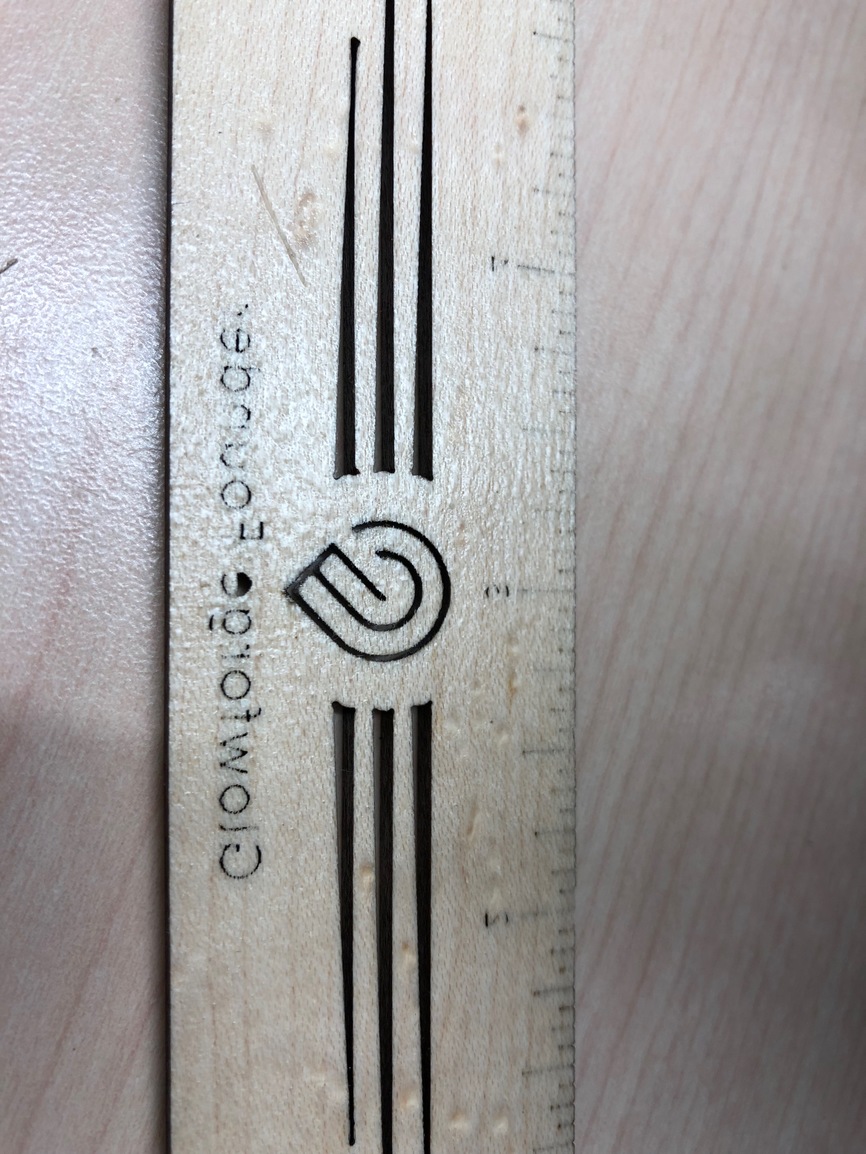
This is the back side of the Founder Ruler printed on ProofGrade hardwood maple. Note that the letters and numbers are burned through. That is, apparently, not supposed to be the case.
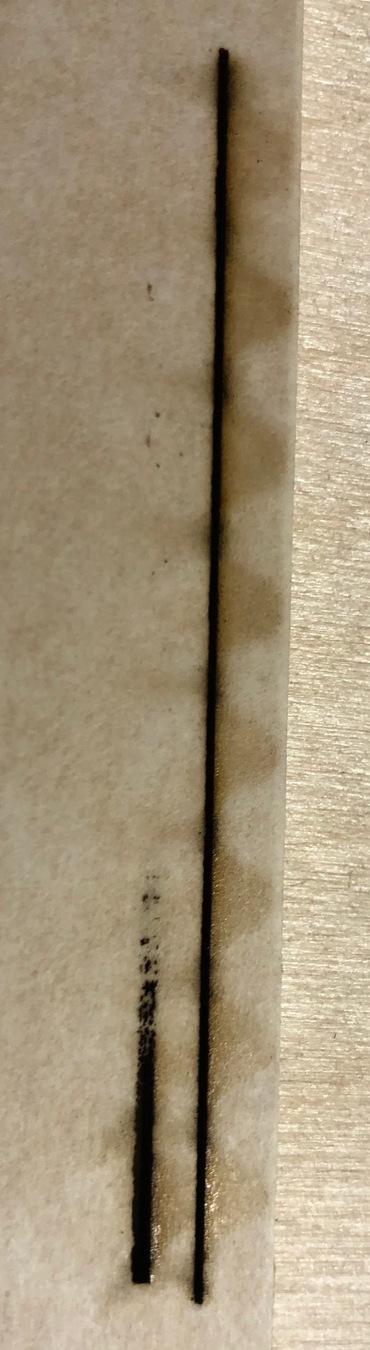
And this is the result of printing a white (top) to black gradient. Backside again. The left line is PG default settings and the right line is manual with the speed set to 1000 and the max power level set to 2(!!) and min to 0.
Just in case people have the same experience I had with this picture, you need to click on it to see the whole picture. What was displayed in my browser was just one line, zoomed in to a part of the picture.
This is not typical behavior at all. Is your lens seated properly in the laser head? is your tray seated properly in the bottom of the glowforge? If both of these are correct you need to contact support. Score should not be cutting through with the default proofgrade settings.
I believe everything is seated correctly, yes. Thanks for confirmation!
It would be handy if one of the free templates were a “Proofgrade Draft Board Test Print” that did a series of cuts, scores, and engraves that could be compared to a picture of the expected result. Or, even more fancy, include a board where one half is already printed and you’re first unboxing print is to follow the steps to reproduce the same on the other half.