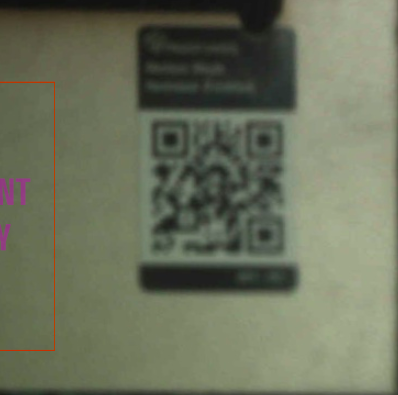
My camera’s been off ever since I got my replacement machine. For the most part I’ve found ways around it, but sometimes it causes problems especially when engraving existing objects. It also is incapable of recognizing proofgrade QR codes – they look very out of focus in the scan.
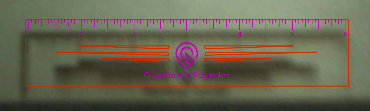
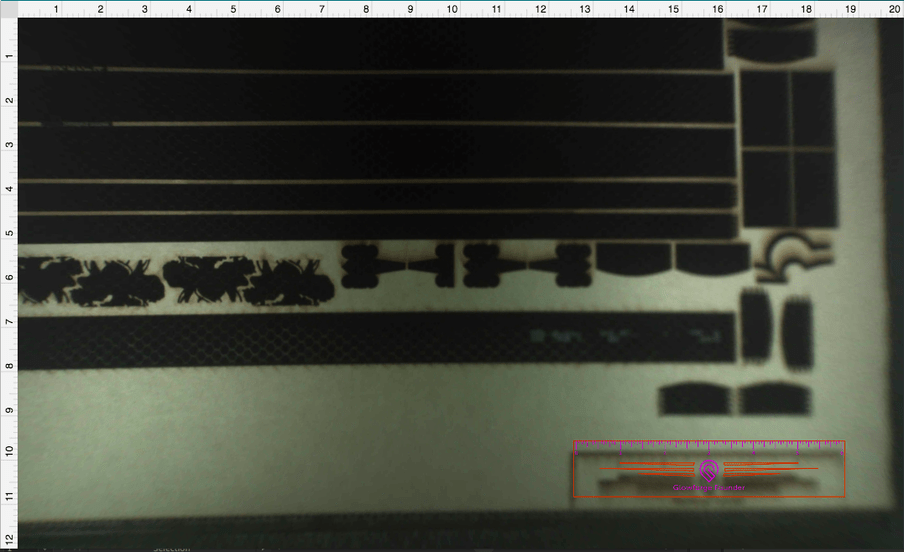
Here’s an example of the difference between the scanned image and the actual cut – and this is fairly near the center of the bed, it def. gets worse towards the edges.
Hoping it’s something that can be fixed without sending it back in?
If it never recognizes Proofgrade and has such a blurry QRC, it may be a candidate for replacement.
Print the Gift of Good Measure on a lower left or right corner of Proofgrade Draftboard and put into this topic screenshots of before and after. That is a standard test for alignment if it is within specs.
The software on your Glowforge is responsible for ensuring that the print lands on the material in the same place as the preview. When you’re done with a print, let a new image load. If the print appears on screen far from where it was supposed to go, you may have an alignment problem.
Most alignment problems come from the material being closer or farther from the camera than expected. While the software is still improving, you can take these steps for the most accurate alignment results:
Use material that is not warped or tilted.
Place your design near the center of the bed.
Clean the area underneath your crumb tray, particularly the four indentations on the floor.
Reboot the machine. Alignment can drift over time, particularly if you bump the head of your Glowforge while removing material.
Should you finish all of these steps, and find that you have an alignment error of more than 1/4", please try the following test:
Turn off your Glowforge.
Check for small pieces of debris or dust.
Check the lower door to make sure it closes all the way. It may require some force to open, but open it, wipe any dust off the edges, and close it all the way.
Remove the tray and clean any dust or debris from the surface underneath. Pay careful attention to remove all debris from the four dimples where the tray rests.
Check the lid to make sure it closes all the way. Small particles of material, such as dust or debris, can prevent it from closing completely.
Check the surface your Glowforge is on to make sure it’s flat. Ensure it is not twisted slightly and that there is no debris propping up one side of the machine.
Turn your Glowforge back on.
We included an extra piece of Proofgrade Draftboard with your materials shipment for troubleshooting. Place the Proofgrade Draftboard in the center of the bed and print the Gift of Good Measure using the default settings.
When the print finishes, leave the lid closed and wait until the fans stop and the picture updates. Without moving your artwork or your material, take a screenshot of the Workspace to show us the difference between the artwork placement and the actual print placement. Make sure to include the rulers in your screenshot and show as much of the bed as possible.
Mac: Press Shift-Command-4 and click and drag a box around your image. You’ll find the screenshot file saved on your desktop.
Windows: Click on the Start Menu and type “snipping tool”. Open the Snipping Tool > New then click and drag a box around your image. Click the Save icon and name and save your file.
Send us the screenshot along with the date and time of the print, and we’ll investigate.
It’s pretty off vertically but the focus is more the concern – is there any way to adjust the focal length of the camera? I honestly think that’s part of the problem, because there’ve been times when I’ve worked without the crumb tray and it’s been much clearer.
I would agree that’s your issue, but the camera is adjusted and fixed at the factory and should not be manually adjusted after that. That said, it certainly could have come unglued in shipping.
Thank you for providing the results to the test. Unfortunately, it looks like your unit is experiencing an issue that we can’t resolve remotely. I want you to have a reliable unit, so I’m recommending we proceed with the warranty replacement process. I’ll be in touch via email to sort out the details. I’m so sorry about the bad news.