I’m having a problem with my camera - the material looks skewed, and I am afraid of ruining my project with a misaligned camera or laser.
Isn’t the image supposed to look clear and straight?
I’m having a problem with my camera - the material looks skewed, and I am afraid of ruining my project with a misaligned camera or laser.
Isn’t the image supposed to look clear and straight?
Can you post a picture?
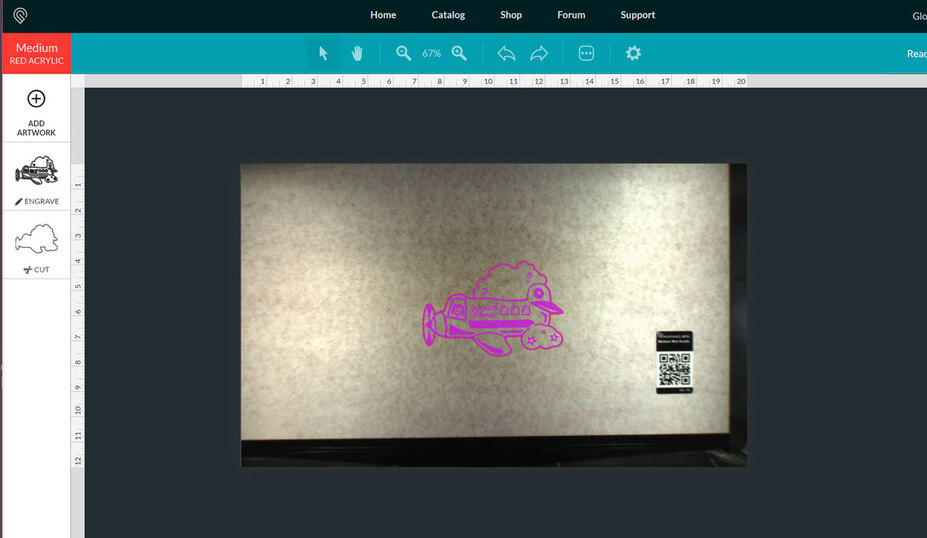
That is just an example using one of the free designs, but that is a full sheet of Proofgrade red acrylic, set perfectly in the center of the machine, on the crumb tray, which is placed correctly in the footholds.
Hard to tell but is the material lined up with the honeycomb?
Use a piece of paper to do a test cut. That will let you know how well the alignment is working without wasting the good stuff. Don’t forget to lower the power.
Yes, the material is flush with the edge of the honeycomb, just fitting perfectly within the solid metal borders. The problem is that I can’t even see the far left edge, and I need to cut many copies of the same pattern with little waste.
Test or no test, is this how it is supposed to look?
Open the front of the machine (it drops down where it says Glowforge), pull the tray forward towards yourself and make sure that the feet of the crumb tray are down into the dimples on the bottom of the machine. I can see the curved lip on the front of the tray.
When you place the material on the tray, you don’t center it, you pull it forward so that the edge of the material just touches the front lip of the tray. (With the material over the gridded area.) 
Thanks, Jules! The crumb tray is definitely in the feet, but I will try moving the material forward as well.
It does look off to me. Testing with paper you should be able to get you project done while waiting for support.
Do you have a Pro model? I’m surprised I can see that much of the tray.
Also, the tray isn’t in backwards is it?
I’m on mobile so not getting the best picture.
No, I have the normal model, and the tray is in correctly. This is why I am worried.
Yeah, moving the material did not work, even with a bed image refresh. I cannot see the left side of the material on the screen at all, even if I zoom out.
Ahhh, well don’t worry then, if it’s a Basic model I don’t know for sure how far out the camera view will extend on the front of the tray…it’s probably fine. As long as you are sure you have the tray pulled forward far enough. On the Pro models, the curved front of that tray actually rests in a groove in the drop-down door when the tray is seated correctly, and the camera doesn’t pick it up in the image.
Edit: And you realize what you will see with the image is only the cuttable area, right? You won’t see the left side of the material, because you can’t cut on it. Current workable area is 19.5" x 11". The head won’t go any further over than that. ![]()
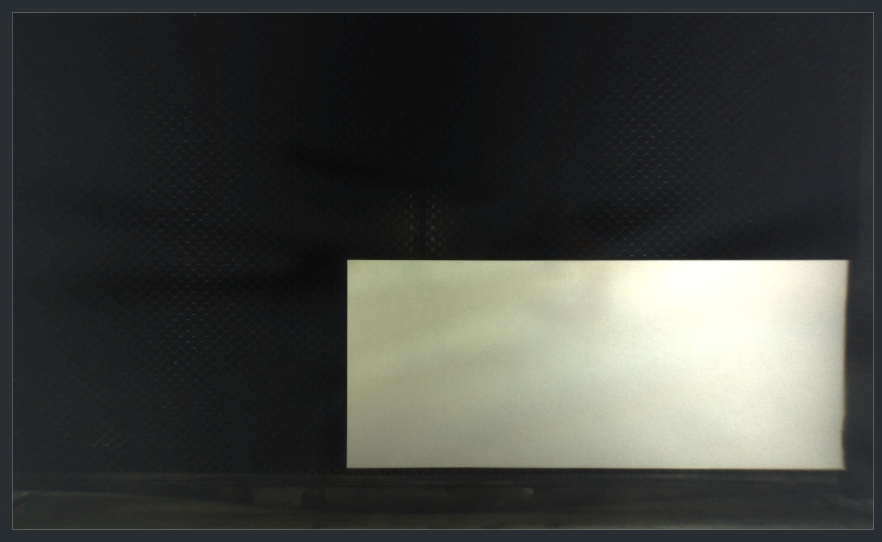
I think you’re probably fine. Here’s a pic of my bed image – please ignore how dirty it is. I need to clean it 
I stuck a piece of paper in there so you can see the edge of the crumb tray a little more clearly. On mine, I can see that front handle as well. That said, I wouldn’t rely on the camera alignment if I knew I was cutting 50 things, or whatever, and didn’t want to waste any space. Line them all up in the GFUI. Then, as long as you don’t move anything, they’ll maintain the same relationship. If you want to check where one is cutting, you can just set all the others to ignore.
I actually did not know that I cannot cut the leftmost inch, but it still looks warped to me. I guess I’ll try.
As for the tray/door placement, it is exactly the same on the base model. The lip of the tray is in the groove of the door.
I don’t know if this is what you are experiencing, so take the info with a grain of salt. I had a similar issue pop up where my tray view was skewed. I was able to keep printing, but had to accommodate by not putting material too close to the edge. It was an problem though and support took care of me.
If a rectangular sheet does not appear rectangular on the screen that is a sure indication the camera view is not accurate. The machine will cut and engrave accurately to the artwork but you can’t align with the camera in the corner where it does not show the material accurately.
Regarding material conservation, when doing many multiple copies I would do a full sheet in two pieces, cutting the material on a miter saw so that I could reach all the way to the edges. This is a full 20" sheet.

I would say that you got ALL of the goody out of that one.