Good morning, extremely new user here. On my 5th project in, my Pro started to engrave off center. I reviewed the tensions on all the belts and they seem correct based on the support guidlines. I clean my camera lens often, nearly every project. Attached are pictures of what the view looks like standing above the glass vs how it appears on my glowforge dashboard. It looks almost slanted instead of straight on, but I have the material laying directly below the camera. In addition, even though pre-print my image shows centered on the material from the live view, as it prints, it moves the entire image over about 1/8th inch Any suggestions on how to get it to print centered?
.
Yep, got a couple of tips…
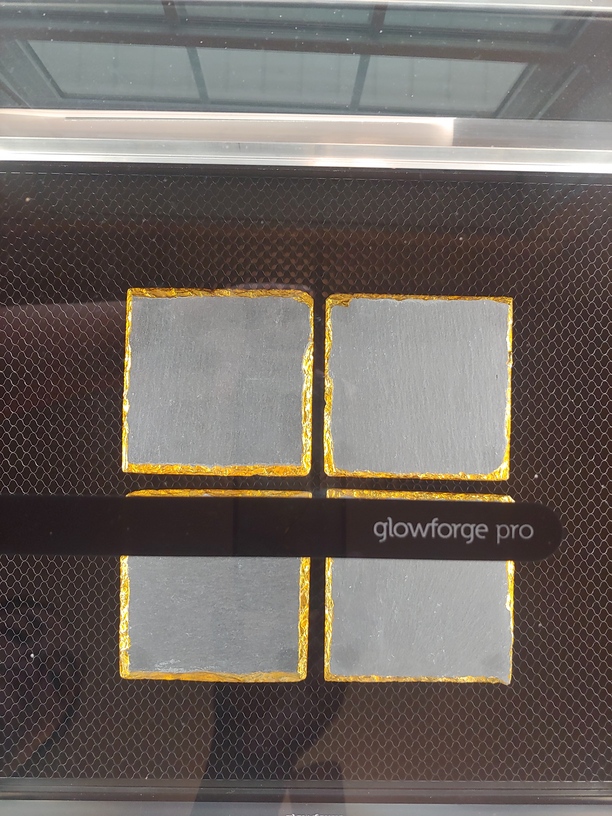
When you’re engraving on something like slate…while it does not have to be masked from a resin in the material standpoint, the fact that it’s a dark color can sometimes make it hard for the precision laser to see the red dot that gets shined on it, and that can make the height calculation be off.
So what you will want to do is use white or light colored masking tape on the material, use the Set Focus tool at the start of the job, and click on the white paper so that the laser gets a correct thickness reading for the Unknown Materials slot.
The alternative is to measure the thickness of the slate with a calipers and enter that value for thickness in the Unknown Material/Use Uncertified Materials slot before you start. Either method works well, just choose the one you prefer.
After doing that, the camera view will adjust itself to become more accurate. But that view can vary the farther away you place objects from directly under the lid camera. So you will want to use Set Focus again, four times for four coasters.
Click once in the center of each coaster, then immediately place the design for that coaster. Then do it again for the next coaster. Each time you click on a coaster, the other designs will appear to shift slightly. Just ignore that and place each design right after you have clicked with Set Focus in a spot. It corrects the view at the spot to look like it is right under the lid camera, and makes it temporarily more accurate. (It corrects for the fisheye effect at that spot.)
When you have done them all you can run the job. 
Oh, and if you haven’t run the Calibration tool yet, that’s a good way to tighten things up.
5 Likes

Thank you thank you thank you! I have been using the unknown materials and updating with slate thickness but didn’t know/try the focus yet. I will do all of these steps. Thank you!
2 Likes
Since this problem is being seen on materials that were purchased from another company, we can’t offer support for prints that don’t come out as expected. Materials may vary widely from piece to piece, even if they’re created by the same manufacturer. I’m going to move it to Beyond the Manual so other folks here can help. Should this happen with a print on Proofgrade materials, please open a new ticket in Problems and Support and we’ll help you right away!
Draw boxes in GF app the size of your tile. Tape a sheet of paper to the crumb catcher. Score the paper at 1000 & 4. Place your tile on the squares on the paper. Place your artwork in the squares in the app. NOT BASED ON THE IMAGE. Ignore the squares and run it. Works every time.
1 Like
This topic was automatically closed 30 days after the last reply. New replies are no longer allowed.