I’m thinking you should be able to get by with just 3.
2 Likes
I am contemplating just two, but I might try a version with three.
1 Like
I was thinking a minimalist approach might be sufficient (even just 1 sweeping finger maybe) but 3 would provide insurance. Keep an eye on the ends of the pawls so you minimize the contact surface. @rbtdanforth 's design shows some good spacing between the ratchet teeth and the arm while providing a good stop on the end. The face of the ratchet tooth and the front edge are the only contact points you want to minimize friction while allowing the spring finger to be pushed aside.
3 Likes
Longer is good, but I think balance is also. 4 covers it, 3 might, but two I think is unstable putting more side force on your axel and that force would have a “melon seed effect” not balanced by anything but the precision of the axel and any other places that give, creating ever more wiggle and the problem of endurance you mentioned.
2 Likes
You will notice that the only place of contact is the front edge of the pawl, with a very thin gap to the ratchet so that line is all that contacts, I was assuming that the pressure of back-spinning could be considerable so a one degree angle or so would not make full face to face contact unless the pressure was very high ![]()
1 Like
I agree with both you.
This is what I was thinking, but after looking at it closer I don’t think this would work.
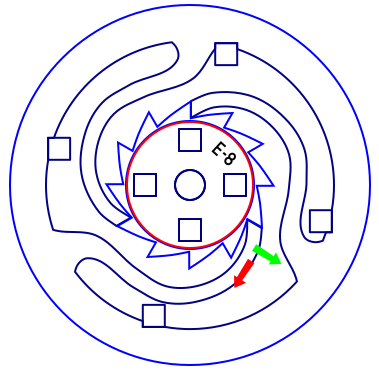
I want movement where the green arrow is, and I do not want movement where the red arrow is. Based on this, I think more shorter springs would deliver what I am wanting, but I still want it to be usable and durable. That is where I need to find the balance with the thickness used for the pieces…
I think I will go back to having four (or maybe even more) spring-pawls. I think I really just need to start testing these. Theory can only get me so far…
I have an idea, and I think I can use the existing pegs to my advantage here.
4 Likes
The red arrow is what absorbs the push back and hence why I had longer tapered springs that took the power straight along their length. There needs to be a curve at the point of contact,(to disperse strain) but you will notice that I spent some effort to put one there.
3 Likes
You will likely need another as a “nurse” ratchet on the other side if that does not sound too cuckoo?
3 Likes
I am not sure what you mean by this. Do you mean a second ratchet to disperse pressure or something like that?
Edit: Here is another attempt at the spring-ratchet.
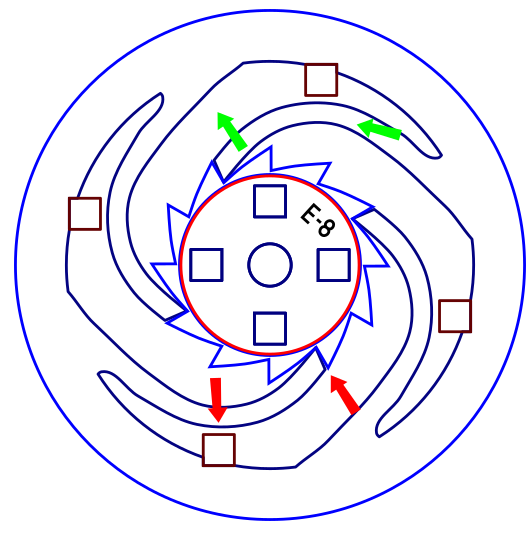
The red arrows show the slight gap between the ratchet-edge and the tooth-face, and how the arm is expected to rest on the peg (to add strength?) to the pawl under constant pressure.
The green arrows the expected direction of the pawl and where the bend is expected to extend.
With this new spring design, I am guessing that maybe the ratchet-teeth do not need to be quite so deep?
Edit
I cleaned it up.
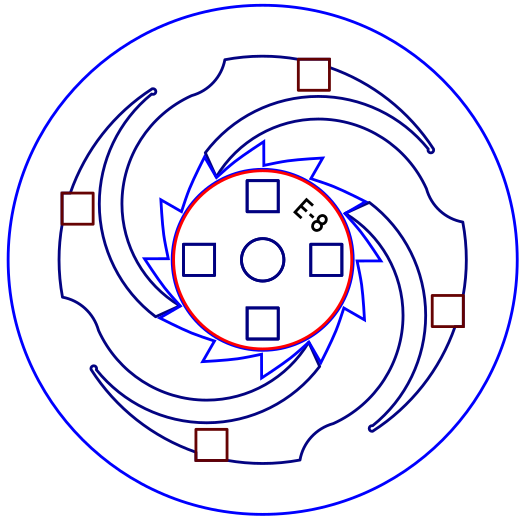
Used symmetrical arcs for the spring-pawls to add strength. But I am still concerned that the tooth depth might be too much, and could provide an adverse amount of resistance… (stuck in analysis-paralysis…)
3 Likes
Try 3 types big , med, small. That is the point of instant product gratification. You will spend more time creating a test design than building it, which is the opposite of what it used to be, Can you imagine doing the job with a saw and files?
3 Likes
Uffda, just thought makes me wince.
6 Likes
I think I am ready to print a whole new drum-axle (the ratchet is designed to go inside the drum to engage the axle). But work has been so busy lately, I just haven’t had the energy to get these cut.
I am busy tonight and tomorrow-night, but I hope to find some time (somewhere) in the next couple days to test these new designs.
3 Likes
Well, this design appears to work.
My only concern is that it takes a lot more force to move the ratchet backwards (because of the spring).
I might try the other version too, since it should have less resistance to turn back. But that will only work if it can hold up the 2lb. weight also…
11 Likes
This has been really interesting… but not in a good way.
The acrylic is definitely lower in friction, but this appears to be allowing the pawl to skip out of the ratchet teeth too…
I may need more of an angle on the teeth to hold pawl and not push it out?
Come to think of it… I adjusted the angle on the spring-pawl, but not the gravity-pawl. Maybe I just need to adjust the pawl and not the teeth?
3 Likes
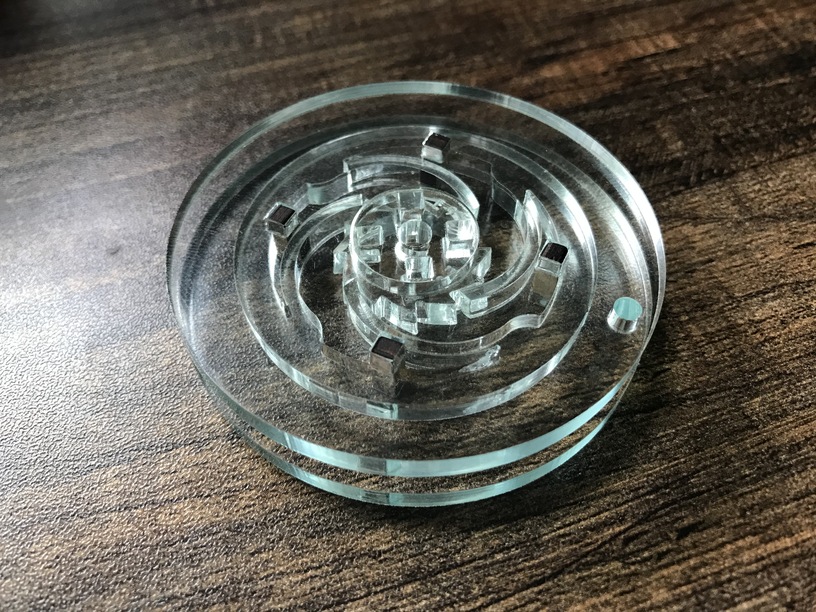
I have cut out both designs and tested both. (Spring-pawl on the left, gravity-pawl on the right.)
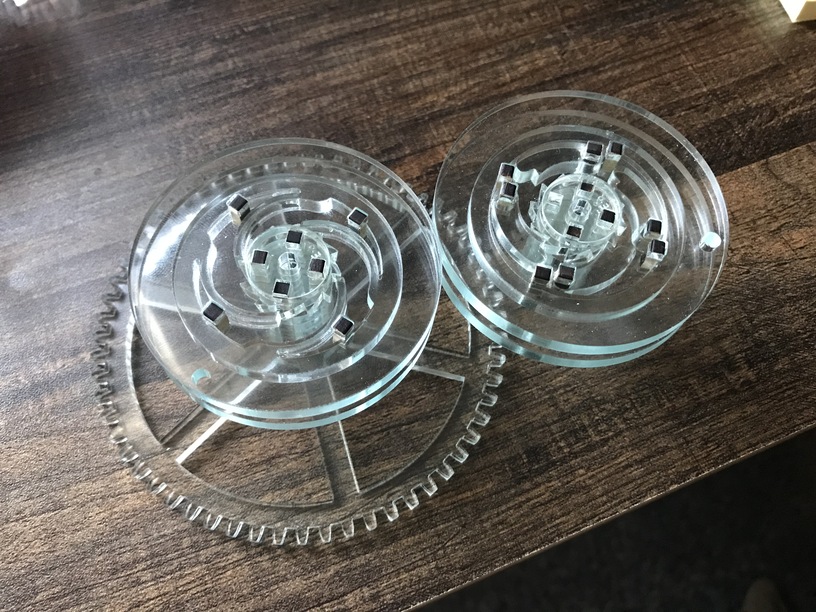
And the winner is… gravity-pawl!
Once I adjusted the angle of the pawl tooth, the winner was just far more consistent with a stronger hold and less resistance on the back-turn.
I am considering adding some WD-40 to the pegs, but I am thinking that might be a really bad idea… not sure yet.
3 Likes
Spray some scrap first I think. ![]() It is quite shocking to see what some things do to acrylic
It is quite shocking to see what some things do to acrylic ![]()
Also spring pawls can be longer and thinner if too strong,
3 Likes
I will definitely do that! I have lots of scrap…
I had considered this also… The problem I have that it still needs to be strong and hold the 2lb weight. If I make it easier to turn back, it becomes weaker with the hold, and it has already started slipping when under pressure.
I got clock put back together with the new ratchet. So far, it is working as expected and it is MUCH easier to wind the clock now.
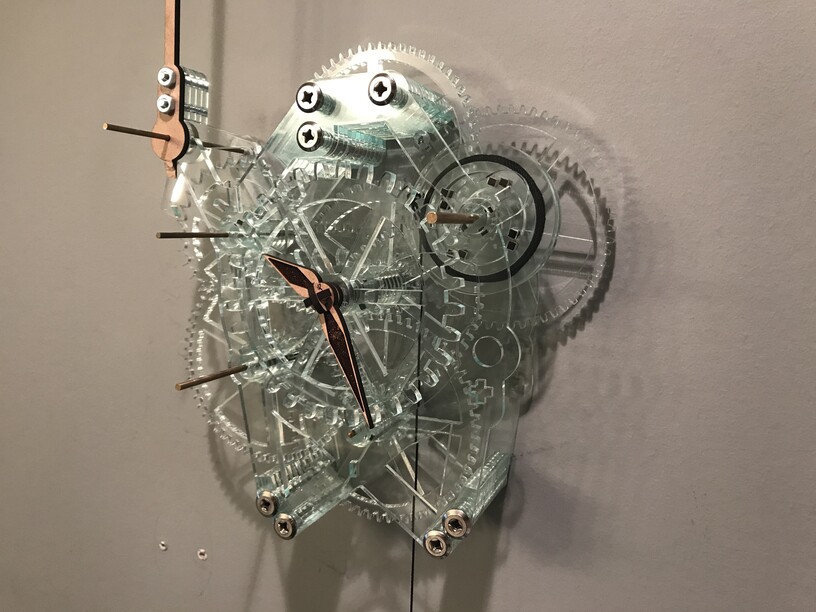
I still think I need to adjust some of the axle-holes in the frame, I have just been putting that off because it uses so much material.
And I still need to recut the pendulum from when I dropped it…
7 Likes
I wonder what it would look like if the clock was made from slightly tinted acrylic and was lit up from behind with a soft light like an x-ray film viewer.

Would it look like an x-ray negative but moving in real time?

Kind of like that, could even use different colors as well to highlight certain gears or a mechanism.
6 Likes
I have actually been contemplating playing with LEDs or lasers to light up individual layers of the clock. I think it could be really cool to light up different pieces to highlight them.
3 Likes
I sprayed a scrap piece from one of the old ratchets with the WD-40 and let is set for a day. It appears to be unaffected by the solvents.
Next I will spray a scrap piece of MDF (the peg material) and see if it dissolves the glues in the material.
1 Like