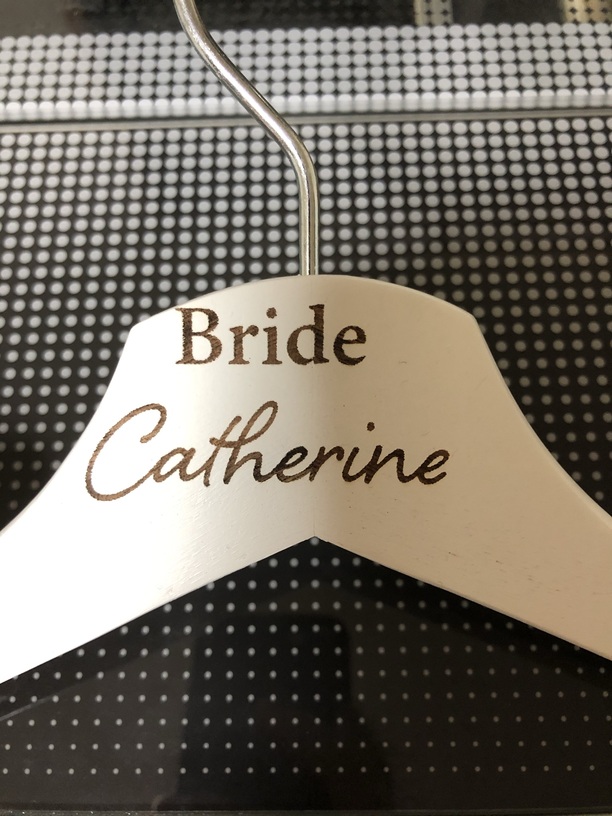
I have tried many times to engrave on some stuff. like hanger, keychain and ceramic tile etc.
but can’t engrave where I placed it every time.
I use set focus. checked lenses are clean.
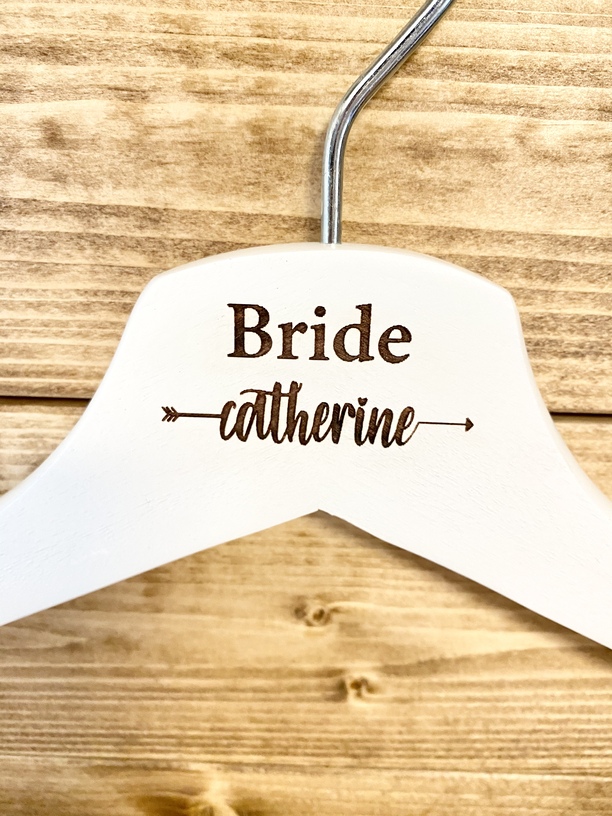
I have tried many times to engrave on some stuff. like hanger, keychain and ceramic tile etc.
but can’t engrave where I placed it every time.
I use set focus. checked lenses are clean.
Have you done the camera calibration?
Using set focus with a calibrated machine usually results in alignment within a few millimeters.
You might also watch the set focus process in the machine and, make sure the targeting laser dot actually lands on your hanger. With a small target area, sometimes it will miss and measure off the edge.
A thing you could do to reduce waste would be to put some masking or something over the area you plan to engrave and, do a “practice” run at a low power that won’t pierce the masking. Then, you can see where the engrave will hit and, make adjustments before committing to engraving your hanger.
Thank your for your quick reply!
I have never done this before.
I will try it and let you know the result.
Definitely do the calibration first. One thing I have noticed is when I place my image where I want and select print, while i wait for the glowing button to appear, sometimes the image will move. It’s like the camera is re-focusing again and the image will shift. I just cancel the print, re align the image and try again. It is usually fixed on the second try.
I have only seen that happen when I don’t use Set Focus before placing the file. As far as I understand, if you Set Focus, and you don’t open the lid or anything, it’s not going to move.
and worse case scenario, mask the material and run the engrave at 1 or 2 power. This will tell you where the image will be and you can cancel and move the artwork as needed before running it “for realsies” 
Yes, Camera calibration works well.
I also use this trick, ALOT!
Hello @kazukitsushima3221, thank you for reaching out to us. As others on here have rightly said, you’ll want to try and run the Camera Recalibrator which should help improve your alignment.
The recalibrator will only make changes if it can make your camera more accurate; otherwise, it will exit without any changes. It takes about half an hour.
You’ll need a 12” x 20” piece of Proofgrade material with no markings or stickers. The feature was designed to be used with a flat piece of medium Proofgrade Draftboard, used upside-down (with the QR code side down). It may work with other materials that are the same size and use the same print settings as well, like Proofgrade plywood.
It prints a grid of markings, takes a picture, then measures its height in multiple locations. This data is used to make your camera more accurate for future prints.
To get started, click on this link: Launch the Camera Recalibrator
Should you finish all of these steps, and find that you have an alignment error of more than 1/4", please measure the accuracy of the camera and send us a screenshot of the results.
Please let us know how it goes. Thank you!
I’m glad to see that camera recalibrator worked for you. That is great news!
Since your Glowforge is printing correctly now, I’m going to close this thread. If you run into any other trouble, please start a new topic, or email us at support@glowforge.com. We’re happy to help!