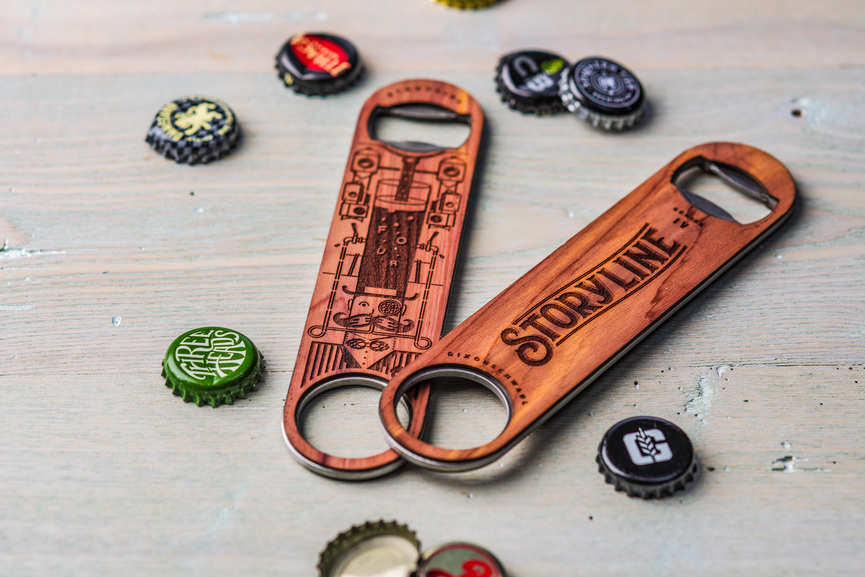
i like these a lot. when i saw the first picture, i thought you might have done what i did with mine, etched/cut the wood out of veneer and glued to metal openers. but i realize now after the others that you bought the bottle openers with the cedar already on them.
you can avoid the jig part if you want by just engraving/cutting veneer w/adhesive on the back and then gluing those to the blank metal bottle openers. the ones i got on amazon were 3 for $5.38. not sure how easy it would be to find cedar veneer, tho. but lots of other options.
My first thought, too, but the lack of secondary steps might make the price difference worth it, time == money. Mind sharing your source for the openers?
it probably comes down to how many you’re doing. if it’s just a couple, i would find it easier just to peel the backing off and line up. if you’re doing 20, i might be happier w/the jig.
Love these. Prompted me to go buy a bunch of blank stainless openers just like this, and use the veneer method. The cedar ones were a bit pricey for what I found online. Yours turned out fantastic.
I’ve been wanting to do bottle openers, but was trying to figure out a way to get the metal part taken care of cheaply. I’ve done the 3D printed ones that use a coin for the hard lever.
I think using blanks like this are best. Really uses the Glowforge well. Definitely one of those supplies to keep around for a quick gift or two. thanks for sharing.
Yes, if you were only doing a handful the veneer method may be a good way, but I’d still opt for a jig. It takes, what, a couple of minutes to cut after getting the file ready, and the file would be simple if you upload the image and scale it to the dimensions, wouldn’t take more than 10mins. At least you wouldn’t have to wait for veneer to show up at your door if your sourcing bottle openers locally.
Plus like you said, that beautiful cedar veneer can’t be cheap. Love this, and glad you showed you used a jig, because I was seriously impressed by the alignment!
I agree that if i was only doing one or two then the veneer approach would be easier. But I think i had to make around 45-50 of them so the jig is faster in the long run.
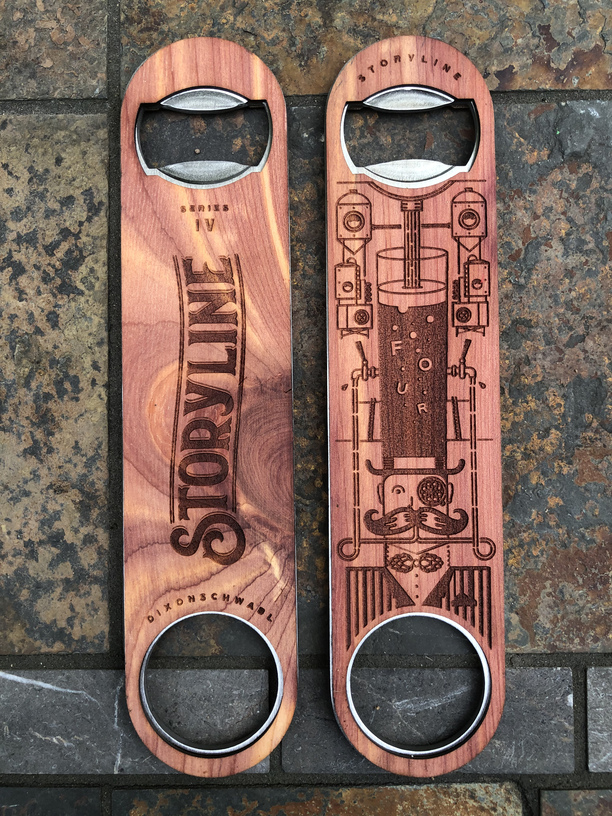
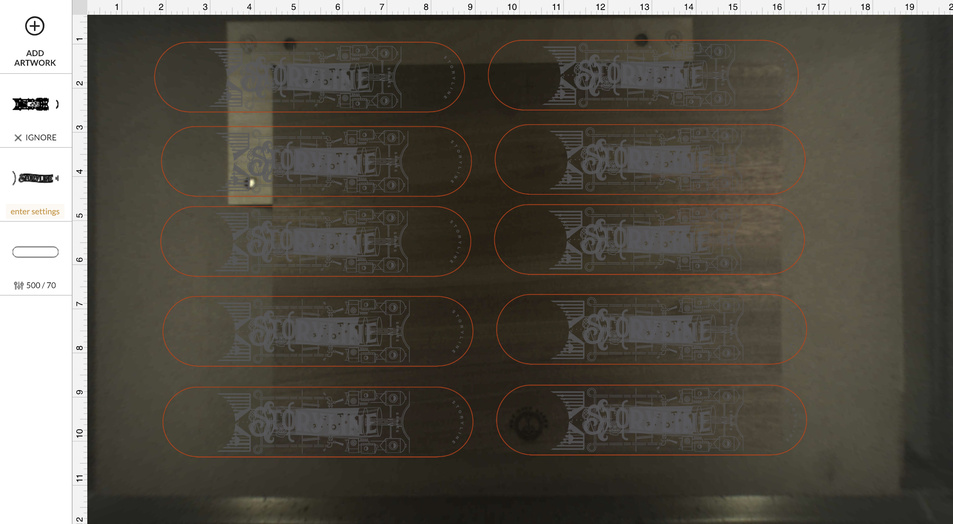
I approach most of my layouts the same when it comes to jigs. In this case a single opener is made with the fronts and the backs on top of each other as well as a profile cutline of the object to make the jig.
Make sure you think about which way you are going to flip them when you go to engrave the back. in my case i flipped them vertically.
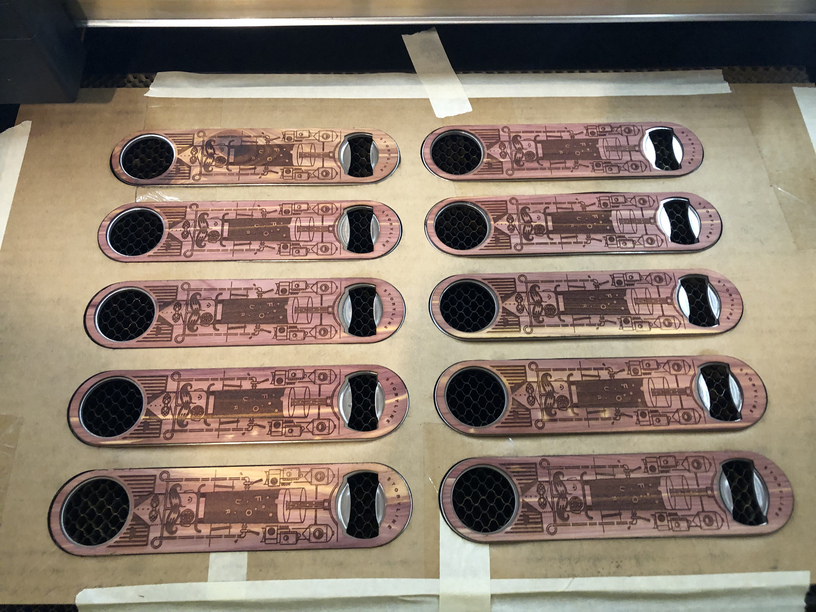
I first import the file and them duplicate the openers to fill the space. Since i am using cardboard as a jig I leave some extra space between the objects.
Then just put in some cardboard and tape it down. After you cut the cardboard just remove the blanks and put in you openers. Just turn on the cut layer and turn on the front layer and engrave. Then flip all the openers, making sure to flip the right direction for your file. Turn off the fronts and turn on the backs and engrave the back sides.
The good part about doing it this way is you can easily adjust how many you are going to engrave. So if the last run has only two openers just delete the rest and engrave. I also make sure to undo back to the starting point if i delete any. That way the file is still setup for all of them next time i open the file.
The down size to this is the template has to be cut each time you power up the machine. But it only take it a few seconds to cut a new one.
The use of a snapmark template would make the template reusable and i will probably make one if i had another order of openers.
@evansd2 I’m not sure what the source of the bottle openers was because they were supplied by the client. But i can ask and let you know.
I wanted to make this by making a wood veneer and then gluing it to the metal opener I purchased. I was having some trouble getting the correct dimensions with the circle cutouts… Anyone have a svg file to share that fits these openers?
Thanks!
as @shop said they are all different so this might not work for your bottle openers, but here is the template file we used.
The pink lines are just for reference to where the hols are when creating your design. Use the green line to cut your jig . It is slightly oversized to allow for any difference with the openers.