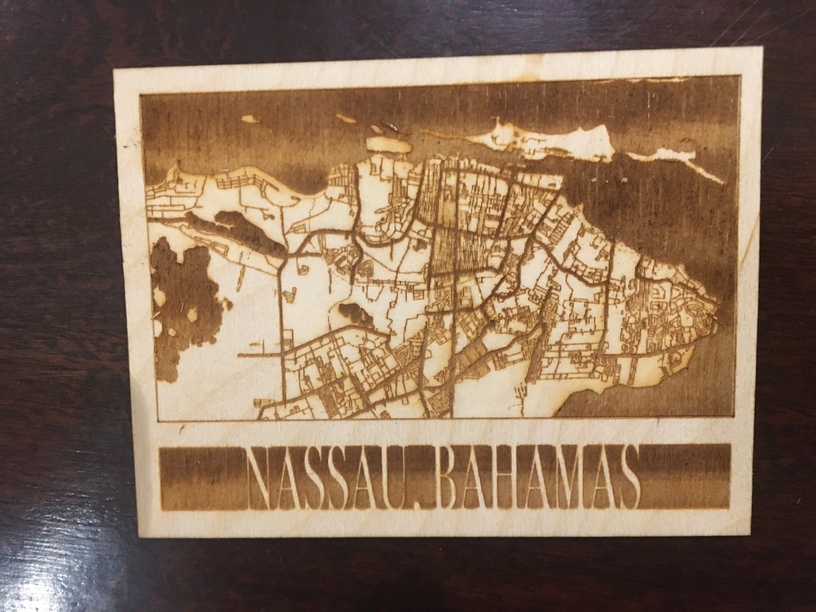
I’ve made a few fun projects on the Glowforge since it first arrived, but this is one I’m struggling with. I made a map of my home island, and I’m not sure how to improve it. I’d welcome any suggestions, and if this is the wrong forum, please tell me!
My wife wanted to make a map like this for her cousin for Christmas, but I feel sure that there must be some way to make the water areas look more even.
It’s hard because it’s the natural variances in the wood you’re likely seeing in the water. My suggestion would be to cut out the land area, and glue it to a 2nd piece of darker wood (or blue acrylic) so you get a sharp difference between land and sea
You could get some epoxy with a long open time, add blue colorant to it. This one is gel like and is also used for vertical surfaces. Just paint it on with a foam brush on the large areas and a small brush to dab in the hard to reach areas.
That’s a great idea! I’ve already been admiring bathymetric maps, this would essentially be a two layer bathymetric map. I need to up my Inkscape skills to see if I can do a small inset score for the little pieces to help with alignment, but I can absolutely see this idea working. Thank you!
By the bye, I really like how your major thoroughfares are separated and on their own level in that picture.
99% of the time you can use the Proofgrade settings for a material similar to the one you’re using - the rest of the time you’re going to need to test - but it’s safe to start with the settings.
Thank you. I feel a bit as though I’m fumbling through my settings here. It’s fun, but I spend as much time scouring through the forums looking for advice, if not more so, than I do Glowforging
So I’d suggest you start there.
If you aren’t happy and you want it lighter, then either increase the speed or lower the power by ~10 points.
If you aren’t happy and you want it darker than either lower the speed or increase the power by ~10 points.
You should find your happy place pretty quickly.
The bonus of engraving is your settings won’t need to change if your thickness does - just your focus, which it will do automatically when you select Set Focus
Just one tip if you’re going to use epoxy (from personal experience) try and seal any wood you don’t want colored because colored epoxy WILL bleed into the wood grain when it contacts it.
I’d like to graduate to epoxy, but it’s going to take a while, seems like we keep coming up with ideas for x-mas gifts for family members to be made in the Glowforge. It’s great! …but I feel like I have a lot to learn
What I want to try next is to cut a map out of a slightly larger piece of wood and use the larger piece as a “surround”, then glue that onto another piece of wood, pour colored epoxy into the resulting “tray” then drop the original cut onto that epoxy - the thought being that the “water” would rise up into any openings but would never come over the top. (Once you accidentally spill epoxy onto places you didn’t want it, your mind starts to work on options…)

 settings.