This is just a guess from cutting other stuff, but if you can dial in the settings just right, cutting upside down might leave a kerf so thin it’s hard to believe. And barely tough whatever your sacreficial layer is.
Want to try!
This is just a guess from cutting other stuff, but if you can dial in the settings just right, cutting upside down might leave a kerf so thin it’s hard to believe. And barely tough whatever your sacreficial layer is.
Want to try!
I don’t find the Glowforge to be loud… until I get a phone call. Then it seems loud.
Even then it doesn’t seem bad. I’m able to have a normal phone conversation standing right over it.
You are probably running the exhaust out a window, and not through 18’ of rigid ducting with a booster fan!
My hard-surface floors and walls with no windows probably don’t help either. Certainly doesn’t seem as loud as our little hand-held Dyson… that thing shrieks!
You would be correct. Included hose just dropped out the window giving the jasmine a constant breeze.
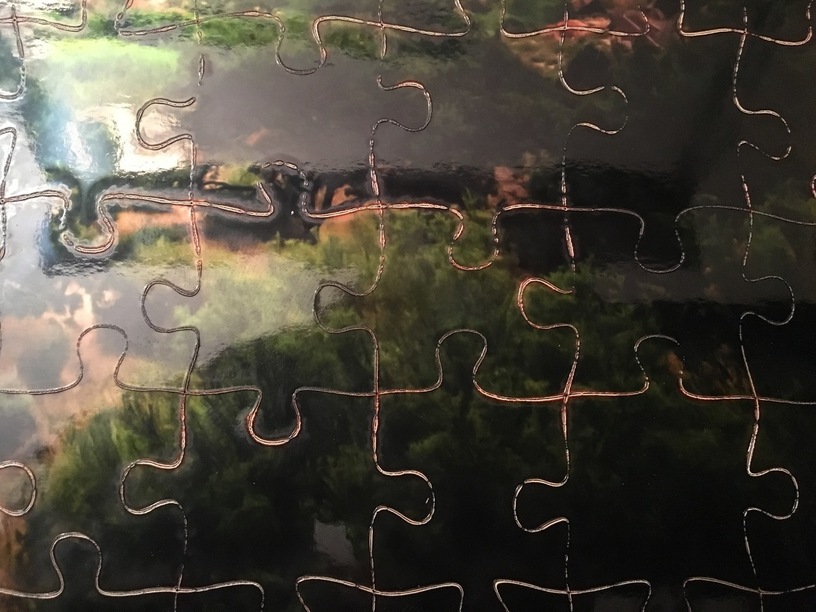
I guess the purpose of testing is to stay consistent. I didn’t. This is actually a metallic photo paper that I cut upside down with a piece of thin backer board on the honeycomb (and mounted to the same chipboard). I probably had the speed a hair low (dropped to 180) and I could see pin holes in the sacrificial paper.
Some of the cuts came through really nice and you can barely see that a cut is there. Other parts (the majority) seemed to ablate some of the photo paper leaving more chip visible.
Love that metallic effect!  (Gosh, you’ve got some gorgeous papers.)
When I ran cuts to test for focal point, I pretty consistently saw a much narrower kerf on the underside than I did on the top, when the FP was set on the surface of the material.
That shows a very narrow kerf on a few of the pieces, which I would expect, but a lot of them look pretty wide - do you think that’s because the paper was metallic and reflecting the heat around so a wider path got ablated? (Just mildly curious. It’s unexpected.) 
Great job on it again.
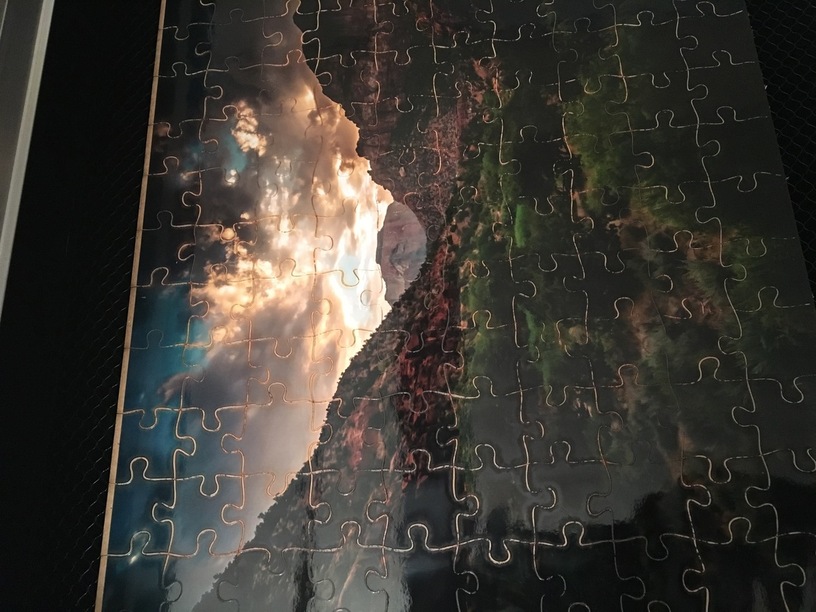
The metallic paper is incredible. It needs the right lighting (diffused instead of accent/point lighting) but you get that right and it’s phenomenal.
I believe the way that they make it is with a very thin Mylar layer just beneath the paper surface that accepts the pigment. Even though it’s a very, very thin layer of it - I think Mylar is kind of melty, isn’t it?
Here I make stuff up. So, in this case, you’re needing enough power to cut through all of the material, but Mylar is sensitive to the power used to cut it. Perhaps 2 passes of faster and lower power would work better with this particular type of paper. From a production standpoint, that’s not a great alternative.
I haven’t really considered using this paper for my products - just another print I had laying around. But, if I could get all of the cuts like the clean ones, a “metallic” series would be cool and worth an upcharge.
WOW!

Yeah, mylar is melty…my only exposure to it is sealing bags by melting it together. Maybe the two faster passes at lower power would work better for that.
I would be worth experimenting with for sure. Wow! is right.
Oh, and the puzzle cut from metallic was generated using the script written by @Draradech!
His post on it is:
And the link is:
https://cdn.rawgit.com/Draradech/35d36347312ca6d0887aa7d55f366e30/raw/b04cf9cd63a59571910cb226226ce2b3ed46af46/jigsaw.html
Everything came through as one compound path - I released the compound paths and it actually cut line by line, like I was hoping (I also changed the strokes on the rows, columns and border, so I could order them separately)! The other generator I used creates compound paths out of line segments - and the Glowforge picks up on this (from the SVG code) and it sporadically jumps around.
Awesome job, @Draradech!
I have to wonder how it would have turned out image-side up. Maybe the same if the meltyness is the dominant problem.
Did this one create uniquely shaped pieces?
Moderately unique (and it also has some options to play with). I don’t know how much uniqueness you’ll get out of a generator, honestly. I think it would work quite well for smaller piece counts/easier puzzles.
Ultimately, from a design stand point, hand drawn is going to get you further along from a uniqueness perspective than generated. It’s just significantly more work.
Sorry - didn’t mean to ignore this. No, I haven’t tried it and probably won’t, just for the fact of how much it would cost to do.
Another option though would be adhesive photo paper. I know Epson and HP both make adhesive-backed photo papers.
How did you cut the chipboard down to fit into the Glowforge?
Circular table saw? Were multiple pieces cut at same time?
I’ve used a circular saw with a Kreg guide but I usually just use the Logan mat cutter I have with the straight-edge cutter.
and honestly, a couple of cuts with a really sharp exacto knife and a t square or ruler works fine, too.
It only really matters how you cut something down if you care about one of the edges.