Very interesting project with a little luck added with canceled orders.
1 Like
How did you make the initial jig for the GF? I need to do 500 corks and for the life of me can’t figure out how to make the jig. Every test I’ve done so far has failed because height changes from cutting the jig to placing the corks and skews everything. I’ve been trying this for weeks. ![]()
Are you engraving the ends of corks? How tall are they? What is the diameter?
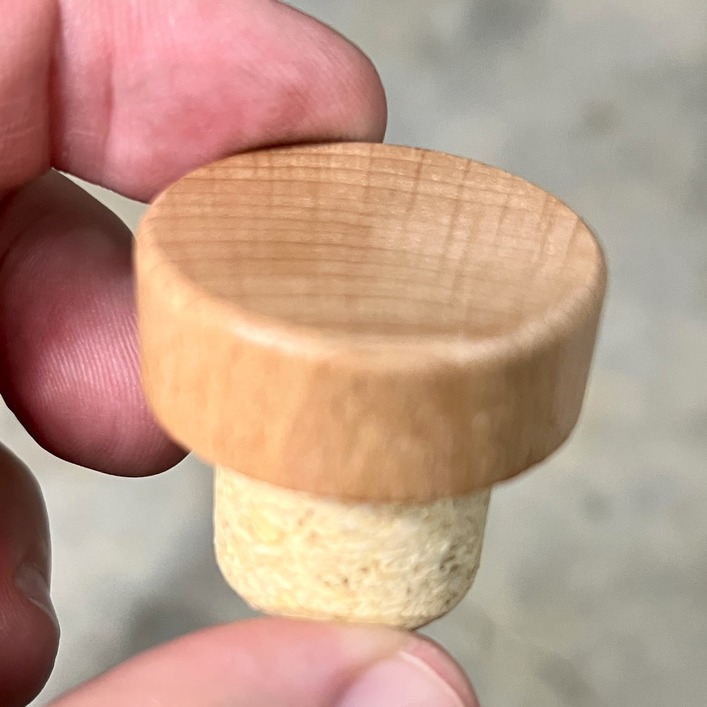
Yes, on the ends. They’re 1.32" tall. the head is 1.33 inches in diameter and is .49" thick. The bottom is .9" in diameter.
Is the top flat? Will you be engraving the same thing on each cork?
Yes and yes.
You could make a lidless box to the dimensions minus the cork top to fit in the laser and just put a bunch of holes the size of the corks into the base, flip the box, and line it up and do a focus on one and a light score on painters tape on the cork wood for alignment check
1 Like
Hi cjezell,
That initial jig is cut from framers matt board (Mountboard here in the UK). Designed so the corks were just held without being tight. The corks were less than 2" tall. This jig sat on the Glowforge bottom without the crumb tray if I remember correctly, that way I could hold it down and just swap out lasered corks for new ones until I had enough. Not every cork lasered perfectly, a few got rejected.
1 Like
Foamboard / Poster Board would be a good, cheap solution as well. Cuts like butter and you could hot-glue vertical supports to the underside. Use tape to secure it to the base of the machine.
1 Like
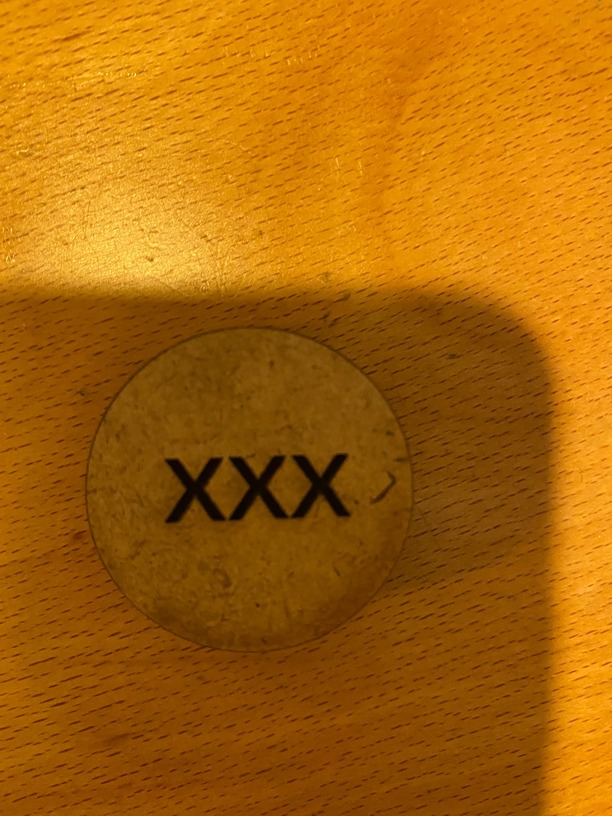
I wanted to see if I could accomplish the task of engraving these corks, and I am happy to say I was successful. I cut the jig out of draftboard on the honeycomb tray. I noted carefully where the file was cut by taking screen shots that showed the x y placement of the jig. I then removed the honeycomb tray, placed a hardboard on the floor of the Glowforge, put risers on top of the hardboard and the jig on top of the risers. The tricky part is making sure the jig is physically in the right place. I made a pretend cork by gluing 4 circles together and placed it over one of the jig holes. I used the set focus tool on top of the pretend cord so the engrave would be correct, but I pretty much ignored the camera view. I engraved my pretend cork with XXX and it worked. Here is the jig file where 123 represents your artwork.
Cork JigA3.svg.zip (5.6 KB)
And here is the pretend cork.
4 Likes