It all started with my Mom asking for some small trinket boxes to give as gifts to the good folks at the home she and Dad are living who take such good care of them.
“Sure!” said I. “How many do you need?”
The answer was twelve. So I started making boxes. It was a fun project and it felt good to do something nice for my parents.
Then my sister asked me for some special boxes for her grandchildren.
“Sure,” said I. “Would you like some fancy shaped ones?”
Well, of course, she did. So, I started making boxes.
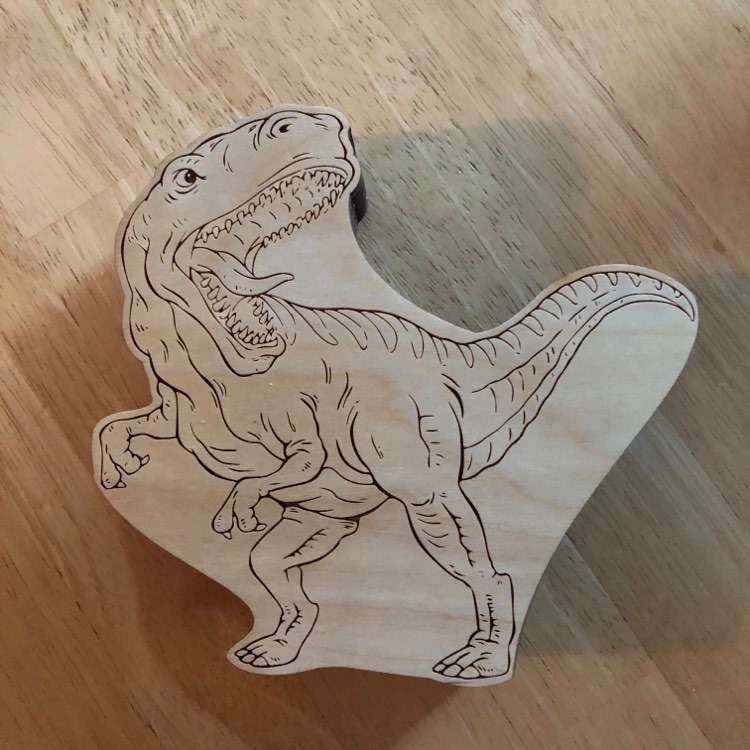
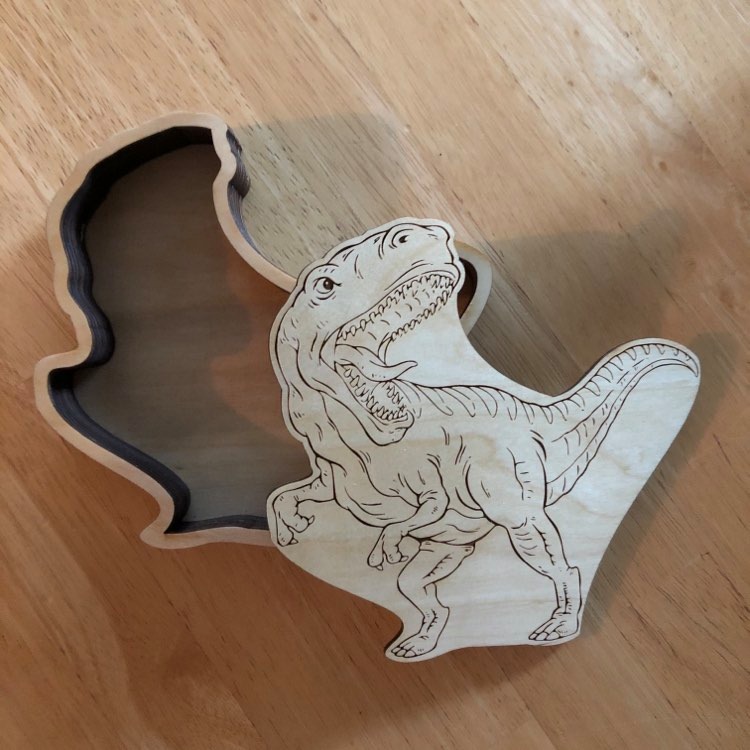
A slight upheaval occurred after I had finished three of the four boxes for my sister and I didn’t get photos of them all. But this bad boy was the fourth one and now no one can wait for my great-nephew to open it up on Christmas Eve.
Besides the t-rex, I also made a bull dozer, a transformer and a butterfly. But it wasn’t until I had cut out the first one that I realized how tricky it was going to be to sand the stacked-layer wall sides smooth.
“Don’t worry about it,” my sister kindly said. “They’re kids. They won’t care.”
Whew!
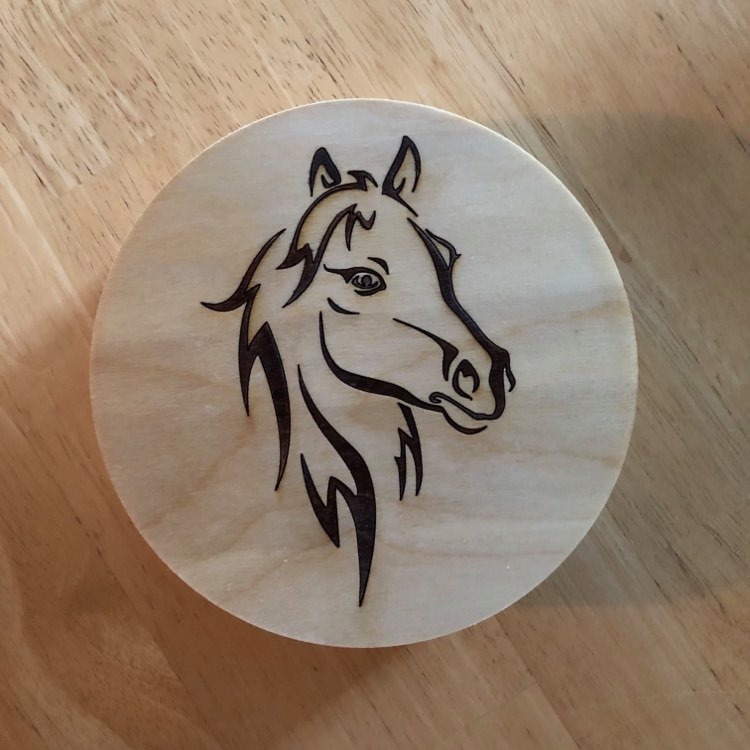
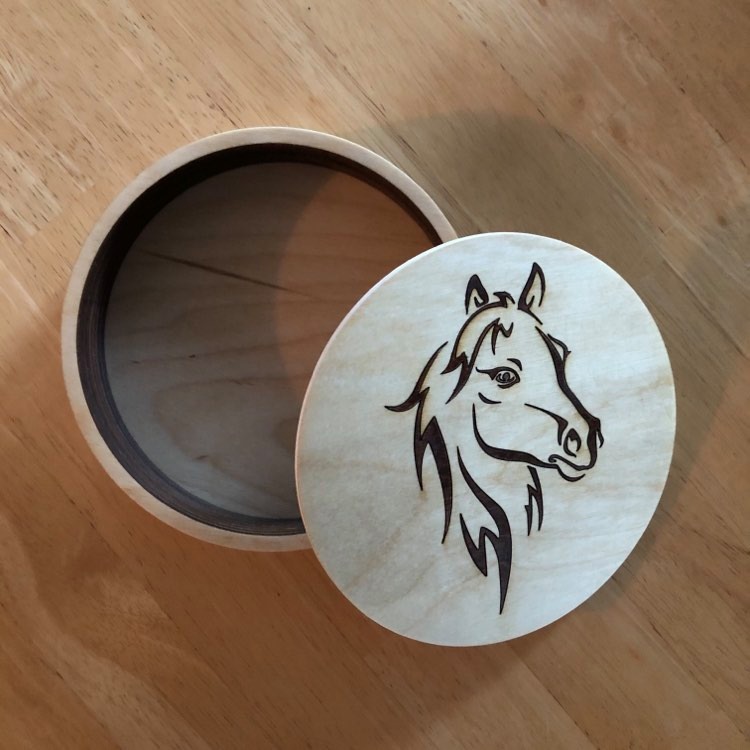
Then another sister asked for a box for her granddaughter. “Something with a horse,” she said.
This time, I kept it simple. A nice round box with the image of the horse in-layed in the lid. I think it turned out rather well!
I really love making these stacked-layer creations. Now I just have to figure out how to finish complex shapes nicely. Or get better at lining up the layers!
You’ll probably be interested in the leather wrapped boxes, the layered hexagonal twist boxes the spindle shaped box, and the morphing star box projects.
One thing I’ve done to align layers in projects is to use wire “pins” to align them. The pins can be aluminum, brass, or copper wire, in which case you can leave them in the holes and just sand them with normal woodworking methods. Or I’ve also used small steel wire nails, which need to be removed again.
I measure the size of the pin with my calipers, and then I program the Glowforge to cut some holes in scrap material. I cut holes of the same size I measure, 0.001" smaller, 0.002" smaller, all the way up to around 0.006" smaller. After cutting those holes in scrap material I figure out which hole size is very tight around my pin, but not so tight that I can’t install it. You want a very tight fit to provide the alignment, but the Glowforge kerf really depends on your cutting settings, so you want to test in actual material with your actual cutting settings. Also notice that the kerf is often larger on the top side versus the bottom side, so make sure your pin can make it all the way through.
Now that you know that size, you can put a couple alignment holes in all of your layers. Install the pins and use as a guide during the gluing operation. If you’ve used the steel nails, you need to pull them back out again, leaving a tiny hole. But using the brass or copper you can leave them in place for a tiny little accent mark.
If you don’t want the holes or pins in your finished item, you can add extra tabs that are easy to cut off for the purposes of alignment, then cut and sand away. But I actually like the look of copper pins embedded in my work.
Use a drill, you’ll have a lot more leeway. Put your pin in the drill chuck and spin it at low-medium speed, it’ll work its way through more layers with ease. Much better than trying to muscle it through with pliers or barehand.
I almost never change the hole size on my pins, if it’s a bit too tight the drill method doesn’t care.
Very nice! Have you found a use for all the “innies” that you get from cutting all those walls? Or do you cut the walls in sections so you can nest them?
Thank you, @cynd11! I keep the cutouts from the centers of the wall pieces and use them to make smaller things, like buttons and poker chips. The 1/8" material is a bit thick for poker chips, but people don’t seem to mind. It’s perfect for buttons, though.