Skip down for pictures. Read to learn from my mistakes.
This is a custom design I started working on while waiting for Gary the forge to arrive. You may have seen me mention on my other thread that I had some scrap from a box I had messed up from…this was that box. This one ended up being more time consuming than I had anticipated…mostly because of my inexperience.
I had a basic idea for a design. A parametric box drawer inside of a parametric box encasement. I chose my dimensions based on the location I was going to put the box. Came out to something like 11.5x10. I used http://www.makercase.com/ to generate 2 boxes, one with the dimensions as the outer dims, other as the inner dims. You may recognize my mistake here…I made them to fit perfectly…which wood is not good at. I wouldn’t realize this mistake until later when everything was glued together.
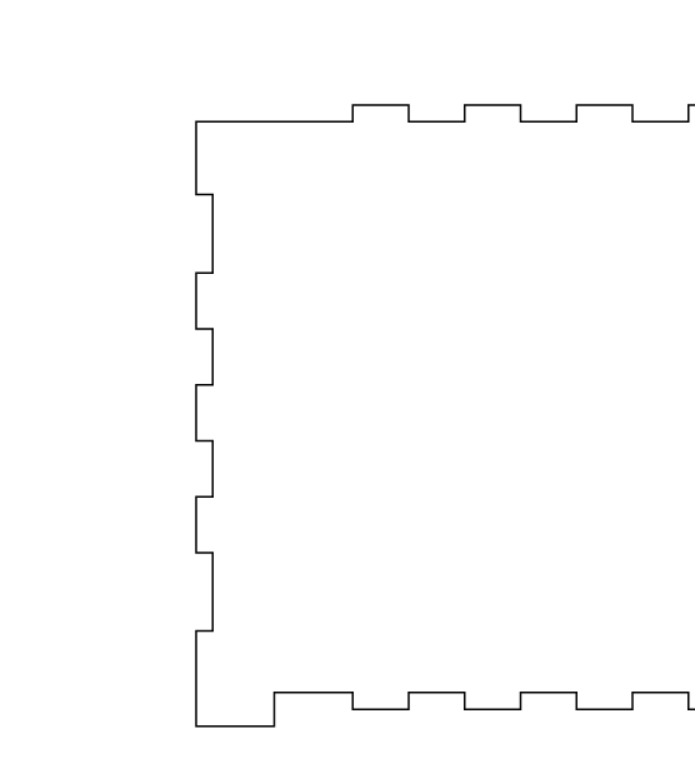
Anyways, I took the two parametric boxes and started on my adjustments. I removed the front of the larger for the encasement and the top of the smaller for the drawer. Next I needed to design for stacking multiple of these…I have a lot of ink. It’s a little hard to explain here, but basically I extended the bottom corner finger joints to give the box 4 little feet. In the corresponding top piece, I removed a finger joint to give those feet somewhere to slide into once completed. Resulting in pieces like this:
I then designed 2 side rails (measured to exact fit) to hold an insert (exact fit) which slid through a hole in the back panel. The hole was the width of the drawer so I centered it in a finger joint to give it a thin piece of wood holding it together. This piece broke while putting it together. But it’s holding up ok after being glued together.
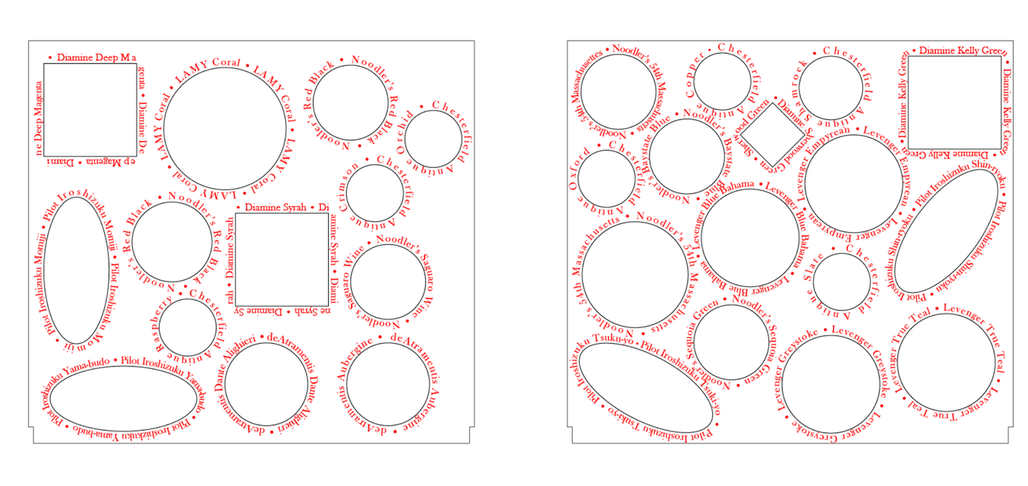
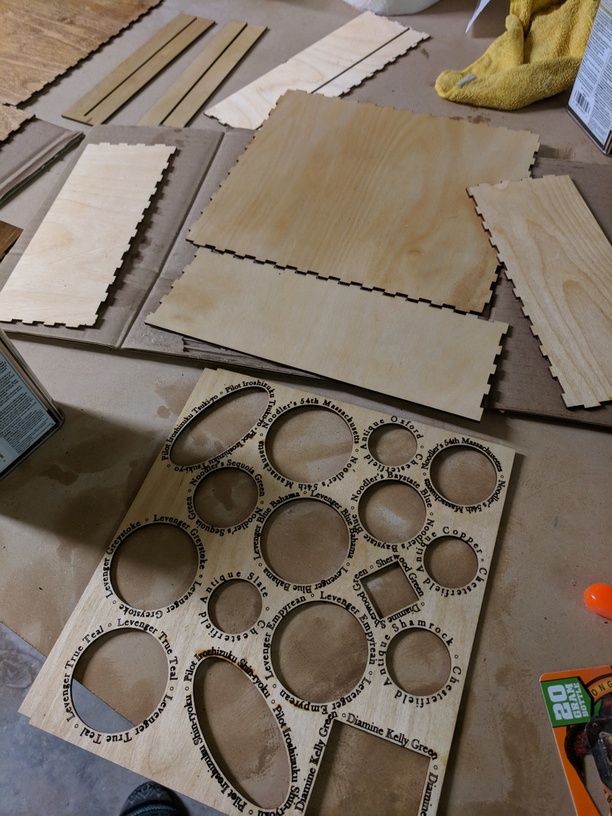
The drawer inserts themselves (I needed 2 drawers) took the longest. I cataloged and measured all of my ink bottles, then recreated them in illustrator and labeled each slot with the corresponding ink name. I cut this on cardboard first and realized that some of the slots were too tight of a fit. I adjusted them and they all seem to fit fine.
When I went to cut, I realized that my 12x12 baltic birch is more like 11.5x11.5. Meaning for the outer casing I would be needing to use my special proofgrade materials (not something I wanted to use 3 or 4 sheets of for a single project). I couldn’t just regenerate boxes without losing my modifications and decided to try and remove a finger joint to change the size of the boxes so that I could cut on my cheaper plywood. I ended up with an overlap somewhere and the laser burns it extra dark on one finger joint length. But it doesn’t really hurt anything so I’m not fretting about it. Not so easy was having to completely rearrange the ink inserts to take an already tight fit and squeeze it in more. But I managed and was able to proceed without cutting into my precious and expensive proofgrade maple plywood.
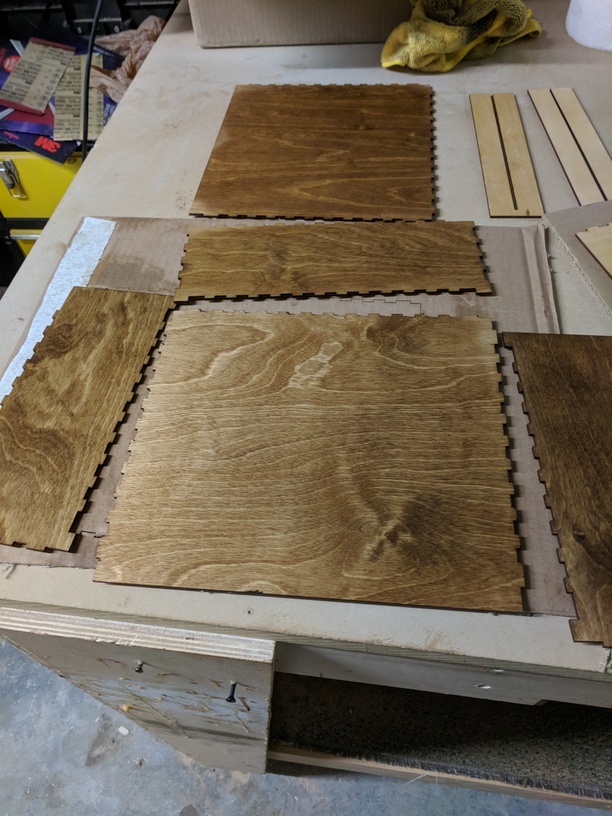
I ended up needing 8 pieces of “12x12” for one drawer and cabinet combo. So 16 total (though I’ve only cut 1 so far). I sanded 18 pieces down to 400 grit and then covered them two sides with 12" wide transfer tape. This took quite some time and made me appreciate the proofgrade materials even more. After cutting the first set, I finished all of the pieces with Watco danish oil finish. The outer box I used a dark walnut color and the inner one I used natural. I then glued everything together. The drawer insert I made to be removable so as my ink collection changes, I can periodically recut an insert. Well this one isn’t coming out. I’m sure the drawer almost popped apart as I jammed the insert into it, but somehow it held. (Yay titebond 2). I will say that baltic birch plywood is impressively strong. There were some thin spots of wood that I thought I would break and they held like a champ.
At this point I knew the drawer wouldnt fit in the encasement, but I tried anyways. This time the glue didn’t hold (I hadn’t let it set long enough)…Not that it’d be a functional drawer anyways. So I went back and extended a few of the finger joints a few mm in each direction to give the drawer more room. By laying out the box as it was going to be put together, I was able to easily box select all the pieces at once and move all of their nodes together to ensure the fingers matched up with the right holes.
In putting it together, I flipped over the top piece and forgot that it was no longer symmetrical. A box cutter helped me file enough wood away to piece it together anyways with just a small hole in one of the seems.
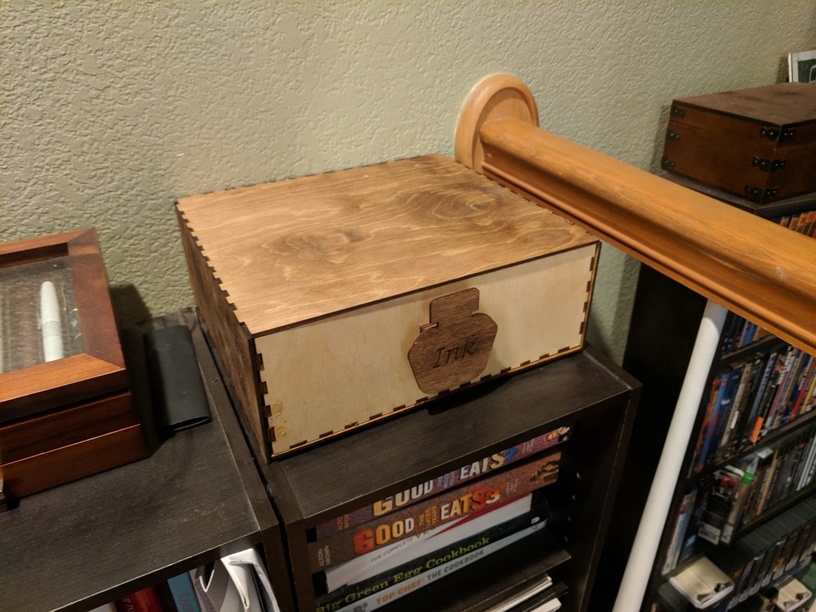
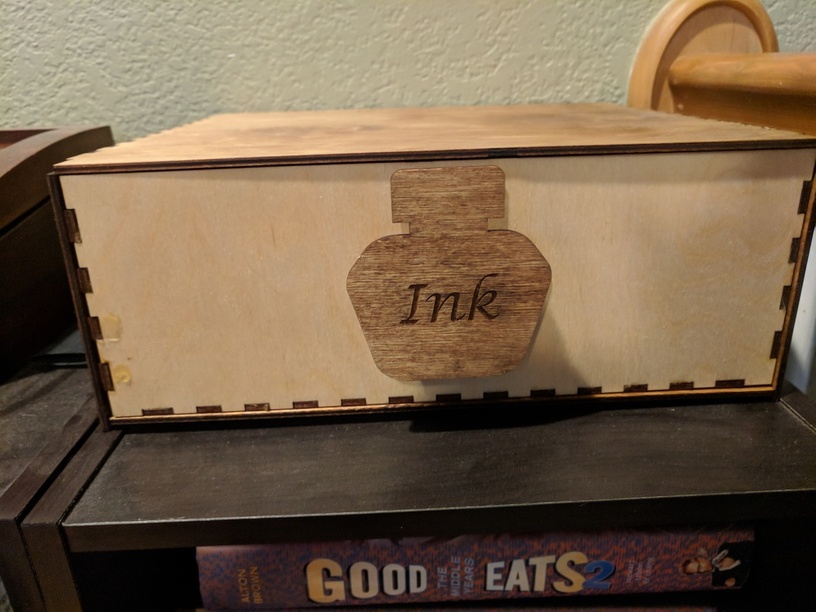
I also realized I hadn’t cut a handle for the drawer. So I grabbed an icon from the noun project. Threw it in illustrator to slap some text on it. Added a few squares to give it a neck, and hit print.
It now all fits and is working, if a bit hacked together. The imperfections are minor and not too noticeble if you don’t know what you’re looking for. The feet on the bottom drawer actually hook onto the back of the shelf it’s sitting on holding it in place while you pull. I of course haven’t tried stacking them yet, but the design looks like it will work. Overall, I’m pretty happy with it. I still need to adjust the 2nd insert to be a little smaller for an easier fit. And because my screw ups made me lose and entire encasement, I’m going to have to finish and mask a few more pieces. So it may be a bit before I get around to cutting the 2nd drawer…especially as I’ve discovered the joy of working with leather. But I digress and you have listened to me ramble for long enough. Here’s what you came for…the pics.
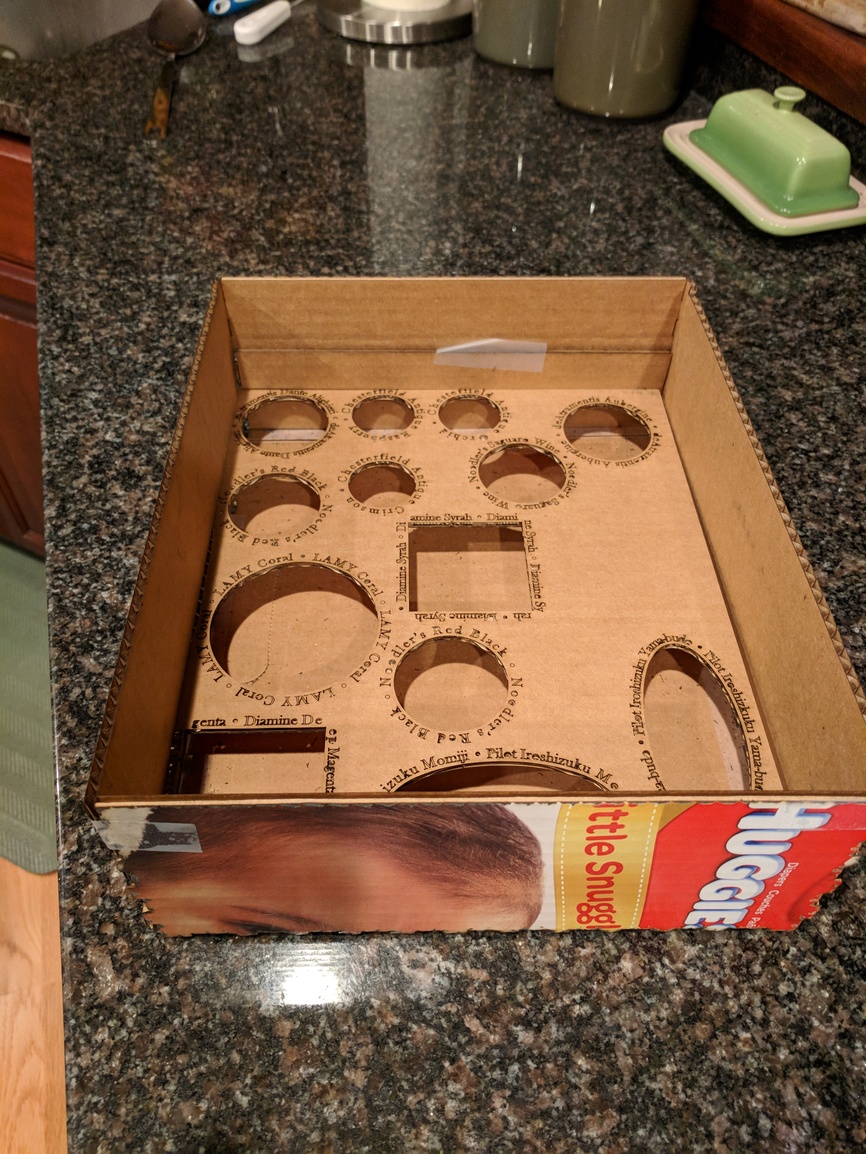
A prototype I made from a huggies box which helped me catch some tight fitting ink cutouts. The cardboard wasn’t sufficient for finding fitting issues, however.
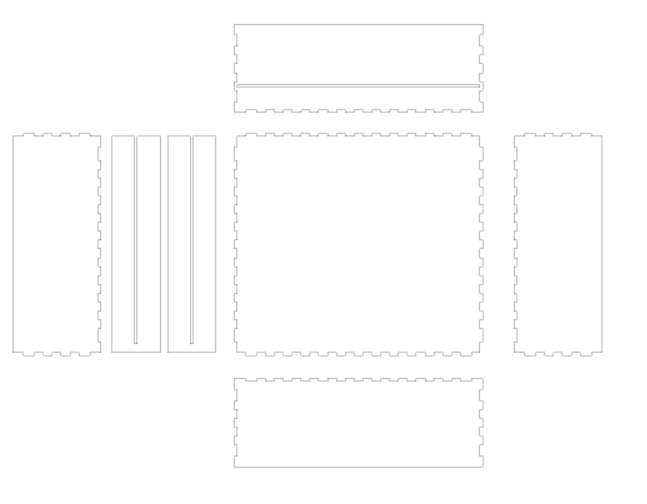
Cut and finished pieces ready to be put together
The Box!
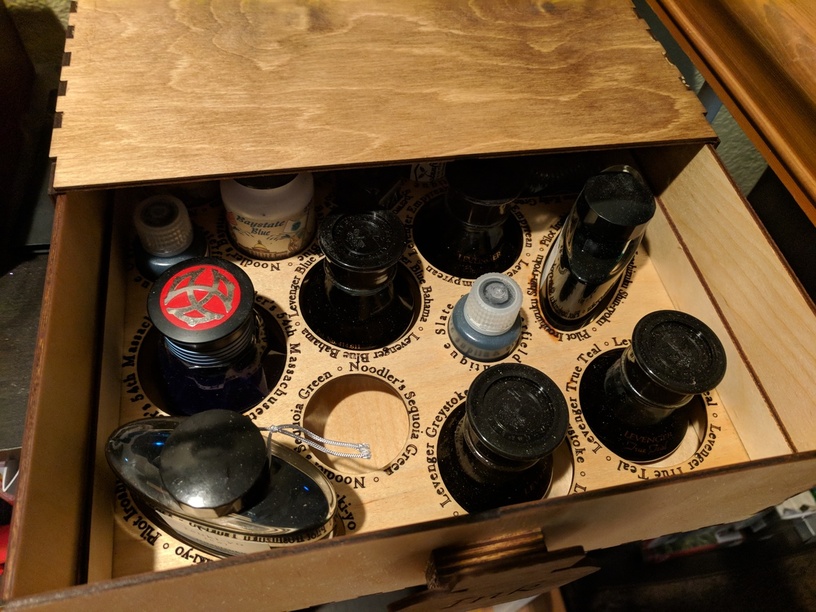
Oh yes, and one more mistake. The empty slot here is because I had these in their original boxes. I had a several noodler’s and rather than measuring each one, I only measured one. Well I forgot that Sequoia Green was in a square bottle instead of a circular one…so now I have an incorrect hole in my insert that I can’t remove. It will remind me to be more careful next time :-).
