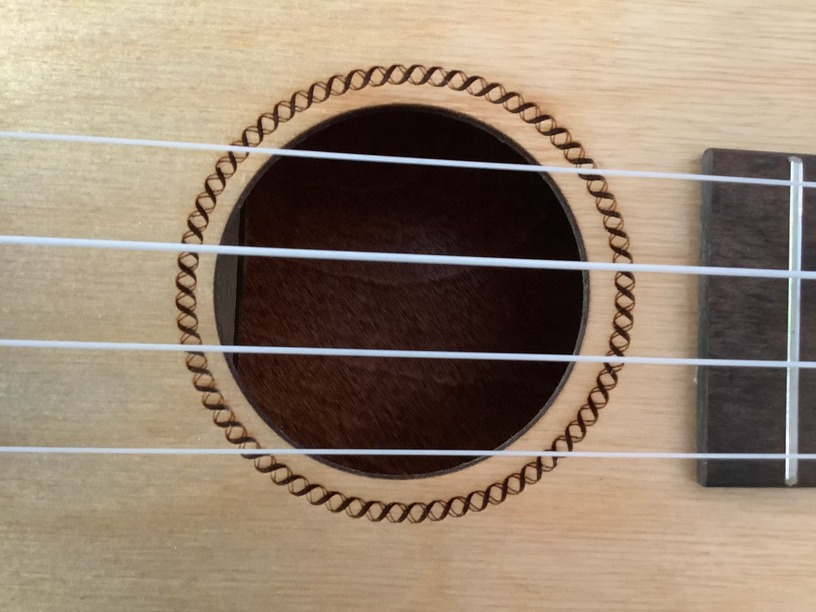
I had a difficult time centering my last engraved Rosette around my sound hole. It seems that there is no way to test your alignment before the laser starts. I have found that one must place the desired operation directly under the camera to get the best results. The wide angle camera lens has some spherical aberration as it goes outwards from the center. I started with a cheap little laser that had a check cycle which traced the outline of the engraving to help with centering. Is there anything that glowforge has that would make my task easier?
8 Likes
I am assuming you have completed the lid camera calibration which for many of us improved our visual alignment a great deal.
Some people have good luck putting a piece of masking or waste paper on their item and then scoring the outline of their design (or alignment targets or some part of the design) with a power of 1 to mark the placement without marking the actual material. Based on that, they adjust their design and run as many of these practice runs as necessary.
For your ukulele, I would draw a circle the exact same size as the sound hole and center my design relative to that circle. I would then score the sound hole circle with very low power and adjust until it lined up with the hole. Then I would not move any part of the design or material, ignore the sound hole cut line and run the design engrave.
10 Likes
what @dklgood said. i use low powered scoring on top of masking to test positioning when it’s important to be perfect. you can micro adjust afterwards and retest.
4 Likes
I have already ran the lid camera calibration which helped with alignment. Thanks for the great advice. I will try using lower power and etch my design using a double layer of masking.
3 Likes
I will score my design. Not etch.
2 Likes
It appears the sound hole was also laser cut? If so, why not just align the rosette with the cut circle in your design app?
6 Likes
@eflyguy has the way to go if it’s cut as part of the process, but if it’s not you could try using a circular piece to realign things later on. Secure a piece of wood to the bed and cut a circle to match the hole in the top. Remove everything but the circle (making sure not to move it) and place the top over it and align things based on that.
1 Like
This topic was automatically closed 32 days after the last reply. New replies are no longer allowed.