Coz only just received my own unit, no where brave enough to dive in to play around with the screws yet.
Looking at your photos, is there a feasible way to remove the entire bottom ceramic(?) plate base (unscrew everything) and design a wooden / aluminum modified replacement plate base with the appropriate cut out openings and mount it back up, this is so to avoid damaging the Glowforge.
Just looking at the photos look simple enough to design for, but don’t know how far up the base extends into the machine in other areas.
Only someone’s who’s done a tear down of the Glowforge would know?
Once the appropriate size bottom opening is there, then the sky is the limit to the applications, pretty sure can find a X-Y axis mod, also a rotary mod would be much easier.
Bonus for people who’s waiting for their Glowforge air filter.
(This one of my thing, looking for better but much cheaper option than the official items, also instead of DIY for hours reinventing the wheel, DIY is last resort)
Formaldehyde filter, tri filter (inc carbon filter), laser air quality detection, easy replacement of filter, just need an enclosure (prob a large card board box will do) with the vent end of the hose to the box, and the air purifier’s top air exit open from the box top, then the laser detect would still work.
I cannot find an air volume (CFM) number but its size (10"x10"x20") suggests that it would be inadequate to the job (220CFM minimum) but I like your idea as a way to get the blue whale (at 4x the size, volume, and price) working directly
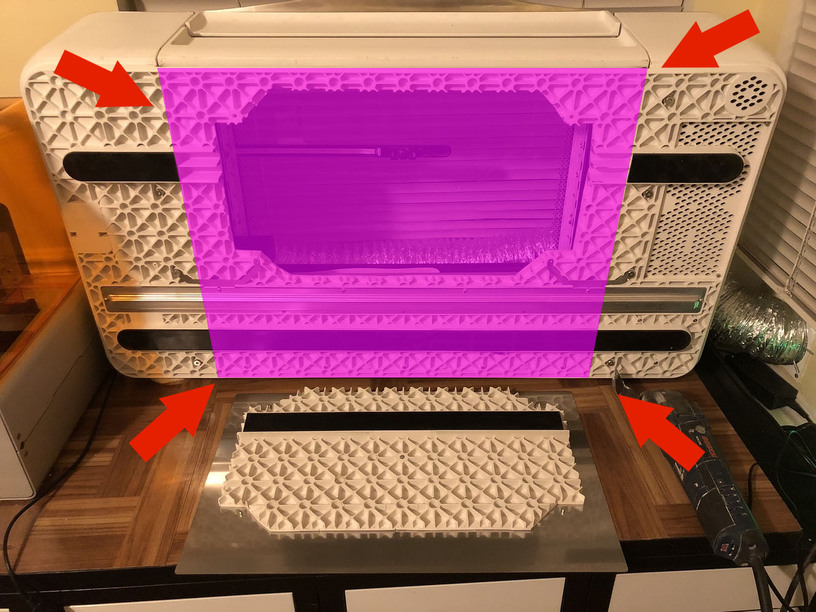
Hi @matt.stoker, I have a Glowforge PRO, I saw that you cut the bottom, but could you cut through the whole area like in the picture?
so that wood planks with 19,685 "width for infinity and without thickness limitations.Do you think it is feasible?
Exuse for my bad english
Sorry! I missed that you asked a question. You can make the hole wider if you don’t care to re-attach the bottom with screws, you can make the hole wider and more rectangular. You’d still be able to set the plate with bottom piece attached into the hole and let gravity hold it in. I may cut mine bigger, in fact. You can’t cut too much taller, though, because of the metal plate below the hole. It carries wiring from the right side of the machine to the left. If you re-routed it, though…
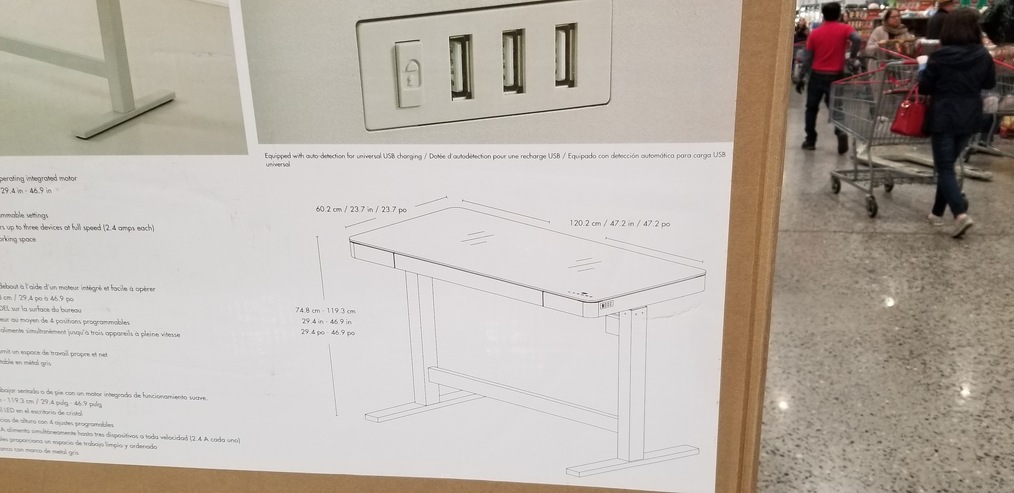
That’s a great one! I’ve been mostly cutting small stuff, so desk-level or propped up on a few boards has been sufficient, but I’d really like to get a cheap adjustable desk and customize it for cutting. I’d cut a hole in it, then use the cutout as the base for projects with a lower offset on rubber feet, allowing for adjustments of any value in z from the zero location of the laser focus plane.
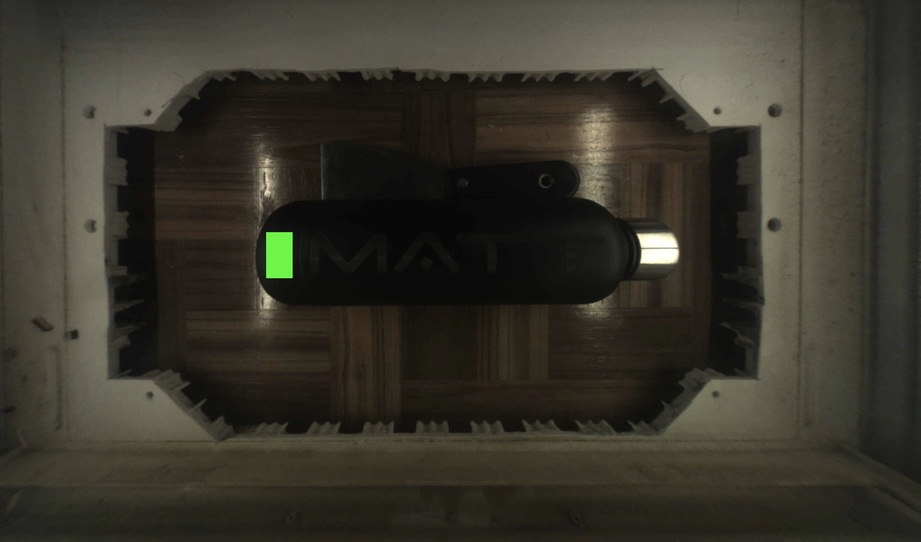
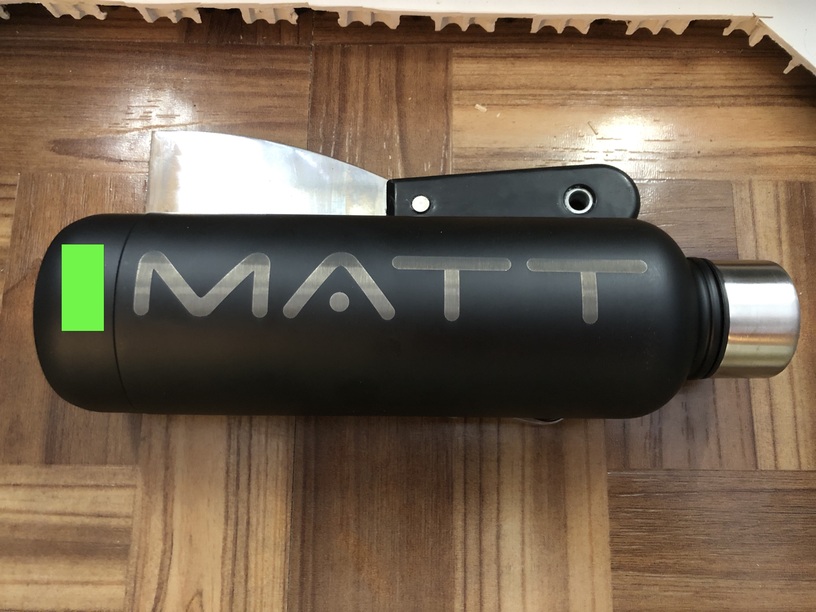
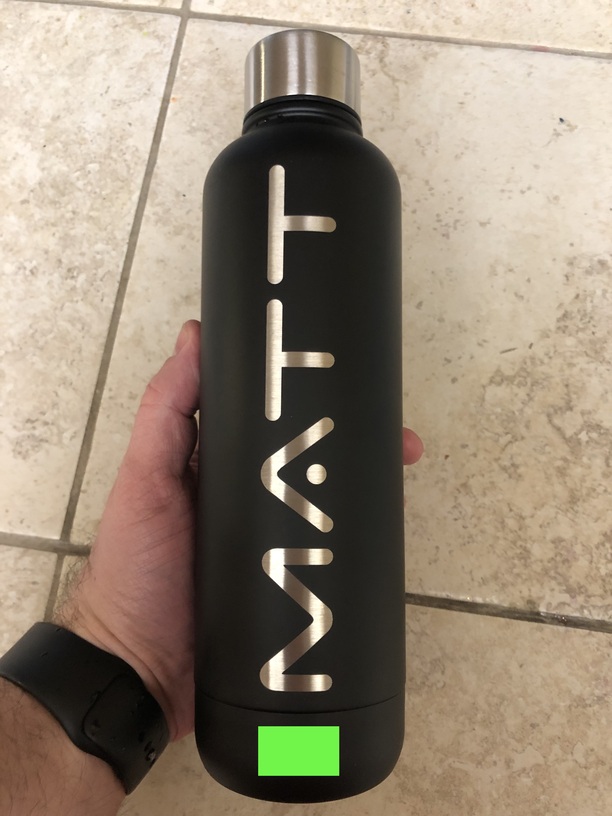
Did some more water bottles today. These laser up really nice and take like 10 minutes from starting design to finished product in-hand. Make for good gifts. I may even start a little side business with them.
Pictures! I redacted my address / phone number with green boxes. Yes, my machine is pretty dirty. I did some wood projects the other day and haven’t cleaned it out.
How wide is the engrave? I can get about 2" in the Redsail and then need to rotate it. I set the focus on the height of the bottle a half inch off the center line.
I should get a rotary attachment or build one but I don’t do much that needs it to make the $500 worth it.
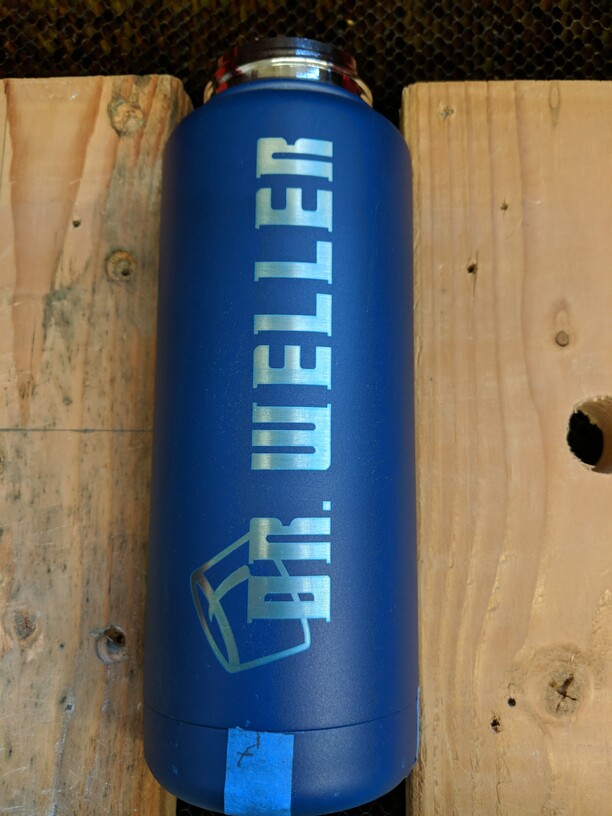
That looks nice! I have been successful with about 30 degrees without too much warping, then need to rotate. On this water bottle, the content was only about 1" of arc length. Ya, I have nearly finished making a rotary tool from a Nema motor and an Arduino. Hopefully I can finish it sometime soon and post a how-to.
I actually did the entire bottle by sending it 5 different engraving sets. The blue tape is part if the indexing I did. Turn it by hand after each set of engraves.
I have so many other projects that making a rotary rig keeps falling to the bottom of the list.
Finally cut the bottom out of mine 2 weeks ago. Been wanting to do it from day one! Not knowing if any electronics were under that metal plate kept me from finding out the hard way. I’m very thankful for the information in this thread. Its allowed me to engrave products that otherwise wouldnt fit. Thank you Matt.
Matt- what were your height, power and speed settings for the water bottle? How are you setting your height settings without the bottom? Thanks so much
Speed 1000, full power. I measured the distance from the head to the crumb tray. Call that zero. Then I removed them (the tray and the cutout are replaceable in the way I did it), placed the bottle in the cutout area on the desk beneath, and measured the distance from the head to the surface of the bottle. Subtract. That gives you the distance.