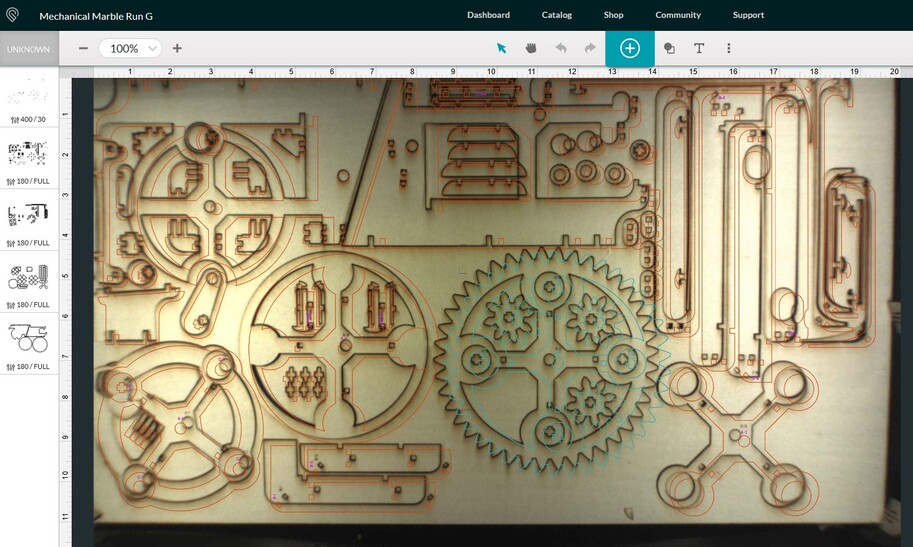
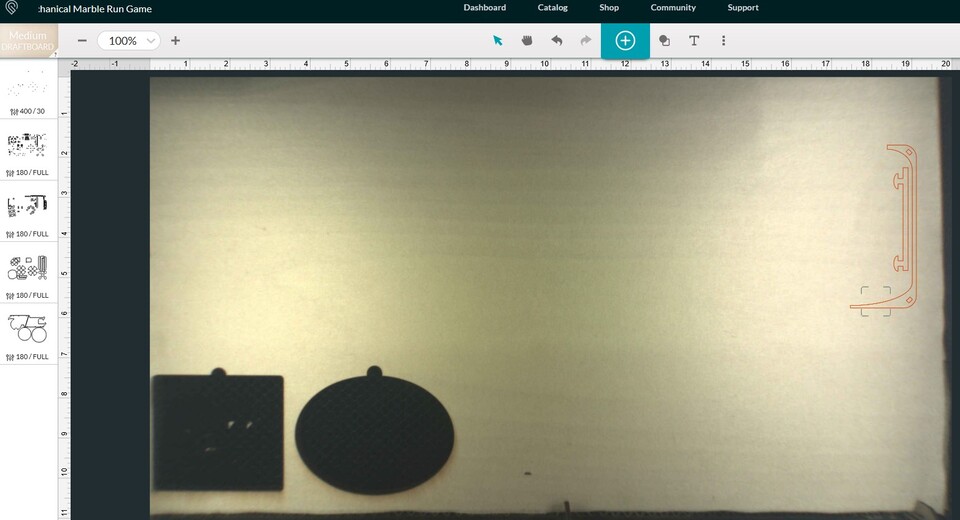
Has anyone determined what the actual maximum X value is for designs on their machine? I think I’ve finally learned that mine can’t handle anything further out than 18.886" in X. I tried to cut the Mechanical Marble Run design from the catalog, found that one of the cuts in the far right exceeded what my machine can handle, and all the rest of the cuts were offset from where they were supposed to be from that point on.
I thought, hmm, maybe it’s a good time to clean and calibrate. Did that, very thoroughly, and tried to cut again, this time on the back of the draft board I used for calibration. Same result, but this time I saw when it happened.
For my third attempt, I moved the two rightmost pieces of the design off the cutting area completely and will make them later. This solved it!
I see others may have run into this problem where the machine thinks it can cut further out than it actually can and thought this might help people experiencing the same problem with such a large design.
Is there a way to set the software to not allow me to put designs out past my machine’s limit?
Hi Kirsten! Are you using the Set Focus tool to make sure the machine knows the correct height of your material, before finalizing placement of your design? There’s a software algorithm that corrects the birdseye camera view to show your material as flat. If it doesn’t have an accurate height to use in its calculations, the view might incorrectly show more cutting area than there will actually be once you hit Print and the auto focus measures the material.
And you’re doing it over on the edge, to make sure those edge pieces are lined up correctly? What Set Focus does, in case you don’t know, is correct the bed image with the most accurate part of the algorithm at the point you select. So when I’m filling the whole bed with a design, I’ll typically do a Set Focus on the right edge and bottom edge, just to make sure nothing’s going to fall off. (There’s typically plenty of room at the top and left, unless you’re using scraps instead of a full sheet, in which case check there too!)
Here’s what the uncorrected image actually looks like. You can see why there would be more error in the display toward the edges than in the center, unless you specifically direct it to center the algorithm somewhere else!
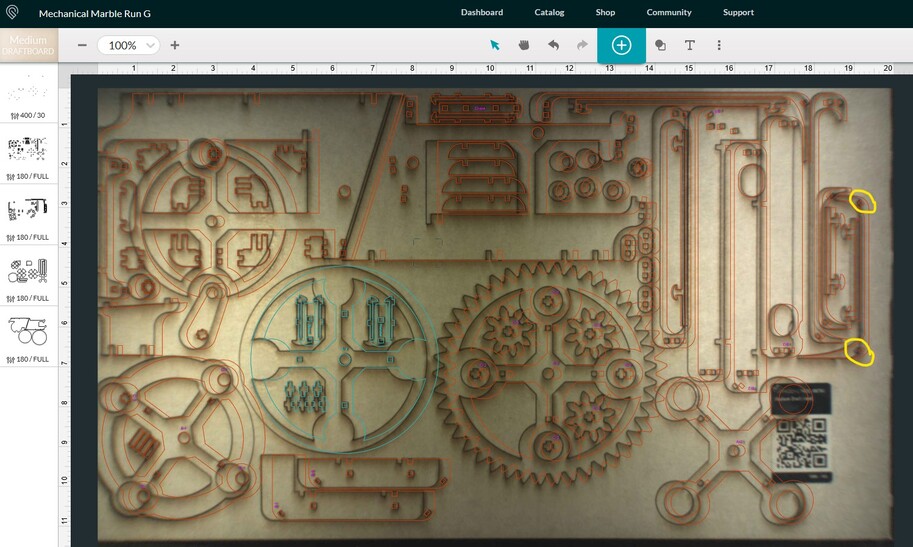
I think that did help! The interface did not allow me to Set Focus any father to the right than this shows, and it made the bumping sound I heard before when it was getting thrown off during the print, but I sent the print anyway and it came out fine. (Well, at this point I’m just making the two final pieces that messed up the print the first two times.) So now I know my X limit is at least 19.115 if I focus as far right as possible. I thought it was supposed to handle 19.5", but maybe mine’s special.
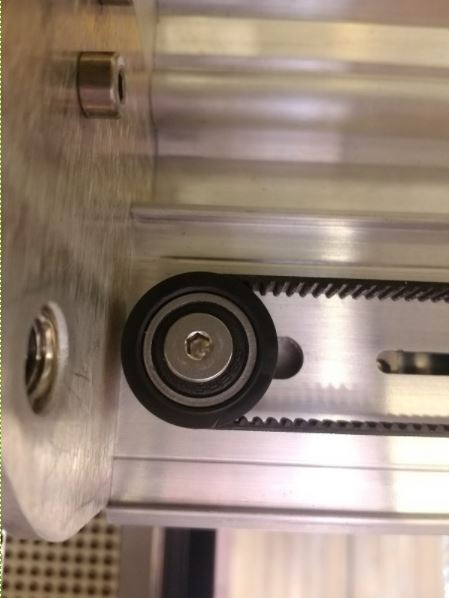
Look under the right side of the x axis where the belt goes around the pulley and see if the height of the belt is the same as the height of the belt on the carriage plate. I had a problem printing on the right side just like you until I found that the black sleeve on the belt pulley on the right had slipped down about a quarter inch. This caused extra tension in the belt when the carriage plate got towards the right side causing the stepper motor to miss steps and create a grinding noise. Once you hear the grinding noise you may as well stop the print and power down because it needs to go through centering again to know where the head is.
Yeah, if it bumped something that would have knocked it out of alignment. Make sure nothing’s sticking up over 1/2" on the bed, and don’t let your material go past the metal part of the tray onto the plastic border, or the gantry can hit it.
The coordinates are pretty machine-specific; see where your left-side limit is, too. Sometimes it’s a negative number.
Nothing was sticking up or past the boundary of the honeycomb. I think my left-side limit is .026", maybe a bit less, but for sure that’s fine (0" is not fine).
Hi @kirstin.hensley, thanks for reaching out to us. The Glowforge Basic bed can accommodate materials measuring 12 x 20.4”. The maximum printable area is 11 x 19.5”, but it’s reduced somewhat when the laser operates at high speed, as it can take space for the laser to decelerate.
I took a look at the logs from your Glowforge to investigate your alignment trouble, and found the prints that you were having trouble with. I was able to confirm that they were up to 1/2" off in places.
I see that you already ran the Camera Recalibrator, which was the correct next step. Since running that all of your prints look to be in perfect alignment now.
Do your prints feel like they are coming out correctly now? Please let me know if you’re still having any trouble and I’ll gladly investigate further. Thank you!
Hi Morgan,
Thanks for looking into this! I ran the recalibration routine in between the first two full prints of the design and still had the problem where the pieces at the right caused the head to lose its position. I believe the X coordinate of the right side of the design was 19.115". What is considered high speed? I had it going at 120 for cut when it made the weird sound and lost position.
So starting from the bottom, here’s what I’ve done:
Set focus, locate design within bounds, print - result was lost position partway through and scrapped the piece
Spa-level cleaning of laser, run calibration on PG draft board
Set focus, locate design within bounds (noted max X at 19.115, I think), print - result was the same as before with lost position, but this time I saw it happen
Test with just one piece, max X at 19.115, and the laser skipped a bit of the cut, but I wasn’t sure it had lost its location.
Moved the two rightmost pieces out of bounds (the rest of design went to X=18.886) and had a successful run except for some wood issues.
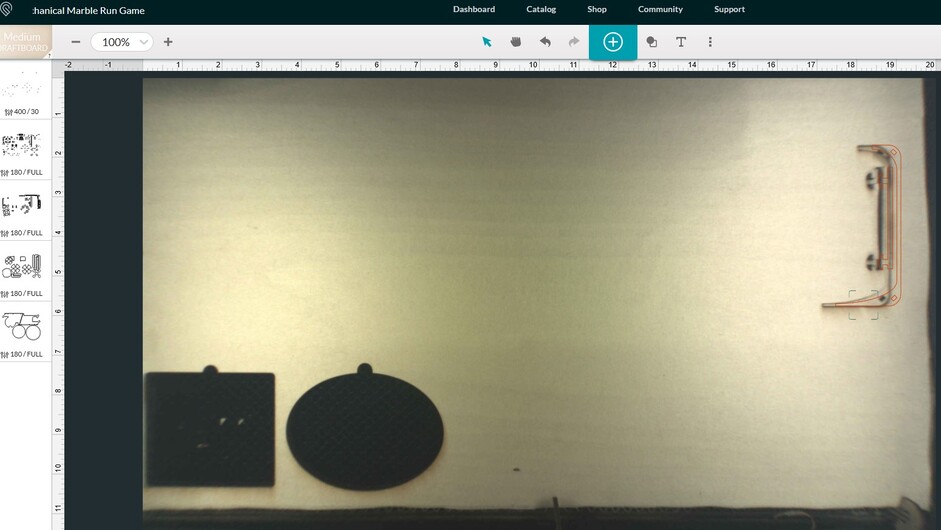
Tried @geek2nurse suggestion of setting focus as far right as possible and then running the two problem pieces in the same location as they were in the original design. Result was that I think the laser lost position when setting focus this time. Pieces came out ok, but everything was cutting off by 1/4"-1/2" to the left from this point on until I shut it down.
I do think my cutting area is more like 18.86 right now and if you’re able to discover how to fix it or show me a more limited view in the safe zone, I’d appreciate it.
Thank you for the detailed update. As a next step, would you please also run Print Head Setup and let us know if there is an improvement? This process aligns the printer head with the rest of your printer. If you run into any questions while giving it a try, please let us know and we’ll be happy to help!
Is there any risk that this would make the situation worse? I’m nervous. I know my machine is not under warranty and can deal with how it works as is.
Thank you!
Hi @kirstin.hensley, if the printer head setup causes more trouble with the alignment of your prints, we can roll it back to the calibration that you have now.
Please let us know if you have any other questions.
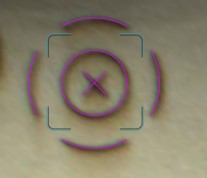
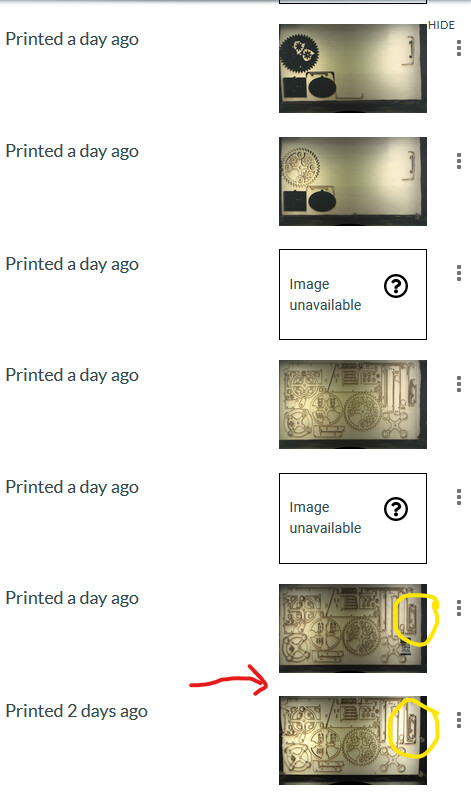
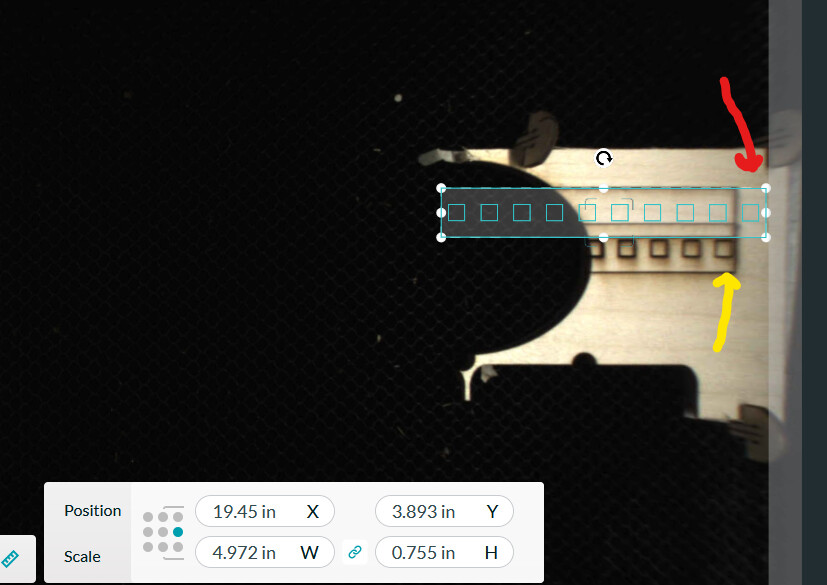
I do think that helped! I ran a test with the design at Max X = 19.115 and it didn’t make the sound or lose its position (yellow arrow). I ran a second test with Max X = 19.45, just above the first cut and it made the sound and started cutting right where it did for the first test (red arrow.)
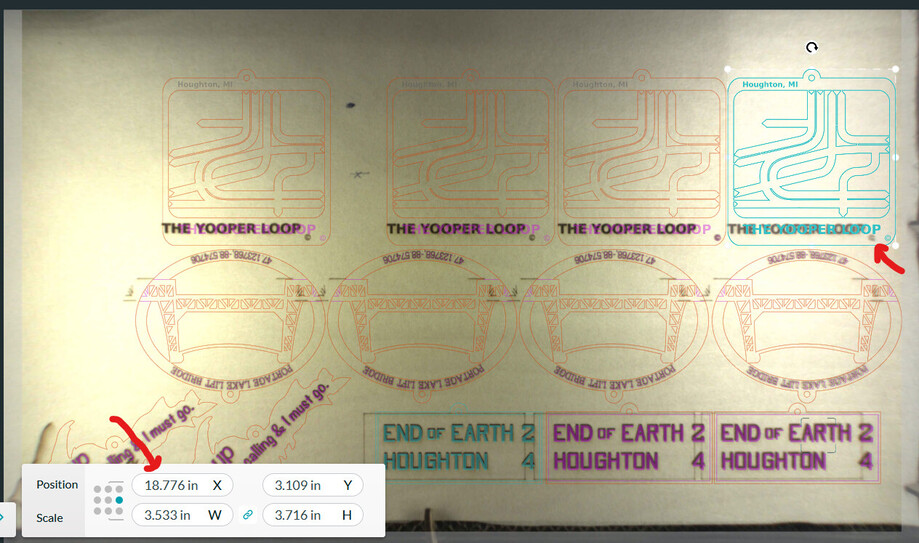
I ran into the same thing today with a max x that I thought was safe for me (18.776). All of the engravings line up with where they should be until the tiny copyright c at the right. After that, all of the score lines are off and I quit the job before the cuts began.
If it were predictable, it would be so much easier to deal with! Thank you for any more ideas you might have.
Thank you for the update. It’s good to hear that running the print head setup improved things a bit. To see if further improvement might be possible, I’d like to have our team look at a couple things inside your unit. Will you please share photos of the following?
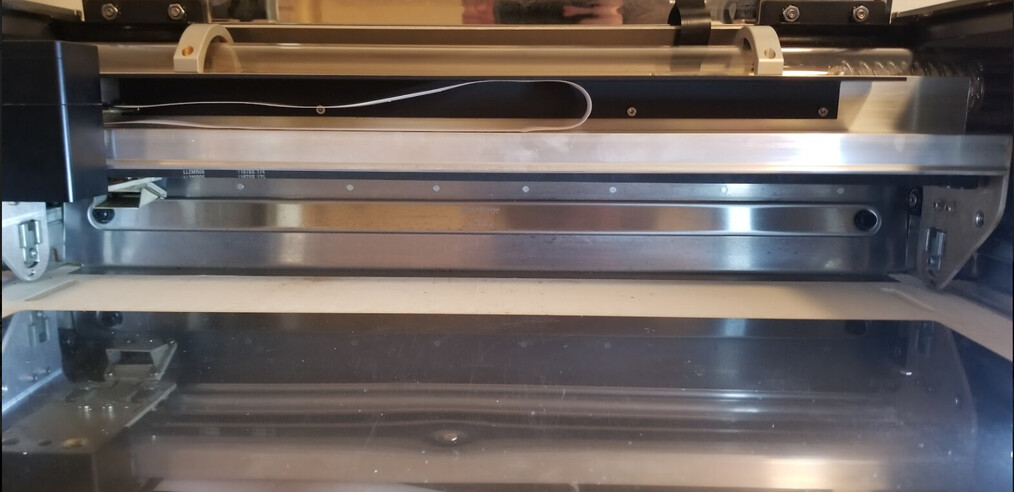
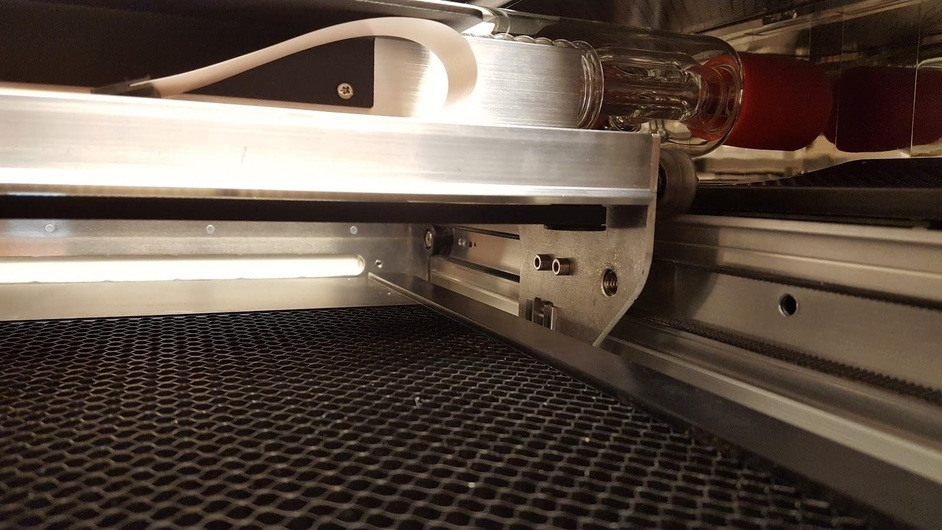
First, power off your Glowforge and remove the crumb tray.
1.The belt under your laser arm with the head pushed to the left: