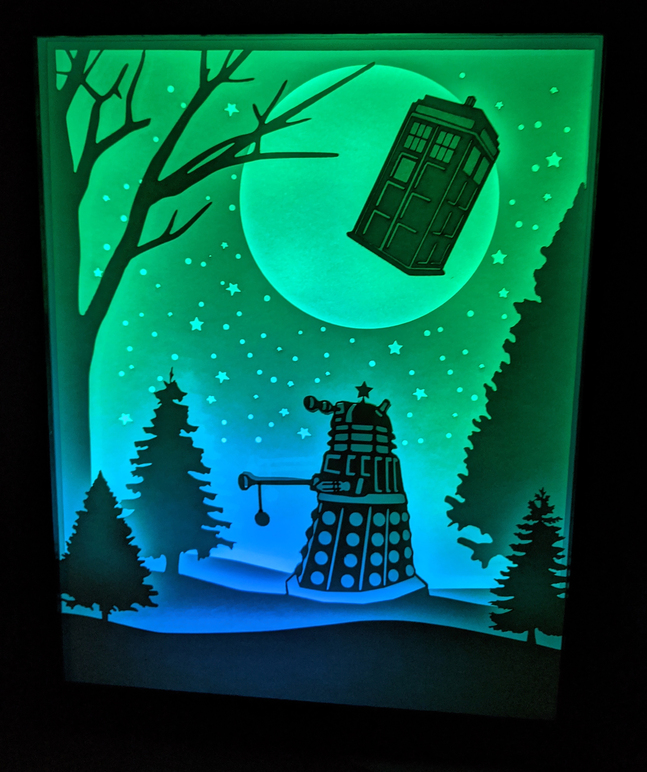
Wow! This is fantastic. I love all the details.
1 Like
I think more of an assembly. I assume all 6 sheets are the same size with different things cut in each sheet…So how it is all put together? Is there space between the sheets? How does the frame work with it? Lights? Thanks again!!
1 Like
The latest round of improvements to the glowforge included what they call “clean corners”. This is the reason you can now cut paper instead of engrave-cut paper.
The star on its head is great, but the part I love the most is the ornament hanging from its laser.
What color LEDs are you using to get the blue fading to green?
Using double-sided foam tape is one method to both separate the sheets and stick them together, but there are others.
I was wondering if it was a change. I saw that my engrave speed increased to a maximum of 1,500. I’m loving the changes as I do a lot of paper craft.
3 Likes
I use foam board strips on the back of each layer…I know this has different names in different places. It’s the 2’ x 3’ boards that are foam in the center and have paper on both sides. I buy it at Dollarama in Canada. I hand cut it into strips that are 1/4 inch wide. I have not tried cutting it on the GF because of the risk of fire and I suspect the edges will melt too much render the strips useless.
1 Like
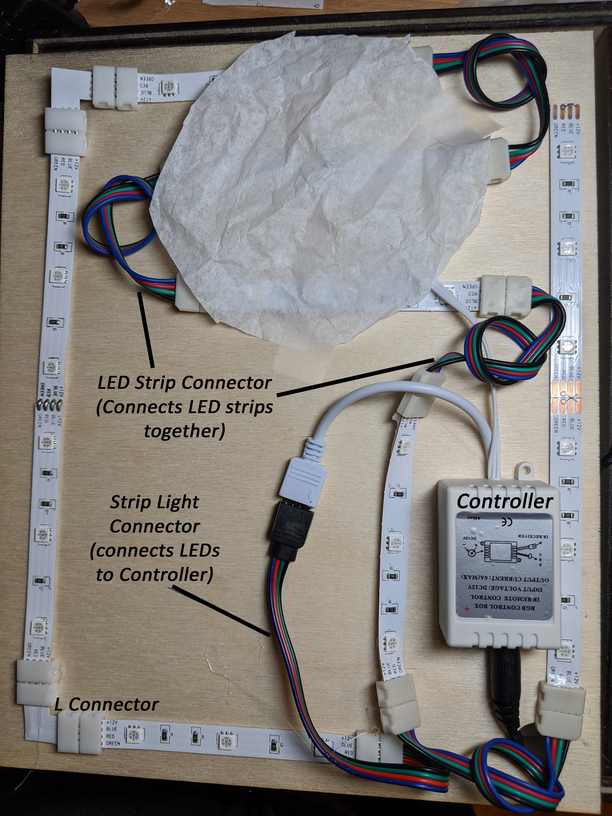
On the LEDs…that was a happy accident. One of the connections isn’t secure so I got the different colour on the bottom strip. I use 5050 RGB LED strips with connectors (I don’t know how to solder well…I need to practice), a 12V 1A US power supply and a controller with a 44 key remote.
1 Like
I will try to take some more pics of the layers and the foam strips in between. I made the frame so that the back sits in on the inner side pieces so it’s flush with the outer side edges. The LEDs have adhesive strips on the back. I also hot glue a few of the pieces in place if needed. Here is a pic of the back (see above) with labels on all of the pieces I used. This is the “wrong” side of the back. There is enough room between the layers and the back piece to accommodate the lights, connectors and the controller for the remote.
I’ll try to post pics of the layers later today.
3 Likes
Okay, here are some pics of the frame and layers so you can see the construction a little more clearly (I hope). I am still working on tutorials for this as well. I will let you guys know via a separate post when those are available.
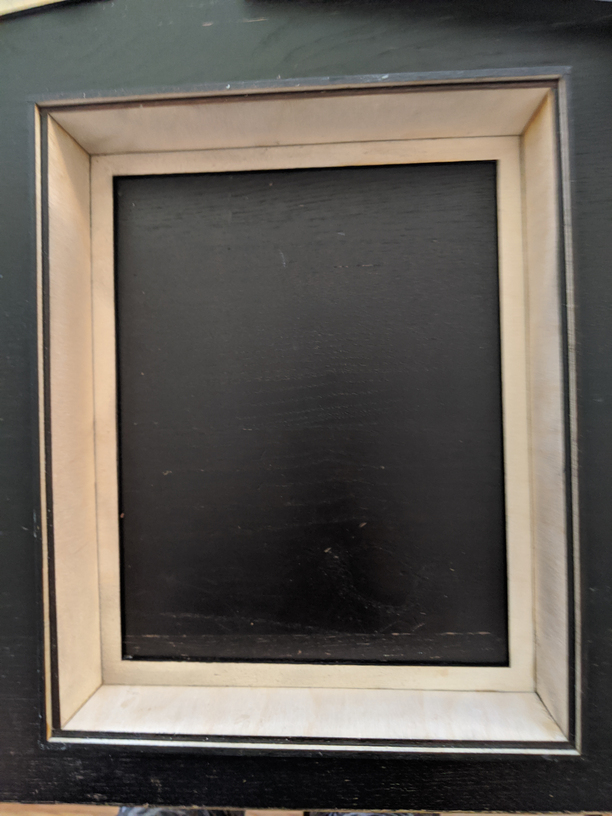
This is the inside of the frame, empty of layers. As you can see, it’s built so that the inner layer is not as deep as the outer layer. This allows the back to nest inside the frame. Second pic is the frame with the back in place.
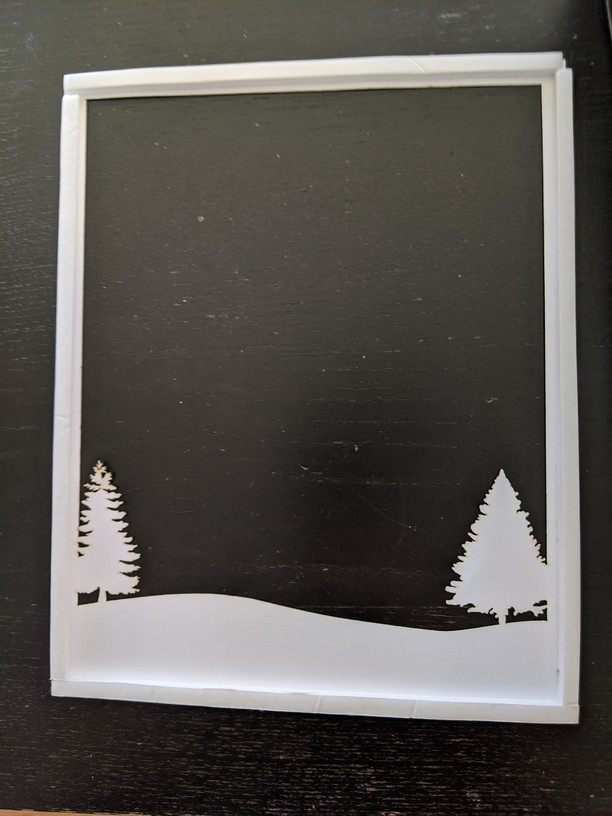
This is the “top” layer, or the one closest to the front. First pic is the “good” side and second pic is the back with the foam board spacers.
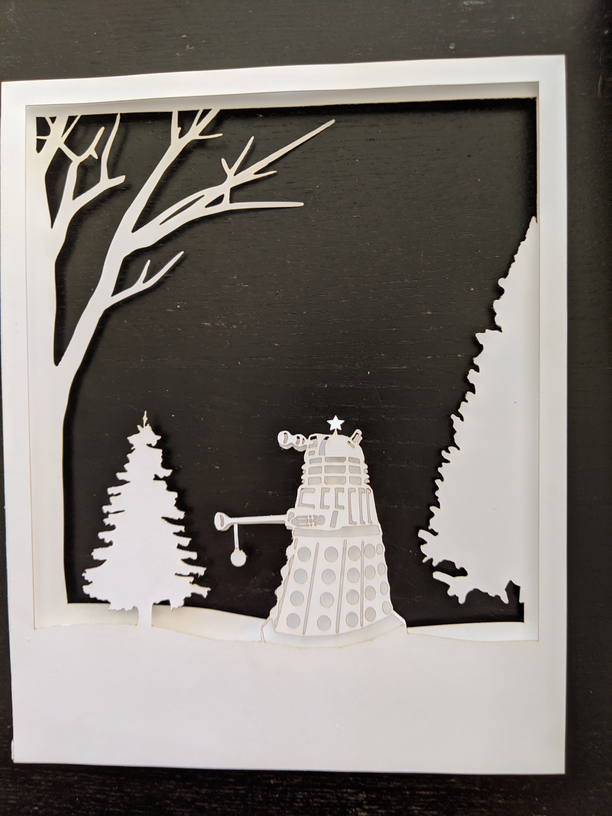
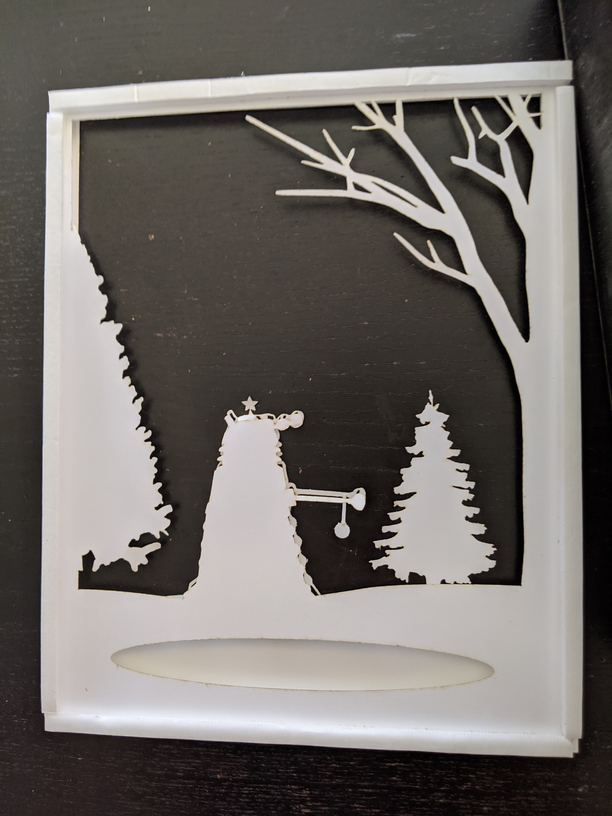
This is the second and third layer. The “front” Dalek with all the holes cut out was flopping forward so I attached him to the solid Dalek cutout behind. You can see on the backside that there is a hole cut in the third layer. This gets hidden by the hill in front of it but allows more light to come through between the layers.
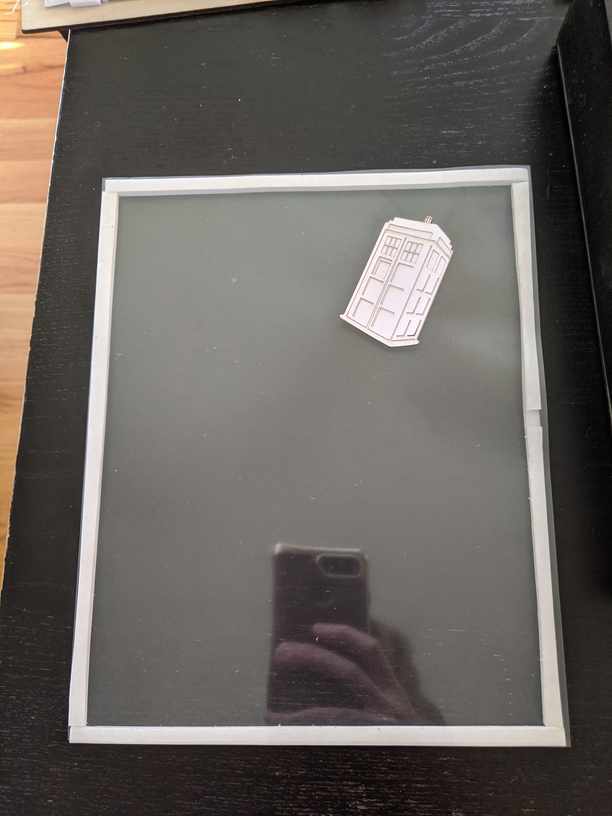
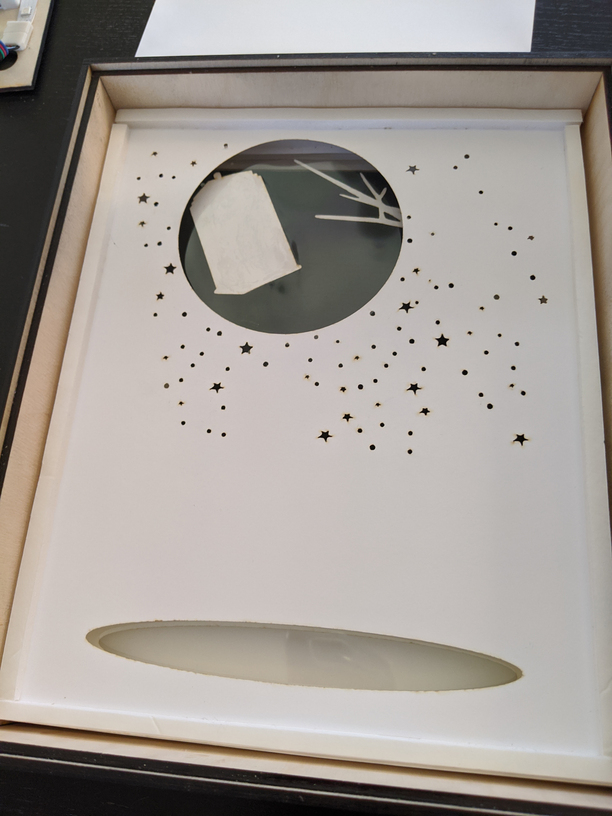
This is layer 4. I wanted the Tardis to “float” in front of the moon so I glued it to a transparency. It’s actually two layers…a silhouette of the Tardis and then a second one with cutouts for the light to shine through.
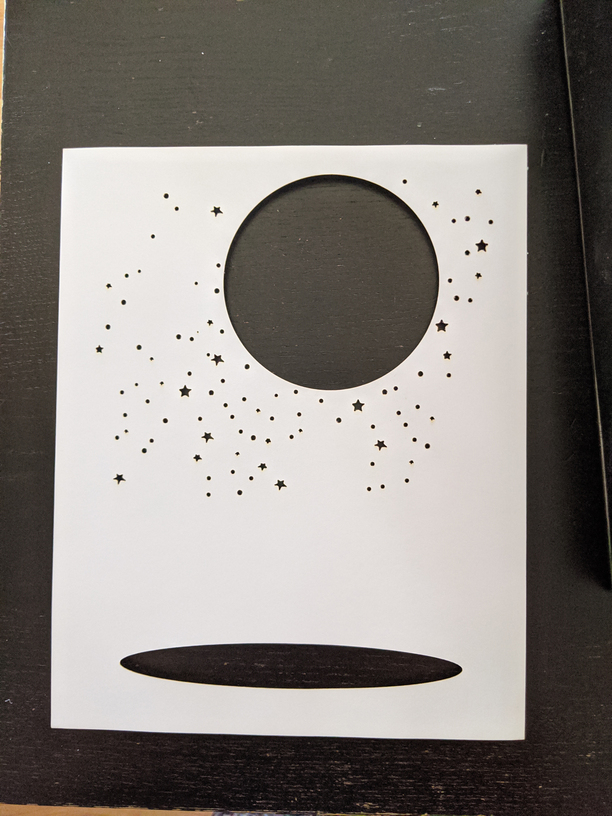
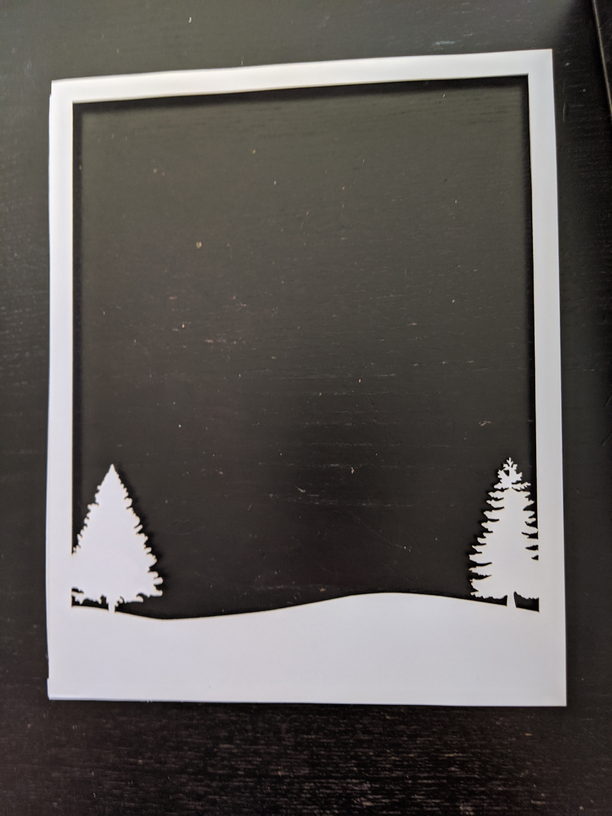
This is the last cut layer. The moon and stars. Because I don’t want to be able to see the LEDs through the moon, I also put a blank piece of card stock behind this without spacers.

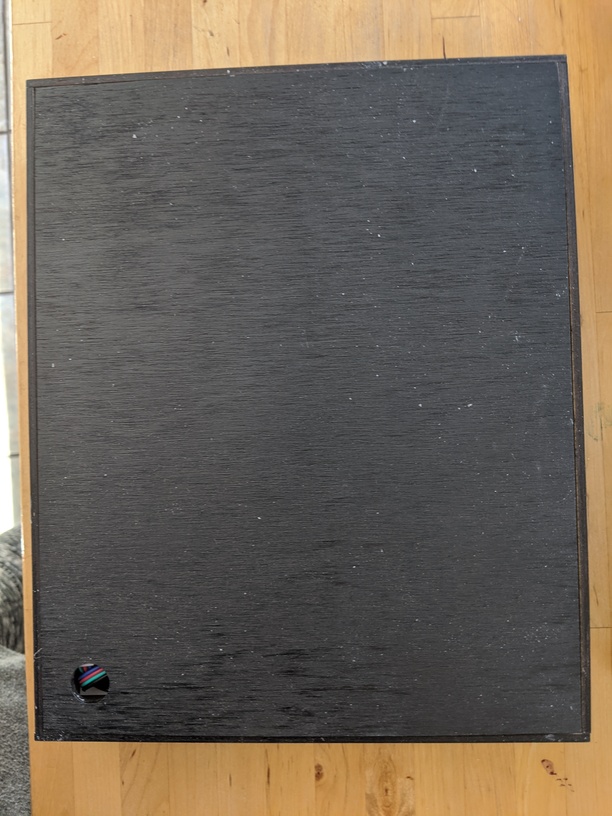
This is box from the back with all the layers in. Second pic is all layers plus the blank piece of solid card stock. Here you can see the space that is left for the controller, light strips and connectors.
I hope that cleared things up but if anyone has more questions, leave them here or PM me ![]()
13 Likes
This is so awesome! I have been wanting to make something like this but did not think of using card stock. What were your laser settings?
Thank you so much for posting pictures!
1 Like
Welcome to the forum, @phillip_hernandez!
One of the rules of the forum is that non-PG settings can only be discussed in the Beyond the Manual area. If you do a search over there for “paper settings” you’ll find some good suggestions for getting started. 
Thanks for the info.!
1 Like
Phillip I will PM you the settings I used for this project.
1 Like
Thanks Traci! This helps allot! I see your strips are what I call foam core, or foam board. So from what I can see it’s 4 layers of foam core strips and the sheets that make up the total picture. The frame will need to have space to accomodate that thickness overall and still leave space for the back panel with the controller and the lights (shadow box frame?). I liked the use of the transparency to make the Tardis seem like it is floating. You also answered my question when it came ot the elongated oval on the bottom (to allow for more light to come through)!
This is very neat!! Thank you for sharing the details!!
1 Like
Was there a picture of it lit? I see the picture of your holiday card, but that isn’t the lit picture.
I’m glad this helped! I am currently working on a series of video tutorials on making these boxes. Most will concentrate on how to design them…but I will also do one on putting them together. There are a couple of large communities on Facebook of paper cut light box enthusiasts.
1 Like
The very first picture in this post is the box lit up. In case it’s lost in the shuffle, here it is again.
5 Likes
So cool!!! Love it!
Thank you for posting your steps. I love what you have done. You have given me lots of ideas of things to try. I have what may seem like a silly question but whenever I have tried to build a box frame from wood with my Chop saw my measurements are always off. Can you tell me your specific sizes you used when you did it with the Glowforge.? That way. Can try and just glue together. Thank you. Again, what you posted is inspiring.
1 Like
Can I also get in on that, setting-wise? I have a ton of cardstock I’ve scavenged specifically for doing light boxes I haven’t tackled yet - any leg up would be appreciated.
Also: this is a fantastic project, and beautifully executed!
1 Like