I’m intrigued by this. A couple points to make:
-
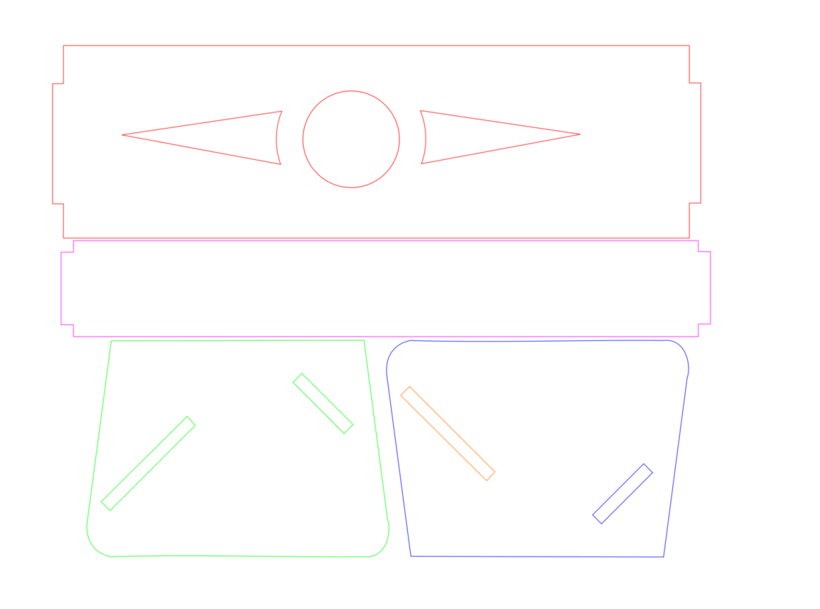
While you can see in the design better the shape of the object you want to cut, for ease of use in the Glowforge it saves you a step to make sure your shapes are not filled. A filled shape when imported is seen as an engrave. You can convert it to a cut, but it is an extra step.
-
I would designate each of these with a different color. that way as you place the design on the materials, you have better leeway to choose grain patterns and other things like fitting in shapes. I’ll demonstrate that below.
-
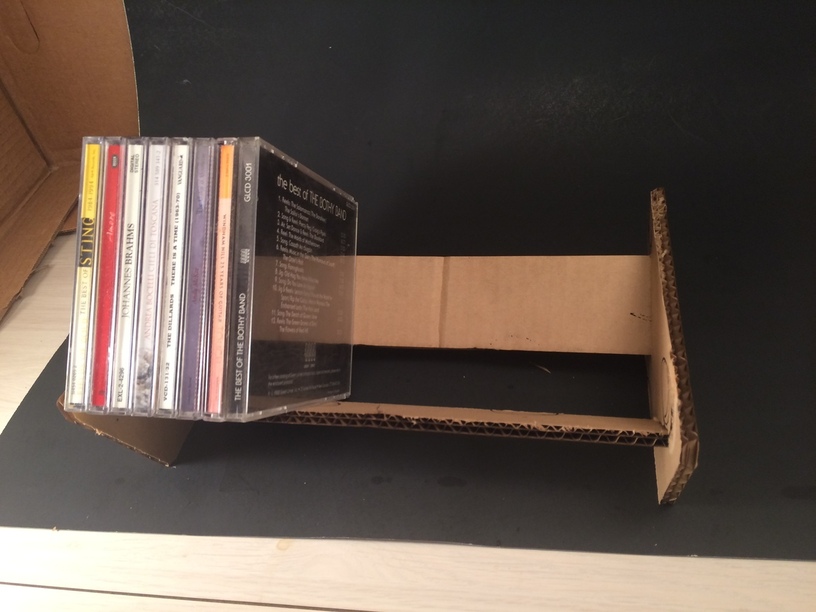
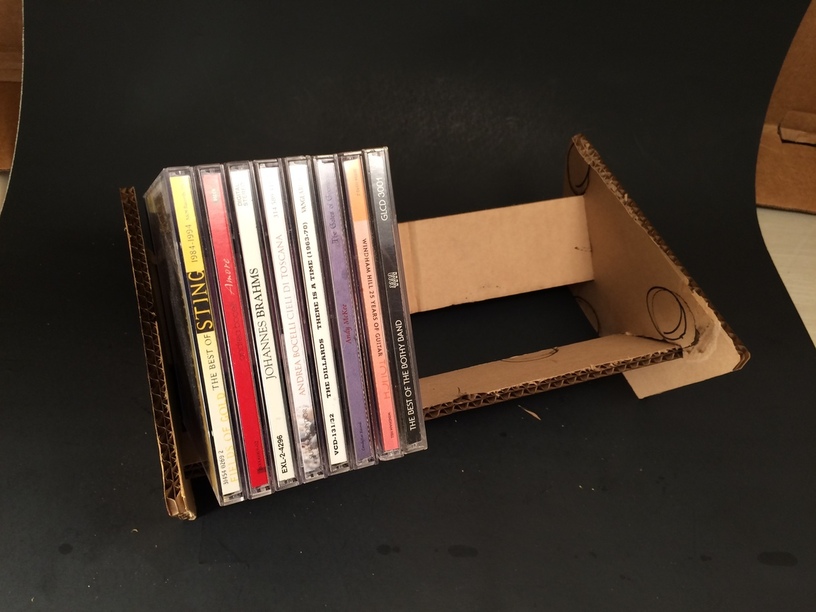
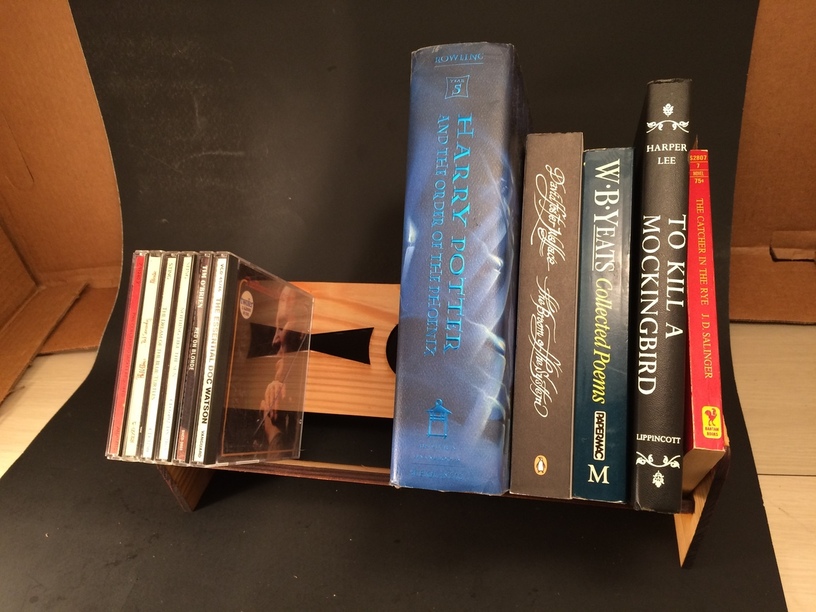
It worked just fine as it is. I just left the cardboard I had in the bed from an earlier test on bed image size and used it. It was 1/4 cardboard so it fit your design perfectly. I didn’t have enough power and slow enough speed so I had to finish with a box cutter but it still worked. I was wanting to test cardboard and haven’t done much work with it at all so this was a ten minute job from importing to finished print. Took a couple minutes to through cut the cardboard with a knife. Now I know a better range for cutting cardboard.
I liked the design but wanted to try to re-position the cross slats to better hold taller books, use tabs to insert in the sides for better structural fit and reduce cross sway, and also add a decorative element just because.
I had some .265" white cedar I had planed and wasn’t quite sure what I’d do with it since it is somewhat thick for a small box. This seemed like a perfect application of the design.
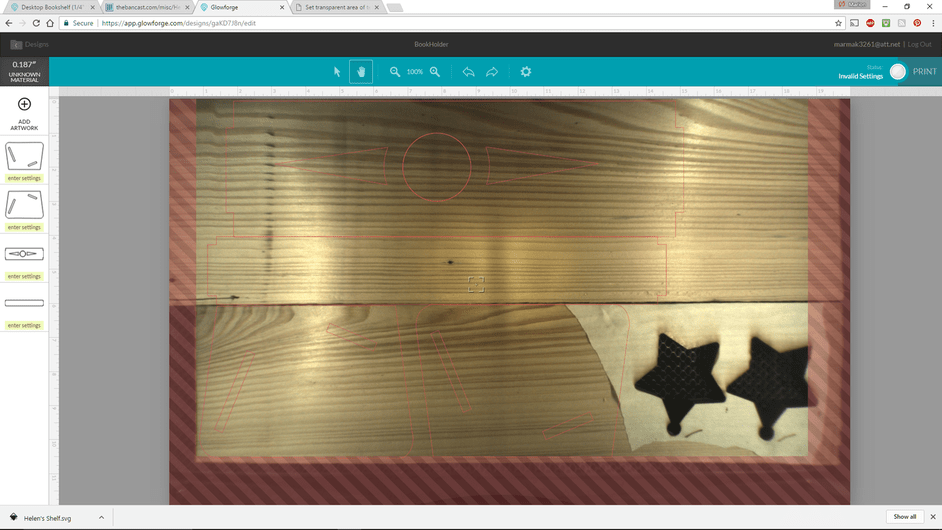
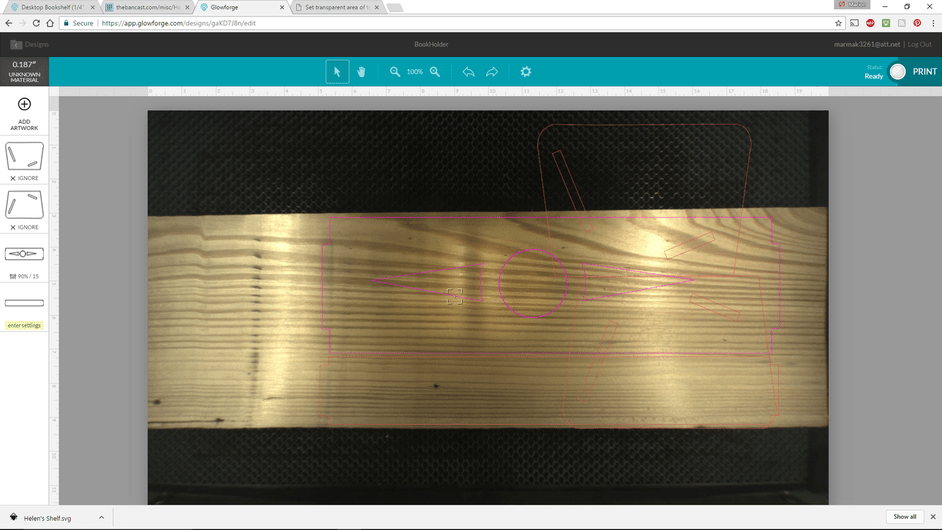
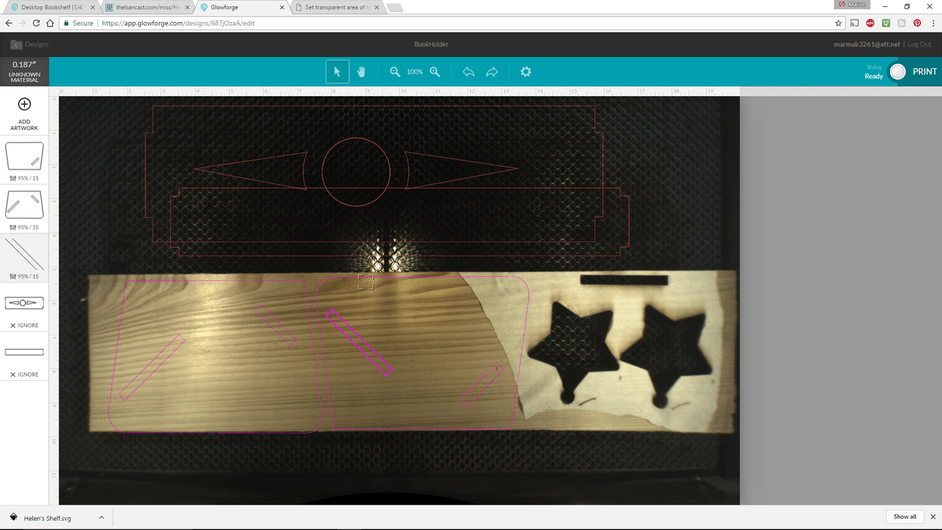
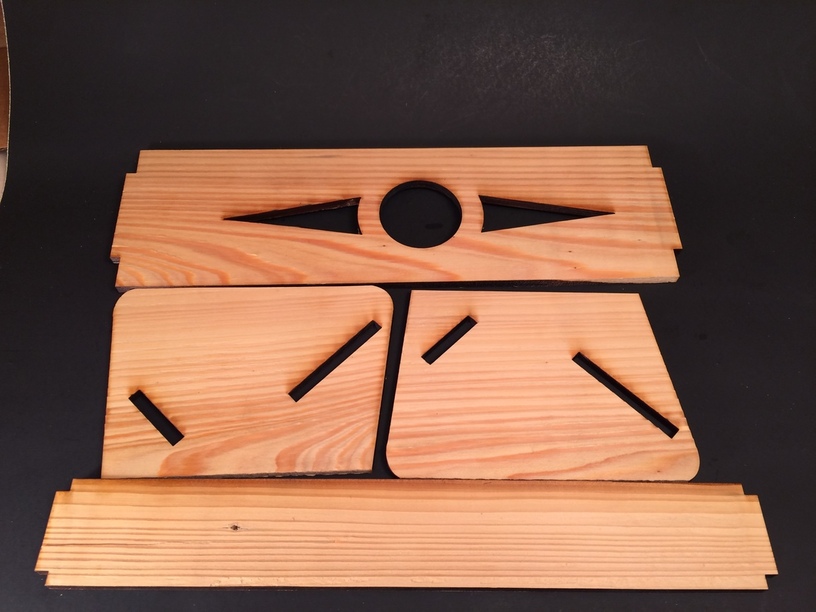
Here is what I came up with. I made each component a different color for ease of placement. That was important because I couldn’t do the whole design in one shot even though it exactly 10.5 inches in the design and I had about 11" of material, it just wouldn’t all fit in the window at once. So close and I tried to design within limitations but for now sticking with a 10 inch tall design will fit fine, even about a 10.25".
In any case it allowed me to make the cross braces first and then do a test cut on the pocket for the tabs.
Cut perfectly.
Then the side. I kept one of the pockets a different color so I could just print that at some waste point and then reposition for the full cut. The test cut was spot on to start with a nice snug fit so I didn’t need to adjust the design at all. Note how the one pocket in the design is highlighted and the test pocket that I had cut it on the top right of the wood between the stars.
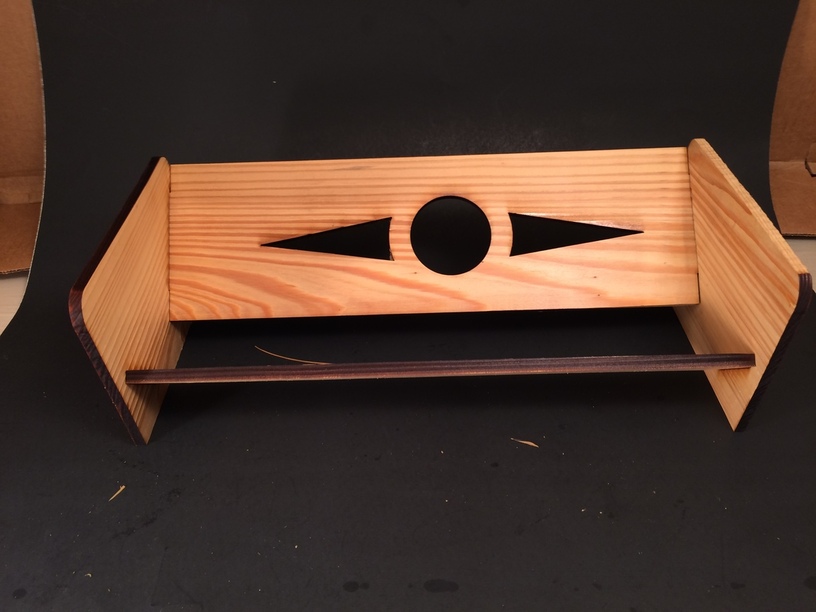
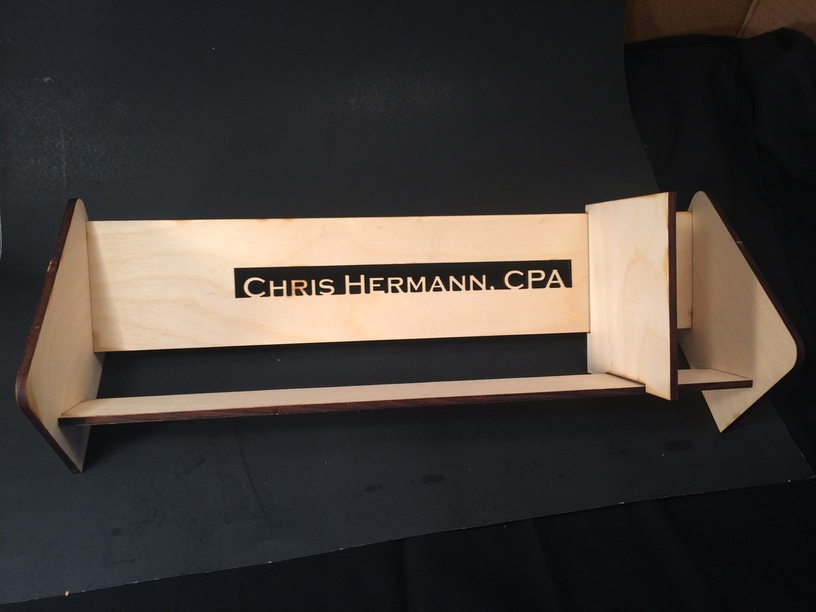
Here is the finished book holder.
Of course it won’t be a MakForge original without some type of flaw. Note I missed the center of the board in placing the circle. Lost my place on the grid in Inkscape.
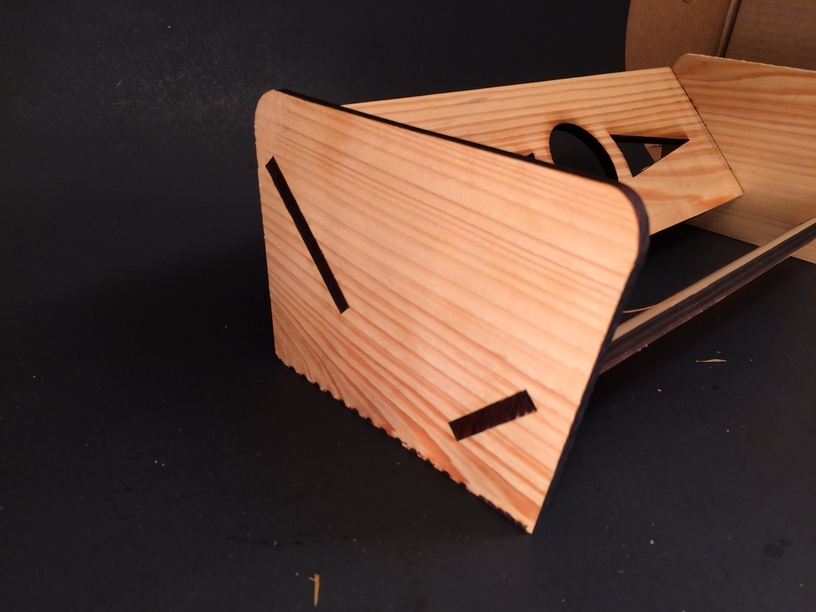
Pretty good work on the tab dimensions. One is a bit proud but that is because the sides are not perfectly planed to a constant thickness. You can feel it more than see it.
I kind of like the rough look. Might only need a sealer.
So when you see a design and immediately know it will work, intrigue you and be a good thing to produce that is practical, it’s pretty cool. @thatsmytrunks deserves a big applause for drawing attention to this simple design that the Glowforge can reproduce perfectly.
Holds the books and CDs just great and doesn’t seem like it would tip over or sway even without glue.
BookHolder.svg
Would be a good design for parametric to use in different materials. Some day.
So this took about an hour and a half mainly because of the documenting. Tomorrow I need to get to that compass rose and the inlay.
 ), but I’ve got a design based on a small bookshelf that my grandmother had sitting next to her bed for as far back as I can remember. I don’t have access to a laser cutter, but I believe my math is all correct on this.


