I’m working on something similar, but not dice. My problem that I’m really hoping you solved is this: how do you get the dice aligned properly for the laser? I’m really hoping you have a solution!
Thanks again for sharing this. It’s come in handy, allowing me to create a permanent jig to facilitate reproducible results in production runs.
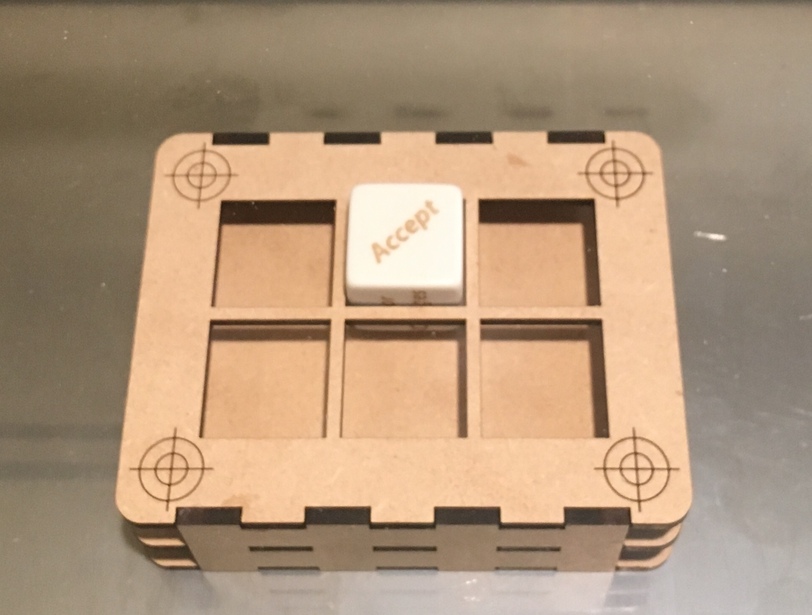
I added fiducials to the top that match a set in each engraving pattern. With the improved calibration routine, I can get pixel-perfect results every time.
10 Likes
Exactly what I’ve been thinking of doing
Thanks for sharing this, My newly married nerd kid will love these for their D&D night
1 Like
I can generate new ones when I get home tonight. If you give me dice dimenstions and required size I can create a custom one.
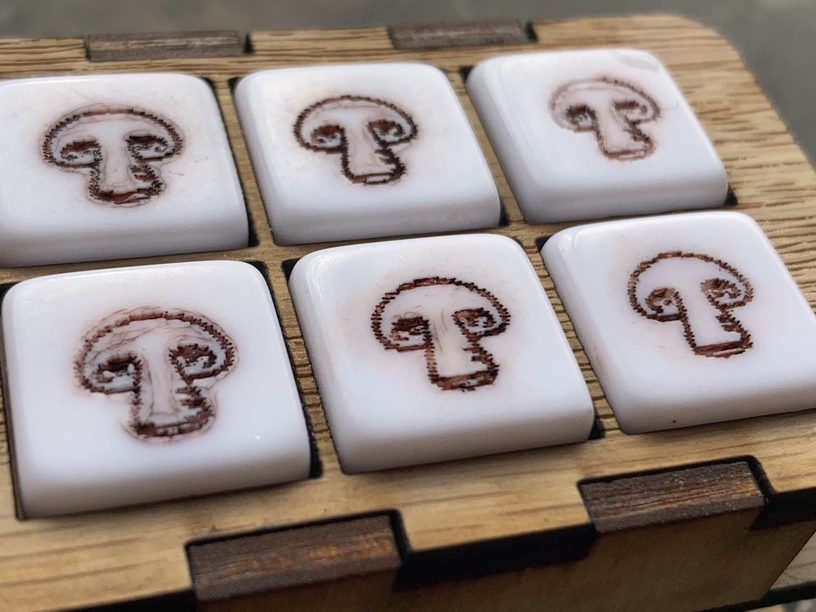
@peter1 This is fantastic. I used it as a base for finally delving in and learning Fusion as well, and think it’s totally going to be worthwhile. Appreciate you sharing! I’ve created quite a few custom dice using this already.

How do you use those for a calibration routine?
- New User
Thanks!
The fiducials on my jig aren’t used by the GF calibration routine, but after calibration alignment is accurate enough that I can visually align the marks with those in the file.
2 Likes
Actually because of a game I happened to play this weekend I had a new idea for registration. In the middle of a jig i leave a cross- shaped cutout with registration marks. Then print multiple inserts. Then i can have a simple light cross shaped score as an alignment test.
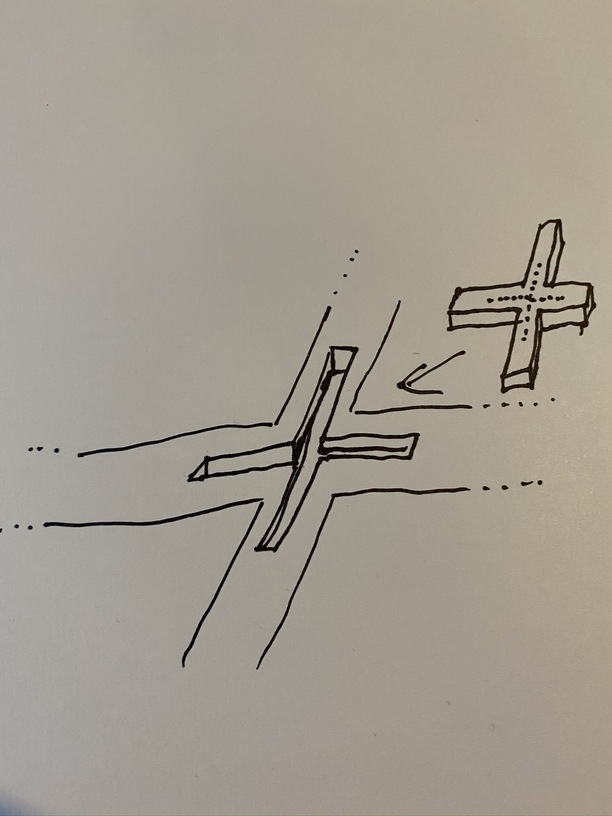
How do you use the cross to line it up?
See how far off it is and adjust your print?
If my score is off to the left a but, how do I manually adjust it?
Sorry for the ignorance and Thanks!
Yes… do a test cross cut and see how far off you are. If you need ridiculous precision then you can use a test dial indicator to adjust position to physically compensate. I wouldn’t adjust placement in software after that cut. You could probably use the insert two or three times. Actually one more enhancement … on the insert have a dotted centerline plus adjustment lines at regular tight intervals “radiating” outward… at whatever spacing makes sense.
1 Like
Hello! Thanks for the file! I’m not familiar with Autodesk nor any CAD software - I installed it though and managed to update parameters to meet my needs; I can’t seem to get the exported DFX file to open in either Illustrator or Inkspace… any suggestions? Thanks!
That is inappropriate.
The designer has already generously provided their file. If you don’t have the knowledge to utilize it, I suggest you start another discussion in an appropriate forum on how to work with file formats, not expect them to provide personalized guidance or a different file in their “gallery” thread.
Per the forum guidelines:
Designs take work and have value, and when you ask someone to give you that value for free, you undermine their work.
How is it inappropriate when in the same thread he himself offered to export as SVG? But I’m glad someone replied because it reminded me to follow up on this thread to say “nevermind” - because after being on other forums actually and some YT videos, I figured out how to do it myself. So yes, I very much appreciate his time and generosity in providing the file, but again, I wasn’t asking something he hadn’t already offered.
This is fantastic! Did you incorporate the kerf value into the finger joints?
juagutie… I’m glad to hear you figured it out yourself. I’ve had a busy week…month… year… so not been able to check the forums. I did offer so at least from my side you weren’t out of bounds.
ben_marton… In 360 I’ve started using their built in laser export and that allows for kerf. It’s a complicated process so I’m not sure i recommend it for everyone but it grants more flexibility for materials in their manufacture component. (a reasonable tutorial video here: https://www.youtube.com/watch?v=2MfYN7sUF7w
Before that i was using the plug made for the Origin shaper and that was easier.
https://apps.autodesk.com/FUSION/en/Detail/Index?id=3662665235866169729&appLang=en&os=Mac
Thanks,
Peter
I just want to also say thanks for sharing your design and extensive know-how. I am gearing up to engrave some custom 16mm dice, and this information really will save me from wasting a lot of blanks figuring it all out.