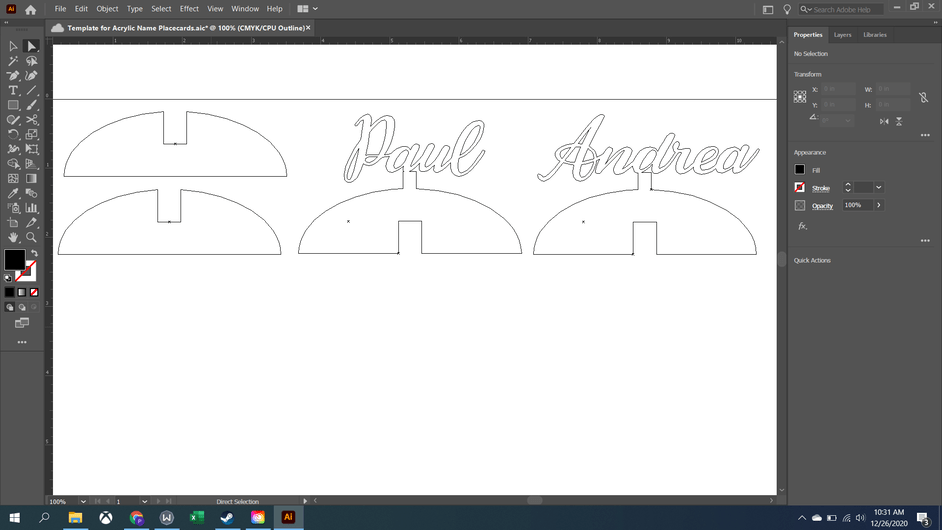
I’m trying to make some place cards for wedding tables. This is one of my first goes at using Illustrator, and after a bunch of fits and starts, I’ve designed something that should (in theory) click together nicely. Hopefully. We’ll see.
But I was wondering - let’s say I wanted the names here to be engraved, while the rest of it was cut out. Or, maybe I wanted the whole thing engraved, just to give it that cloudy-white engraved acrylic look. Is there any easy way to do that? Thanks!
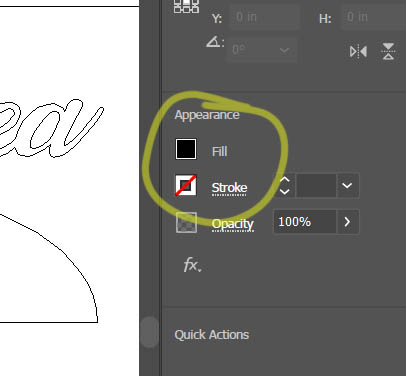
Vector lines are cut/scored and filled areas are engraved. When designing in Illustrator keep in mind that the Glowforge recognizes colors rather than layers. Make different parts of your designs different colors so that you can separate them in the Glowforge interface.
See where I circled. One of the most important things to learn is that if you have a color set to FILL (except for white) it is going to engrave (no stroke), but if you have STROKE set to a color it will Cut or Score. Score is just a lower power cut.
So how you have this set now it is going to just engrave the whole thing.
You will need to change your design to have a FILL name and then a STROKE line around the whole thing to cut it out. Clear as mud?
But you can also change the path settings in the GFUI. The red could be set to Score and the black to Engrave if one wished to, as long as they are closed shapes.
More to the point, @morehouse.a, do you know that you are looking at the Outline view in AI?
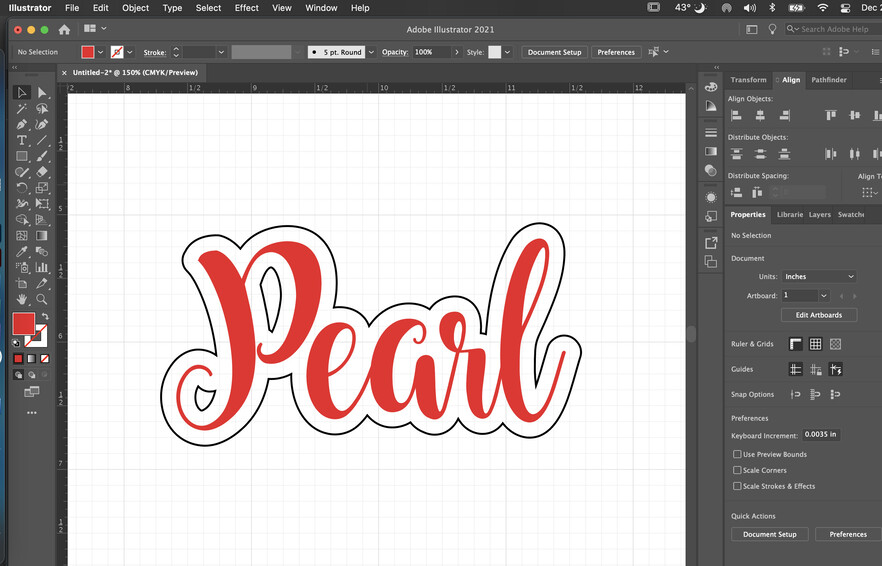
Do the text again, but make it a solid color (and Make Outline so it is not longer text)
Overlap your solid letters onto the cut out design.
Make sure they are different colors so you can set the Cut and the Engrave where you want.
Alternately, get some spray paint, mask the bottoms and color spray the names. Just make sure they have a good amount of time to dry so they don’t smell. Bonus, this would be incredibly faster.