Engraves and Scores go off path when copied and pasted in UI

I was referring to your statement that the UI doesn’t support shaded fill vectors. The OP said they are gradient fill PNGs.

The issue here is that the UI is screwing up copy/paste functions. That’s a problem. I don’t see the relevance of questioning design choices. You’re just adding a lot of unnecessary noise that distracts from the actual problem.

2 Likes

Ignoring the non-sequiturs, eflyguy may be right about the raster.
I’m pretty certain I rasterized those layers (it’s been a while). I had certainly read and knew that Glowforge can’t handle vector fills, but when I downloaded my own PDFs above, the gradients in “Second take” are definitely vectors. The ones in “First take” look too clean to be bitmaps, but are acting like bitmaps as they don’t have paths and are ‘images.’
If they are vectors, it is interesting that one iteration of a vector gradient fill comes out perfectly on this project. And as eflyguy so eloquently put:

And if they were actually bitmap, then:

So the tests I need to do, to get this straight, are getting a little out of hand.
I won’t be able to update here for at least 24 hours.

First test though is to download “First take” Object > Rasterize the gradients in Illustrator, save as an SVG and upload here to see if the bitmap gradients appear in the forum:
First take - RASTERIZED
“Second take” not rasterized, so full vector gradient fill:
Second take - VECTOR
But maybe the forum removes all gradient fills: vector and bitmap? I dunno.

Hang on. I’m running some tests in AI to see how to best tackle this problem. (Unfortunately I have an older version of AI than you do, and I’m seeing the clipping paths that always get introduced when i open a newer version file.)

I suspect some of the clipping paths might be causing the problems with the copying in the UI, but it will take me some time to test it and let you know if it’s because of my version of AI or because there are actual clipping paths in there.

Checking back tomorrow is fine, I should have finished testing by then.

1 Like

To add a further wrinkle, I’m running some side by side tests.
The first ones to run were the files that have been messing up, with 4 gradient layers on each side of the token. Those gradient layers are likely bitmap (I designed this a month ago, so it’s hard to remember), they act like bitmaps in Illustrator, but are quite clean in appearance in Illustrator like a vector.
I did 8 copies and pastes within the GFUI and they all turned out perfectly so far:

So the issue either randomly happens, or only when there are significantly more copies and pastes, like the 44 that I have done a few times to get the error:

Okay. Sorry, @eflyguy, I was kinda crotchety with you.

1 Like

Definitely problems with the clip paths, which is a known issue in the GFUI.

Currently working out the best way to accomplish what you want to do with these in the least amount of steps possible. (Adding the little hash marks as a separate engrave will create more contrast across the darkened areas, but it bumps up the number of steps to deal with, which adds another layer of complexity, and it’s going to quadruple the time required to deal with each token.)

Sample shown below of not adding the hash marks as a separate layer. I’m thinking it will need to be split out. (But good Lord, it’s going to take a long time to process these.)

And it would help if I actually added the picture… :rofl:

Alternative view with lowered Pattern Density to lighten it up a little. (backside)

And final results of the backside at lowered PD. (Not as happy with it, but if it’s acceptable it will save you a ton of time and me a rework of the instructions I’ve already got pulled together.)

Okay, that was a slightly more complex problem than I realized, but here’s what you do…(and apologies if it’s overly basic, but in case anyone else comes along with lesser AI chops, I’d rather not have to type it all up again.) :smile:

I worked off of your Second Take - Full Gradient file. (You’ll want to use a single gradient as well, the more you add in there, the longer it’s going to take to create the base raster image for it. )

That file had issues with the clipping paths (which I suspect might have been what caused the distortion at times) and there are some cut lines in there that are expanded into Filled shapes, and one wide stroke Score that I converted to a Filled shape in order to incorporate it into the engrave.

It sounds worse than it is…here are the steps I took:

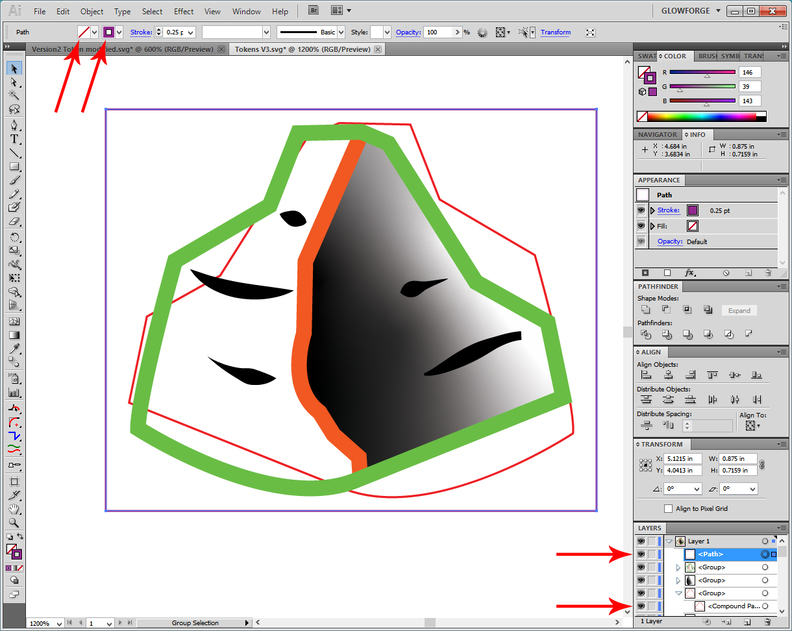
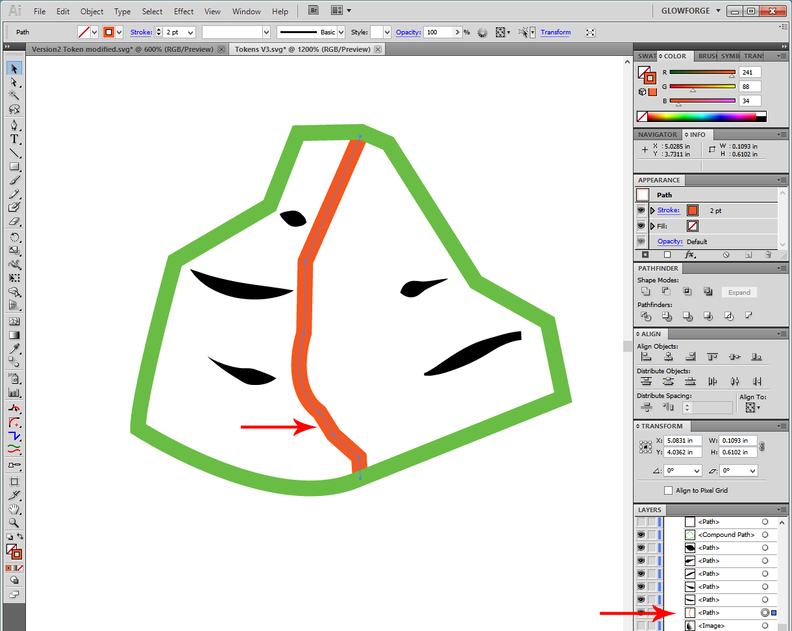
1. Corrected the Cutlines.
Ungrouped it, got rid of a couple of unnecessary clipping paths, and converted the two Paths shown into a single stroke path with no Fill. Those are the Cut lines so they need a Stroke color with no fill. (The rectangle and the reverse side cut line for the rock.)

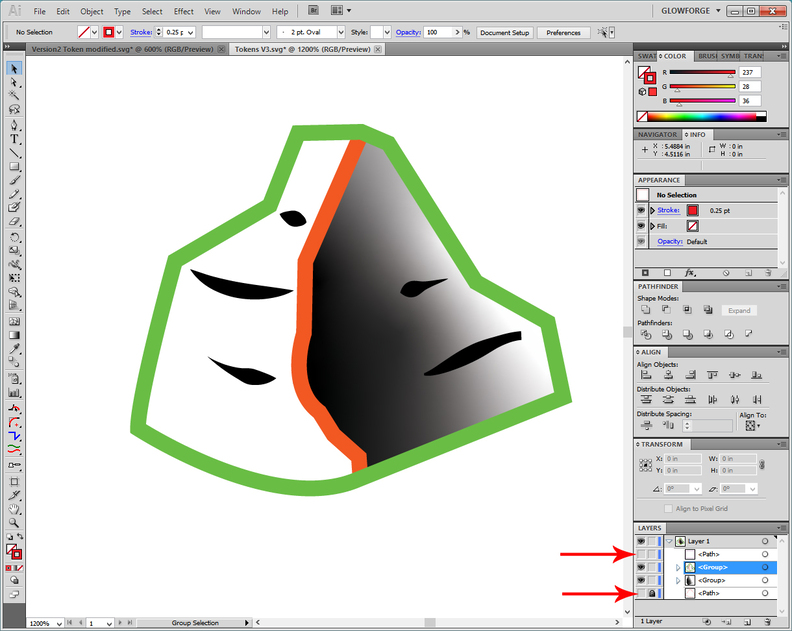
2. Hide Paths and Groups by clicking on the eyes.

  • Hide the Hash marks grouping for the front.
  • Hide the Cutline Paths.
  • Delete everything except the Red Cut Line out of the reverse grouping.
    (You don’t need it, you’re going to make one image, copy and flip it later.)

3. Adjust the Gradient under the Clip Path (optional)
You’re going to work with the remaining gradient next.
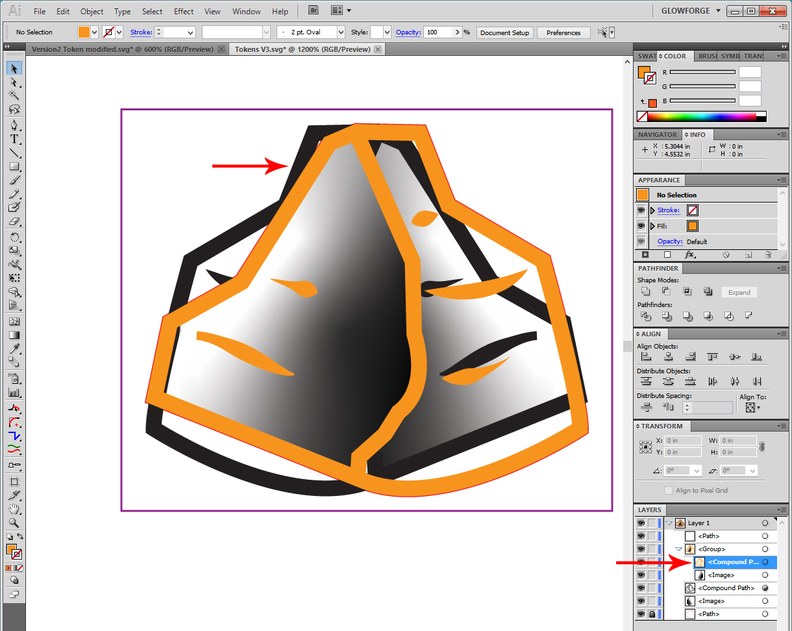
In the Layers palette, drop down the sublayers by clicking on the little arrow shown. Click the round radio dial next to the Gradient on the right to select just that layer.
While that layer is selected you can move the gradient slightly, or adjust the Opacity as shown to get a slightly lighter effect when the engrave is done.

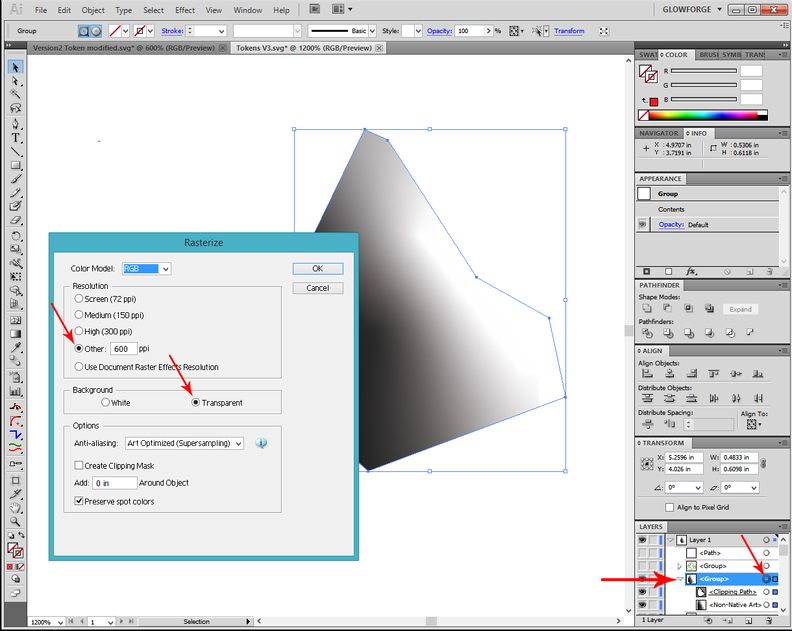
4. Rasterize the Gradient

  • Drag a selection rectangle around everything showing, or select the Gradient Group with clipping path and gradient.
  • Click on Object > Rasterize and use the settings shown on the popout.

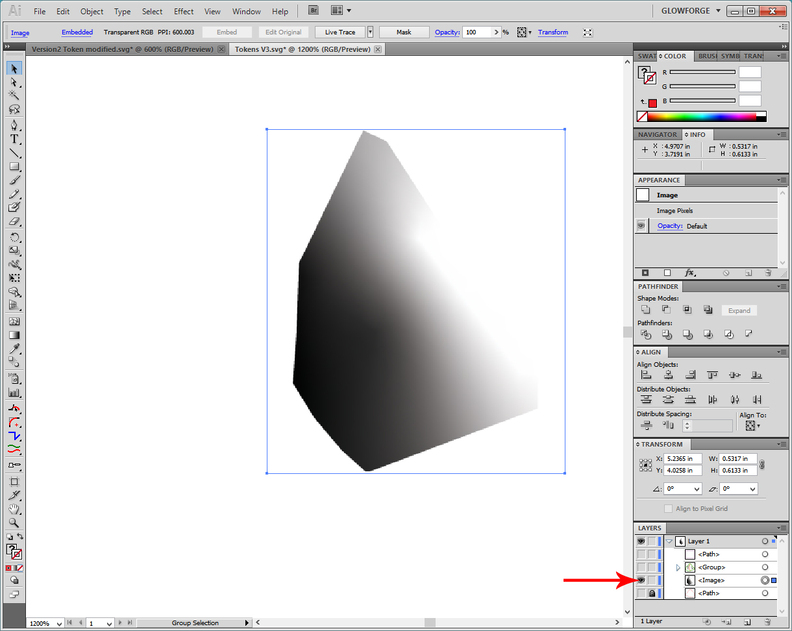
Notice that the group has been converted to a single Image in the Layers palette. (That’s the goal for the gradient.)

5. Convert Hash Marks Group into single Image as well.
The reason for doing this as a separate step is to give you more control over the darkness of the Engraves.

It tends to disappear into the gradient engrave if you don’t keep it separate.

  • Hide the Gradient Engrave. (Just work with the Hashmarks group.)
  • Display all the sublayers of the Hashmarks group. (Can Ungroup if desired.)
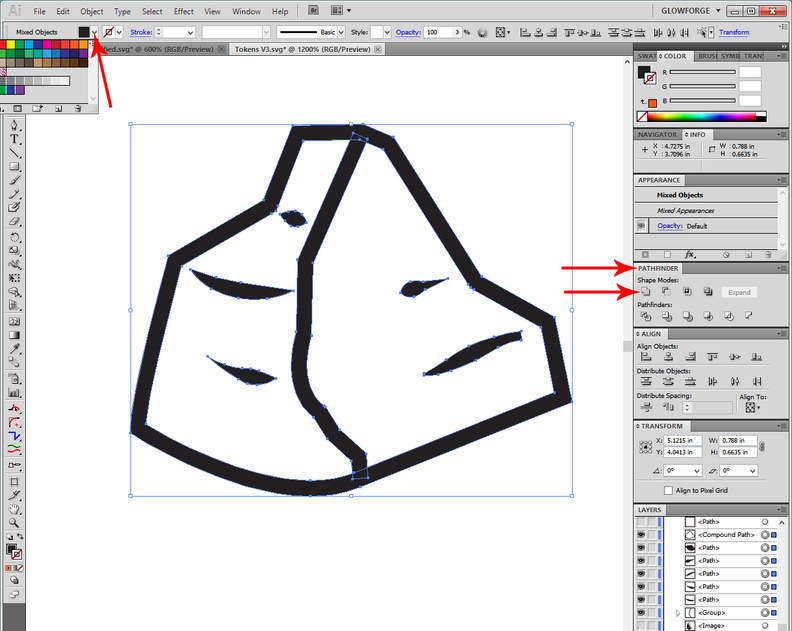
  • Select the single stroke line shown and expand it to convert it into a Filled shape for engraving purposes. (Object > Expand.)

  • Once you have that single stroke line expanded, select everything and give it the same Fill color, and no Stroke color.
  • While everything is still selected, unite the shapes by clicking on the Unite button in the Pathfinder palette.

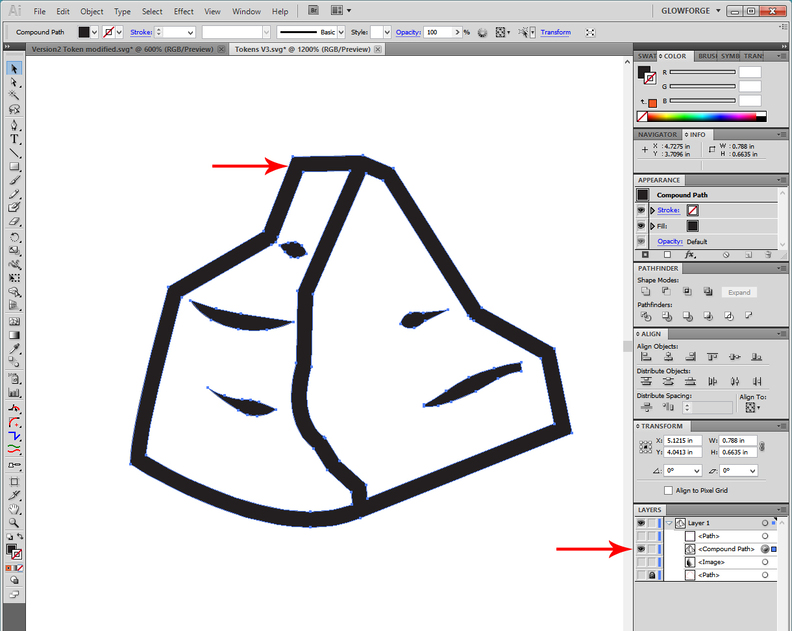
  • Turn all of the various filled shapes into a Compound Path by selecting and clicking CTRL+ 8.
    (Or click on Object > Compound Path > Make)

6. Here Comes the Fun Part. :smile:

  • Unhide the Gradient image.
  • Select everything. (the Compound Path and the Gradient Image)
  • Copy (CTRL+C)
  • Paste in Place (CTRL+F)
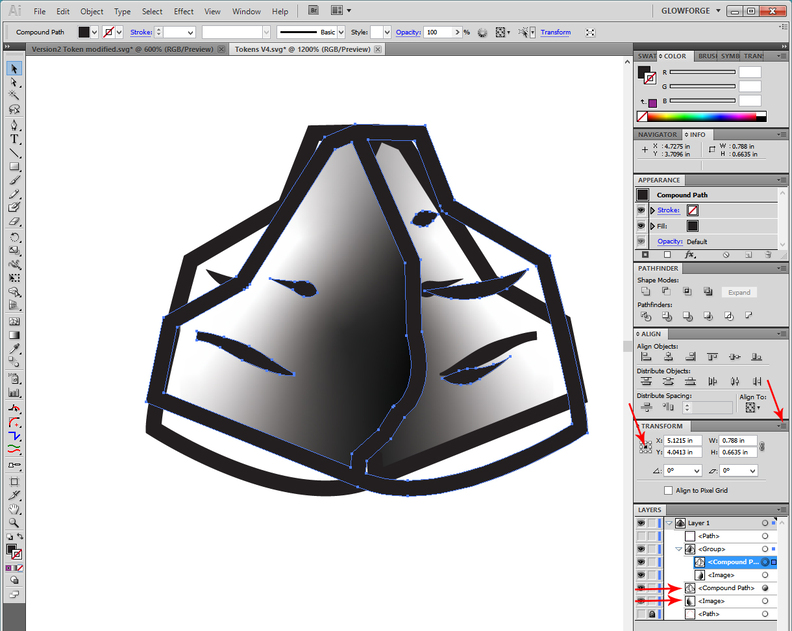
  • Flip the Copy.
  • (Make sure that you do not click off of the copy after pasting in place. Click on the tiny horizontal bars at the top right side of the Transform palette, choose Flip Horizontal. Also make sure that the Tic-Tac-Toe board on the Transform palette has the center position selected.)

7. Almost done.

  • Select the Compound Path for the reverse side engrave and give it a different Fill color.
  • Unhide the Cut line Paths.

  1. Save the File
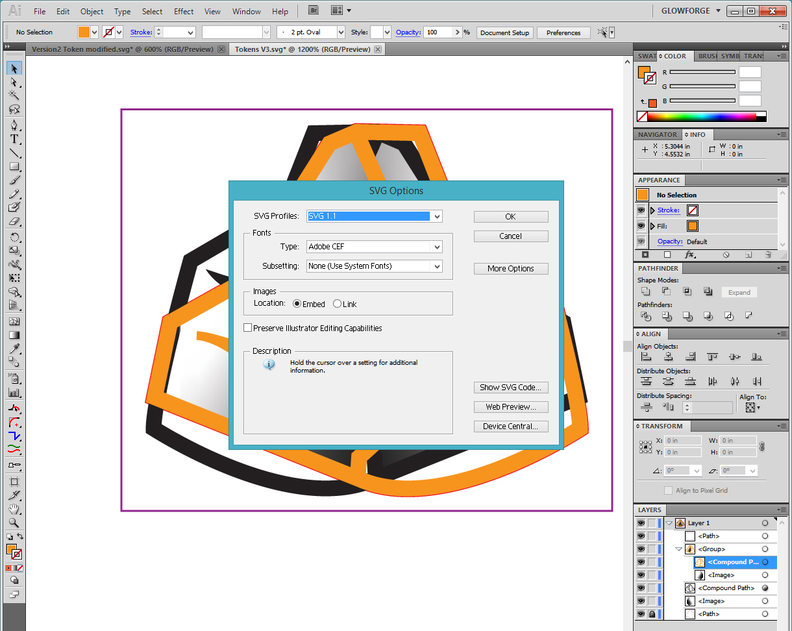
    Save As an SVG file using the settings below:
    (Make sure you click the Embed Images dial in the popup.)

9. In the GFUI:
Drag and drop the svg file you created onto the Dashboard so that it opens up in the interface.
Process the file in two parts:
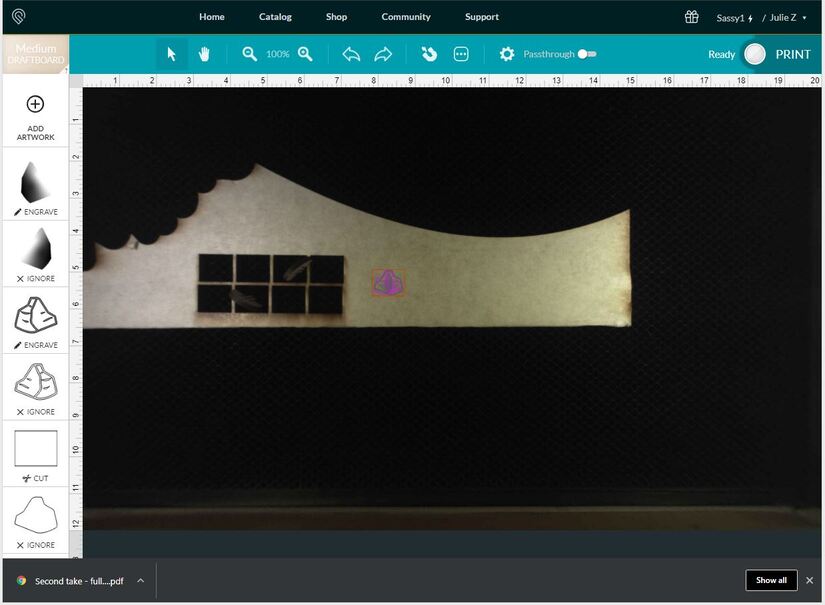
First Part:

I would use Draft Engrave settings for the gradient, and SD Engrave settings for the hashmarks.
Set the parts to Ignore as shown on for the first side processing:
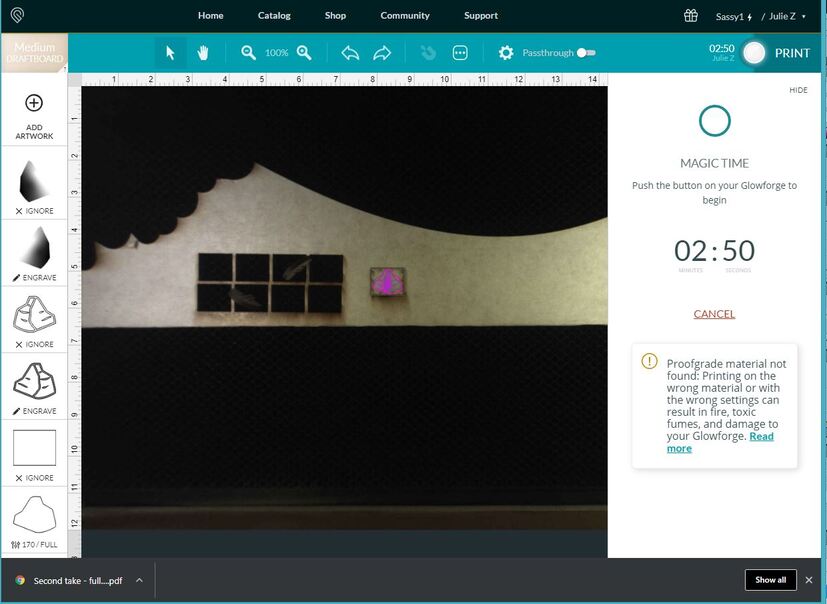
Second Part:

Flip the rectangles over on the bed and then…

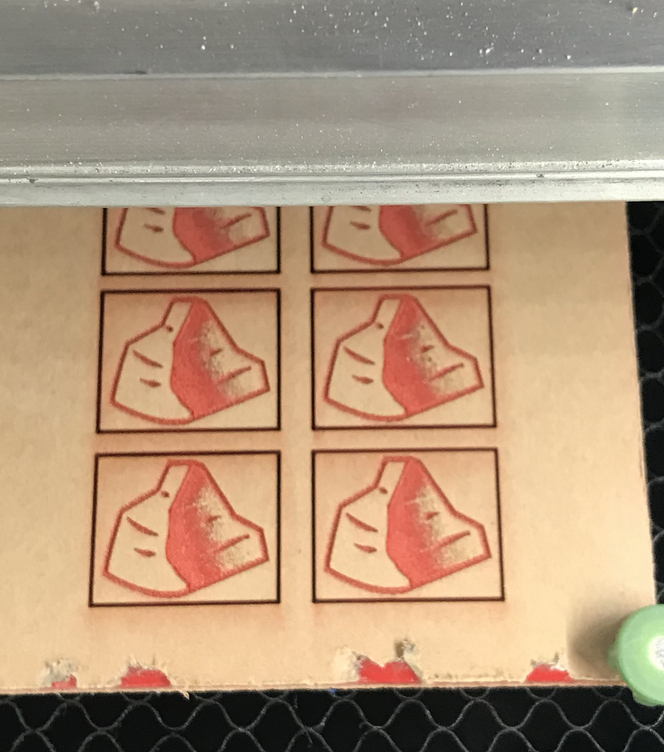
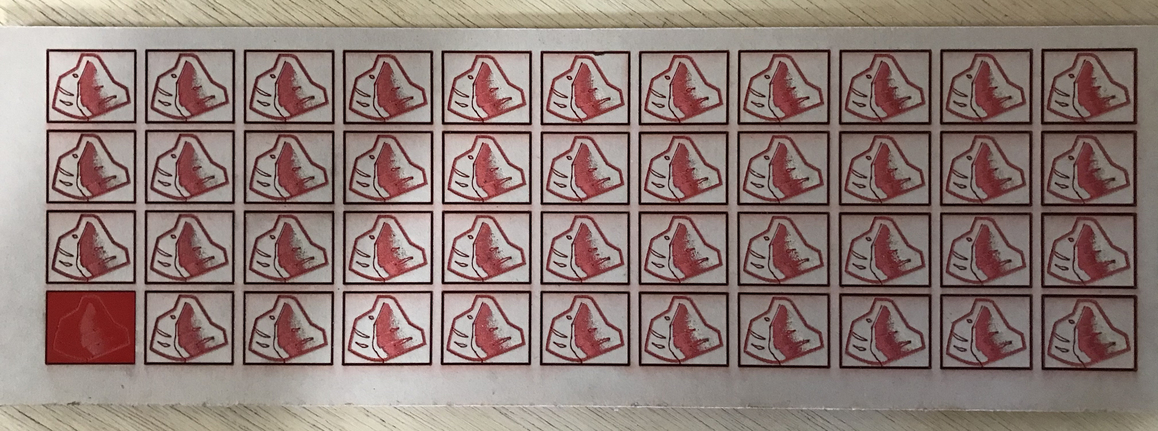
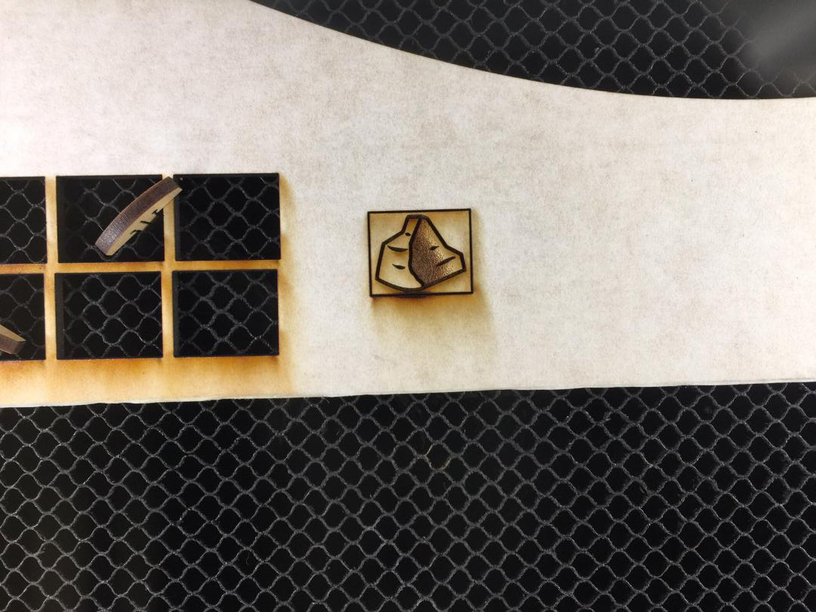
I think this gives a nicer result than the earlier tests I showed photos of before. If you want to speed things up a little but get a lesser result, you can combine the hashmarks with the gradient when you rasterize it the first time.

4 Likes

You are amazing to work all of this out, document it and share with us. You are so generous, tenacious and talented. Thank you.

2 Likes

Happy to help! :slightly_smiling_face:

Yeah Jules, you are to this message board as the red cross is to a disaster zone. I’ve been an avid follower of your tutorials and posts, it’s great to get this help.

You state that the original copy/paste error could be created by clipping paths, but to my understanding of what a clip path is, I didn’t have any in my file. It was definitely a lot of layers, as I was playing around with scoring and engraving different parts to see what created my favorite look. Could you provide a laymans term or link for what a clip path is in terms of lasering?

I was also unaware that grouping things could create issues.
Thank you again for all the help.

1 Like

Hmmmmm…how to explain it…

First of all the initial clipping paths that I removed were not some that you had put in there, they were introduced by me opening your file in an older version of Illustrator, so nothing you did…that’s just the penalty I pay for not forking over more money on an ongoing basis to Adobe. :smile:

You did have two clipping paths in the file that limited the gradient into the shape of a rock. Clipping paths in Illustrator work like white masking over certain parts of a raster image…you normally create them by using a path outline to create the mask…it hides everything outside of that path. Those might have been done in whatever software you used to create the gradient, or they might be a function of how Illustrator treats gradients inside of a shape…I’m not sure. But the Glowforge interface is not set up to handle clipping paths, so by rasterizing it along with the image, it gets rid of the clipping path and replaces where it was with solid white raster fill, and that has the effect of masking the image the way that you want it to. Pure white pixels in a raster image are ignored by the laser.

So that’s why I did it. :slightly_smiling_face:

I’ve got that file created if you want it, I just wasn’t sure if you wanted to create it yourself so you could shift the gradient around to suit your needs.

Tokens V4.zip (68.9 KB)

1 Like

The gradients et.all in these files were created within Illustrator.
I can’t say we’ve sussed out a tell tale reason why the initial file failed on copy and paste, but it certainly has something to do with the file being complex and Illustrator and Glowforge’s relationship.
With that, I will go simplify and perfect my file (thank for the file offer, but practice makes perfect), pay the cat tax and end this support request here.


7 Likes

My preferred method as well! :smile:
(Beautiful kitty, and I have some taxes overdue as well…better get on that before I become the dinner.)

1 Like

I’m so sorry to hear that you’ve hit this snag, but I do see that there has been AMAZING suggestions made inside of this forum post.

It looks like you’ve got a couple of great steps moving forward, and have even already seen some improvement. Could you let me know if you are still running into the same trouble?

Also, we appreciate your tax cat contribution. On behalf of the support staff, thanks for making our day!

3 Likes

It’s been a little while since we’ve heard back, so I’m going to close this thread. If you run into trouble again, or have any questions, please post a new topic here on the forum or email us at support@glowforge.com and we’ll be happy to help!