I am curious how is this done? I found a butterfly svg but not sure how the back part of this looks engraved and the butterflies details are lighter ? Is this possible to do ?

5 Likes
So this is pretty straightforward, I think.
Step 1: paint the wood white.
Step 2: mask the painted wood
Step 3: engrave the dark areas
Step 4: remove the masking on the unengraved spaces
Step 5: cut the words out of a contrasting material (looks like a pink acrylic maybe?)
Step 6: glue the words to the butterfly
(likely) step 7: Take a picture and photoshop the result to make it look a bit cleaner than it is.
12 Likes
I am old and have new eyeballs (lens replacement surgery), but to me, it looks like this is a butterfly cut out of wood and then the details are cut out of acrylic and layered on top. Perhaps the patterns were scored in the wood to indicate where to put the acrylic pieces. And then the words are added over the top of it all.
2 Likes
Thank you, How do you have the dark areas engraved though ? It seems like the back ground is engraved? Like reverse?
Yeah. That’s just a matter of having the right image to engrave, or if yours is doing the opposite, use the “invert” or “negative” command in something like photoshop.
If you’re doing an engrave with a vector SVG there are techniques to “invert” the paths as well.
1 Like
Sounds like I need to google this stuff lol I have no idea about the inverting shoot ![]()
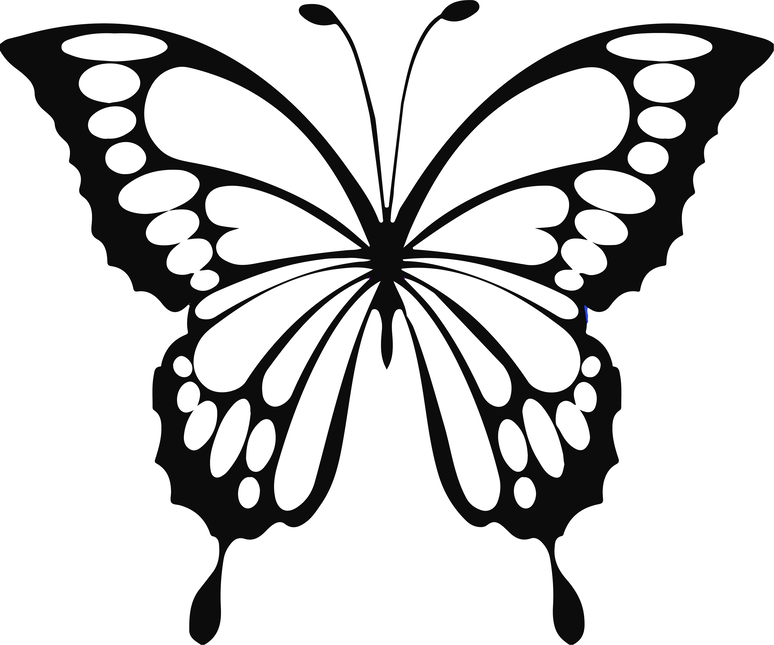
Like this butterfly would do what you’re looking for:
Whereas the negative of that image would not:
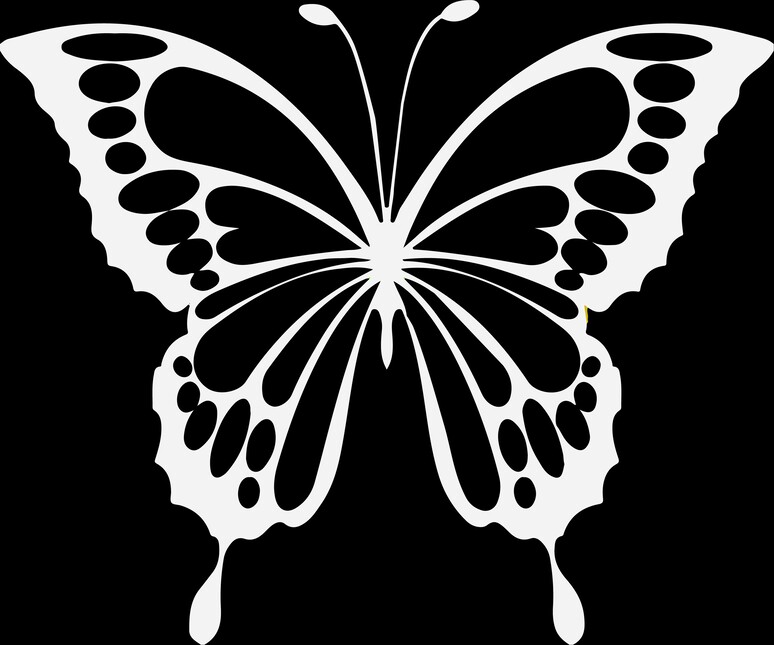
I’m simplifying a bit here, but not by much. Basically the laser will engrave away black areas, so if your image is the opposite of what you want engraved, invert it. (and of course also the outer black area is a problem in this example, you probably don’t want to engrave that area. Like I said, I’m simplifying)
3 Likes
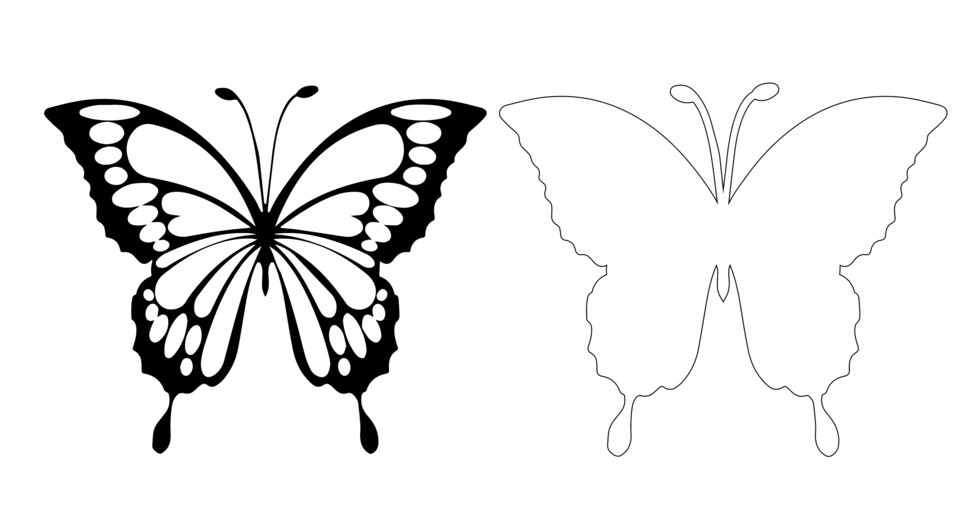
so do i need to duplicate the image and put it behind the black one so it cuts it out after it engraves?
2 Likes
Yeah pretty much. In the original example, they offset the silhouette by a thin bit to make a white border, looks nice.
I assume you used a trace function in your vector program to make the outline?
Also, btw, I did a quick google image search for that butterfly, I have no idea of its source or usage rights.
1 Like
I do not need the exact butterfly . I just need to know how to do this engrave feature or look ![]() thank you for helping
thank you for helping
1 Like
I do have another question. When i engrave mine looks so black. Is there a way to lighten the engraving part?
that butterfly svg is off Etsy for sale
That’s mostly a settings thing.
In general your engraving gets darker when:
- You increase power
- You slow speed
- You increase LPI
- You choose a material that engraves really dark (like cork and some others)
Do the opposite of one or more of these things and you can get pretty light colors. This looks like it was done in Baltic Birch plywood. Decrease power, increase speed, and/or drop LPI and you’ll get lighter colors. (Speed especially matters maybe more than the others for most materials.)
Heck (this is sort of cheating) some materials are inherently dark and engrave white. Slate, for example.
I mean technically that’s a light colored engrave, right? ![]()
3 Likes
Thank you for all your knowledge
If you do this setting you’ll see no engrave at all. Top speed minimum power won’t even get through your masking.
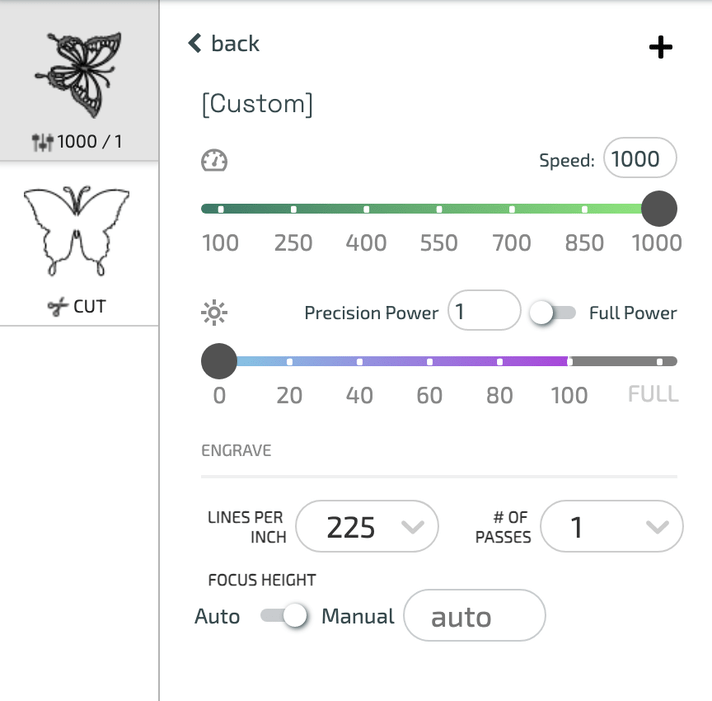
Since we’re talking about custom settings I’m going to move this to BTM per forum policy.
It’s a feel thing and subjective in terms of aesthetics, but 1000 speed and 25 power at 270 LPI is a good start. I tend to find that anything lower than 270 LPI starts to look rough or “jaggy”, and I prefer a smoother border.
4 Likes
I tried keeping that the same and lowered the lines per inch to 125 and it didnt engrave anything lol
Yeah 1 power will barely get through tissue paper ![]()
1 Like
Thank you so much
1 Like
No worries! Hopefully it’s been helpful. Post a pic of your results if you have a minute, I’d be curious to see how it works out.
2 Likes