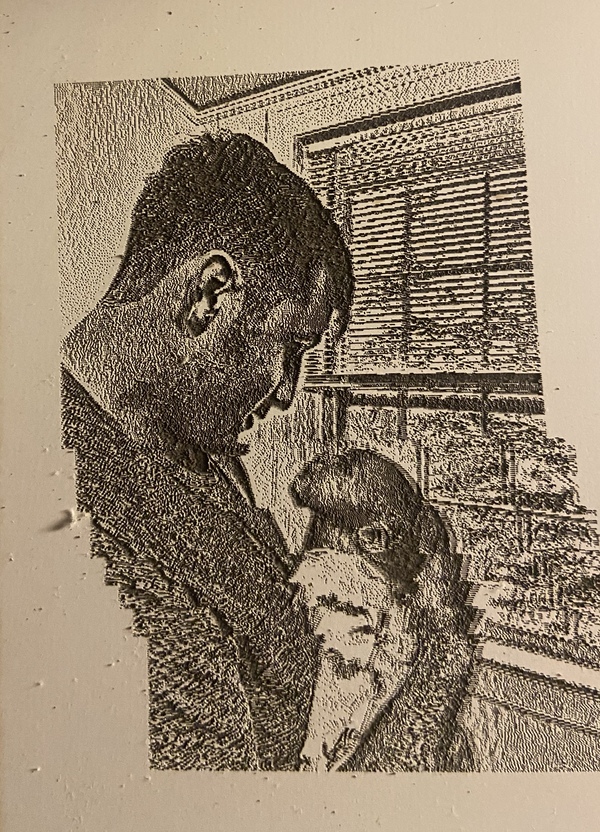
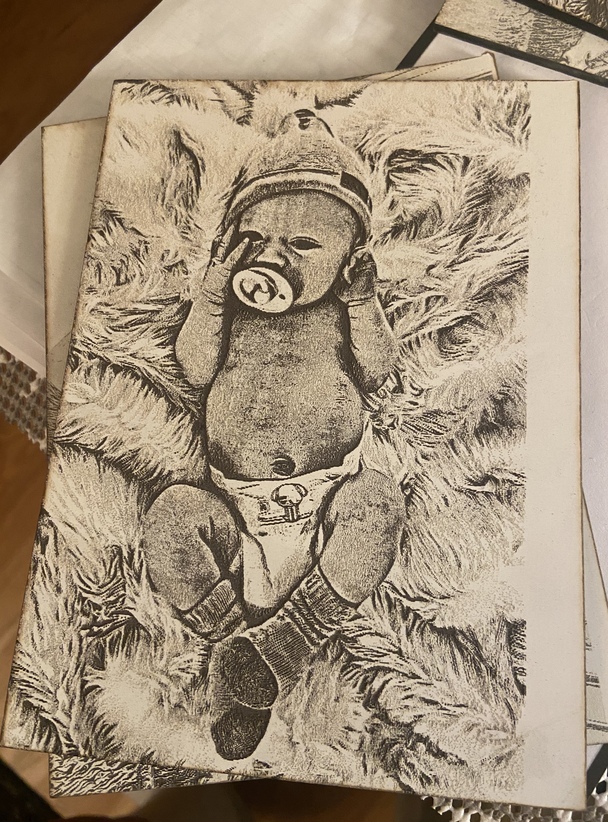
My engravings are shifting after starting a print. I am including two photos. The first one shows the whole engraving shifted to the left. The second shows the engraving started all right for about an inch then shifted to the left and then returned to normal after about two inches. If it was the belts why would it shift then return?
1 Like
It would seem like if the belt was loose then it would likely shift in whichever direction force was applied. Have you checked the belt tension?
2 Likes
This link might help
5 Likes
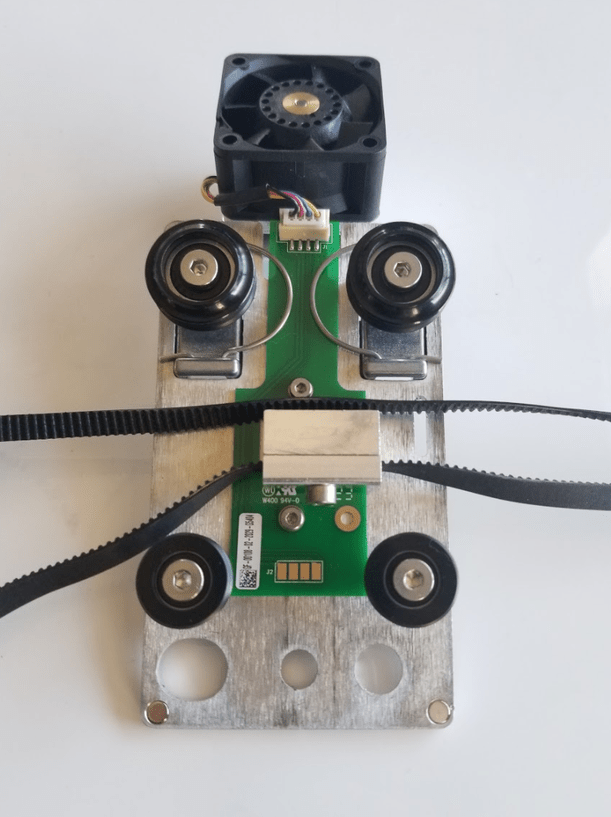
Could also be a faulty wheel on the gantry carriage in conjunction with the belt, jamming up and forcing the belt to slip. Remove the carriage plate and ensure all the V wheels are in good condition.
3 Likes
I tighten the belt under the laser arm and did another print. It came out straight but blurry. I then attempted a larger size of the same print and it started out straight and about two inches in the print stopped and the error message in the UI said it hit a bump. I did not see anything to clear out and restarted the print and it shifted to the right. When the carriage goes left and right i hear a bump sound like a car going over a small bump in the road. even when the machine is off I can move the carriage left and right but feel little bumps as I move the carriage.
I’d like to start by taking a look at your carriage plate and wheels.
Could you please do the following?
-
Turn off your Glowforge
-
Closely inspect the carriage plate wheels from the top for any cracks
-
Closely inspect the sides of the wheels for any cracks
- If you notice anything damaged or out of place, please take a photo and attach it to your reply.
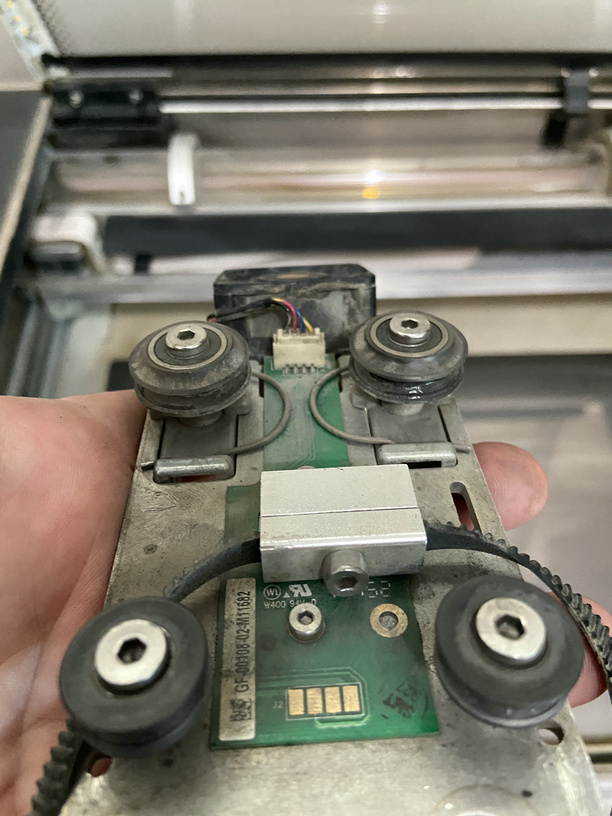
Try grabbing a few Q-tips, moistening them in vinegar and gently cleaning those wheels…looks like there might be a sticky buildup on at least one of them…don’t get it really wet, just moist, and careful not to drip on the electronics.
Thanks for the advice!
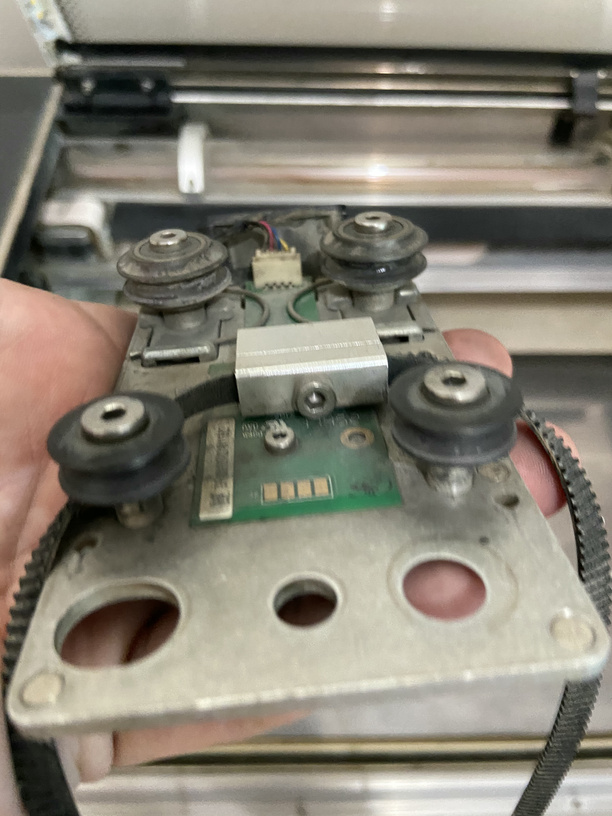
You might want to run a cloth dipped in vinegar and wrung out along the rear and front tracks for those wheels too…there might be some unseen buildup on the tracks that is causing it to stick. (Surprising how much crap can build up on those tracks.)
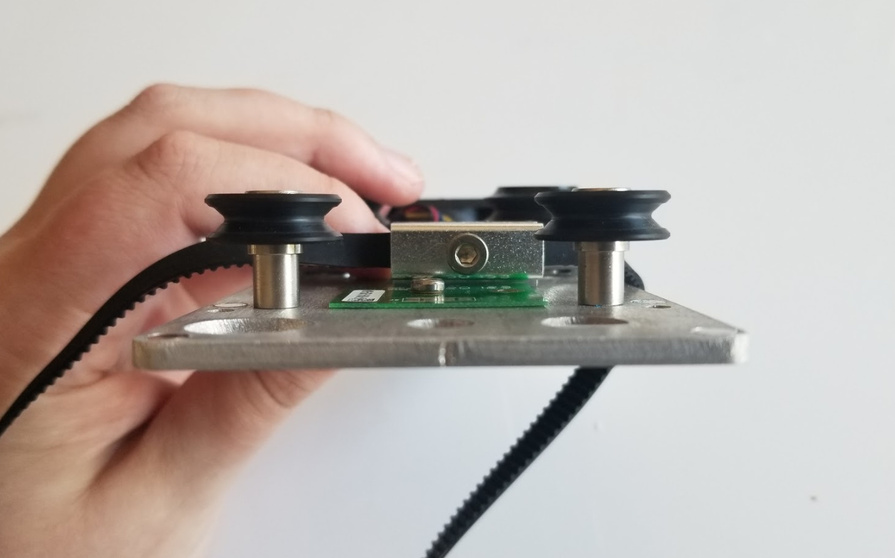
I cleaned the wheels and the track. Now I am trying to put the carriage and belt back on. the instructions say to rest the belt on the silver part under the motor and then hold it there with your thumb and fingers and then slide onto the pulley while you slowly move the carriage to the left. I do not understand what the silver part is to rest it on. What are they talking about? I am not very good with finger dexterity so any tips would be helpful. Thanks!
doug
Hang on…one of the folks here (@primal_healer) did a video…it’s hard to understand until you see it…
After you get it back on - recheck the tension.
3 Likes
Find a flat mirror to lay on the floor of your GF while the tray is out. It really helps to see and understand what is going on behind the gantry.
2 Likes
Sometimes it can be tough to get the carriage plate belt back on the pulleys. We have two different methods for this.
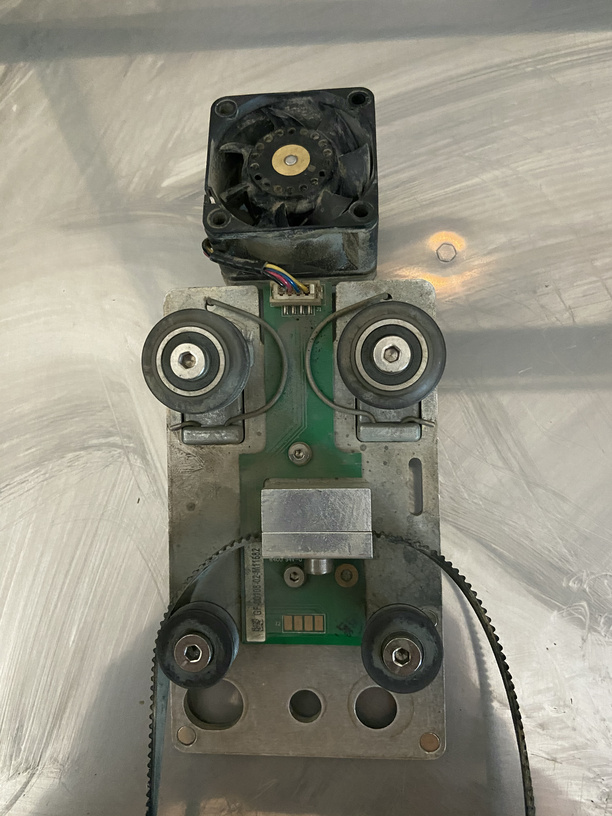
Option 1: Cleaning Your Air Assist Fan - Reattach Driver Belt
For this method, you’ll hook one end of the belt over a pulley. Next, you’ll then slide the carriage plate while maneuvering the belt onto the other pulley. You can do this from either the right or left side first, sometimes one side is easier than the other.
Once the first side has been wrapped around, hold the belt up to the front of the second pulley and move the carriage plate towards that pulley while guiding the belt on with your hand. This should provide enough force to move the belt onto the other pulley.
Sometimes option 1 can be tricky, especially if your belt was very snug when you removed it. However, it can be faster so I always recommend folks try this first.
Option 2: How To - Adjust the Carriage Plate Belt Tension
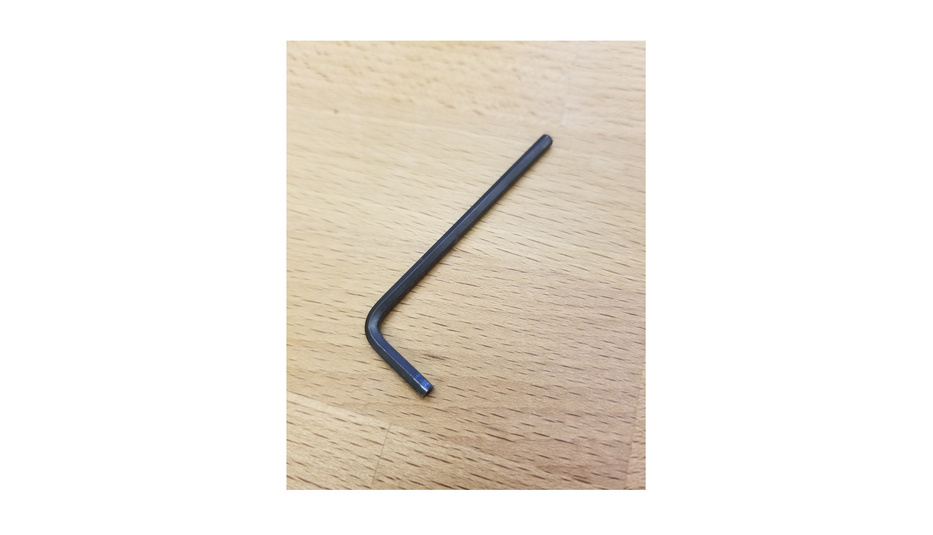
If Option 1 isn’t working, then I would recommending trying Option 2. For this method, you’ll need a 3mm hex hey.
You’ll loosen the pulley under the laser arm on the right side. Once the pulley has been loosened, you can wrap the belt around both pulleys and slide the loose pulley to the right as far as it can go. This will sometimes take multiple tries to get the belt tension correct. You’ll need to hold the pulley in place while you tighten it.
I hope this information was helpful. Please let me know if you are still having trouble or have any other questions.
On option 2 can you explain what you mean “slide the loose pulley to the right as far as it will go” Is there any way you can post a video showing how to do this. Please because I am not able to do option one at this time.
Thanks,
Doug Wolfson
Hi Doug! Unfortunately, we don’t have a video available for these instructions. But, I’m happy to help with additional photos if needed.
The pulley on the right holds the tension on the belt. When you are tightening the pulley, you’ll need to hold the belt at it’s full tension while you tighten the screw.
If you are still having trouble, please let me know and I can reach out by email with more steps.
Yes I am having trouble!!! I can not seem to do option one with my hands and fingers. I am trying to find someone to help but that is hard with covid without hiring someone. I do not understand how to do the second option without photos or video. This very frustrating! my email is dougwolfson@gmail.com
There are detailed, close-up photos in the link they provided.
They have given me a second option, where I loosen the pulley on the right side. I am asking for photos of that option.
For all Glowforge printer belt instructions, you will need a 3mm hex key.
Before you do anything, turn off your Glowforge and unplug it.
How to Adjust the Carriage Plate Belt Tension
The belt under the laser arm is attached to the carriage plate and moves the printer head to the left and right. If your belt is too loose or too tight, you can use these instructions to adjust the tension.
- Turn Off Your Glowforge
Once you have located a 3mm hex key, power off your Glowforge. Open the front door and carefully remove the crumb tray.
- Locate Laser Arm Pulley
Without removing the carriage plate and belt, locate the black pulley fastened by a metal screw on the right end of the laser arm.
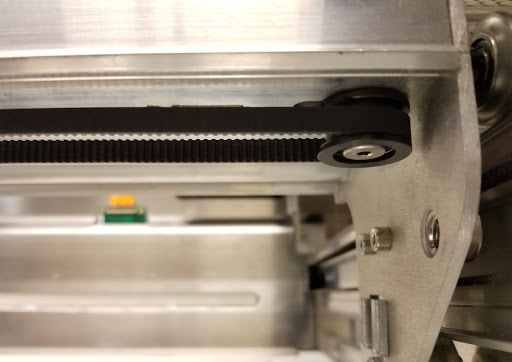
The pulley on the right side of the laser arm. The crumb tray has been removed.
- Insert Hex Key into Pulley
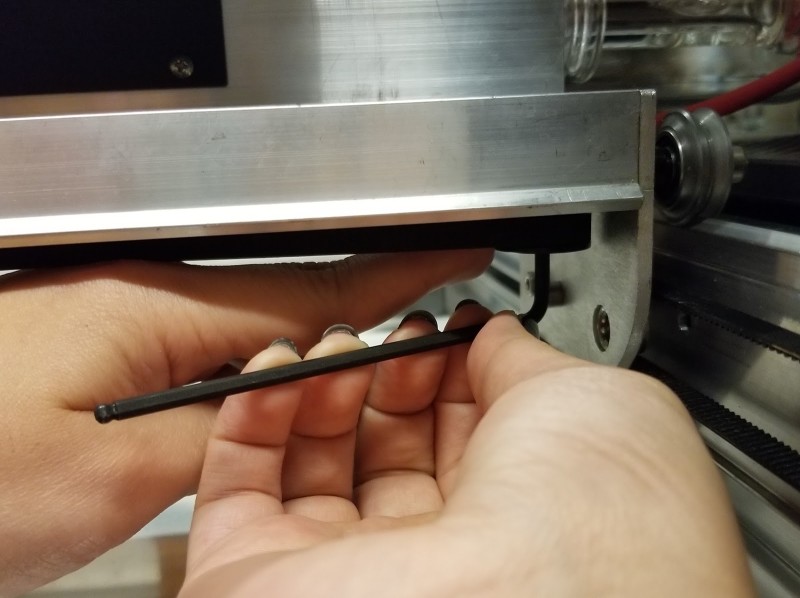
Insert the short side of the 3mm hex L-key into the metal screw with the long handle pointing toward the front of the unit.

The hex key is in the pulley ready to loosen the screw
- Loosen the Pulley
Turn the key clockwise to loosen the screw until the pulley can slide with some friction. Don’t remove the key from the screw.
- Slide the Pulley to the Right
Holding the key with your one hand, position your other hand to push the pulley to the right until the belt is fully extended.
One hand holds the pulley in place, while the other holds the hex key.
- Tighten the Pulley
While keeping tension with your other hand, turn the hex key counter-clockwise to tighten the screw in the pulley.
- Check the Belt Tension
When pressing lightly on one side of the belt, the other side should not move. It may take a few tries to get the belt tension correct. If the belt has too much slack, loosen the pulley and try again.
- Try a Test Print
If you are satisfied with the tension on the belt, try a test print.
1 Like