Need a small gift in a hurry? or need to label something that doesn’t need your FULL artistic talents to do the job?. Here’s my keyring mini-project.
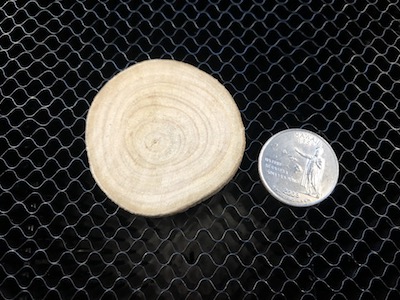
I bought a pack of branch slices measuring 0.19" by 1.9" by 1.9" for use as game tokens or keyrings:
https://www.amazon.com/gp/product/B01MS9PGF8/ref=oh_aui_detailpage_o00_s04?ie=UTF8&psc=1
While I love to carefully plan a project, do loads of experiments and try to finesse every element, sometimes it’s worth just seeing if you can make something right now. That’s great for low value items as well as a quick, personalised demo for a guest or child.
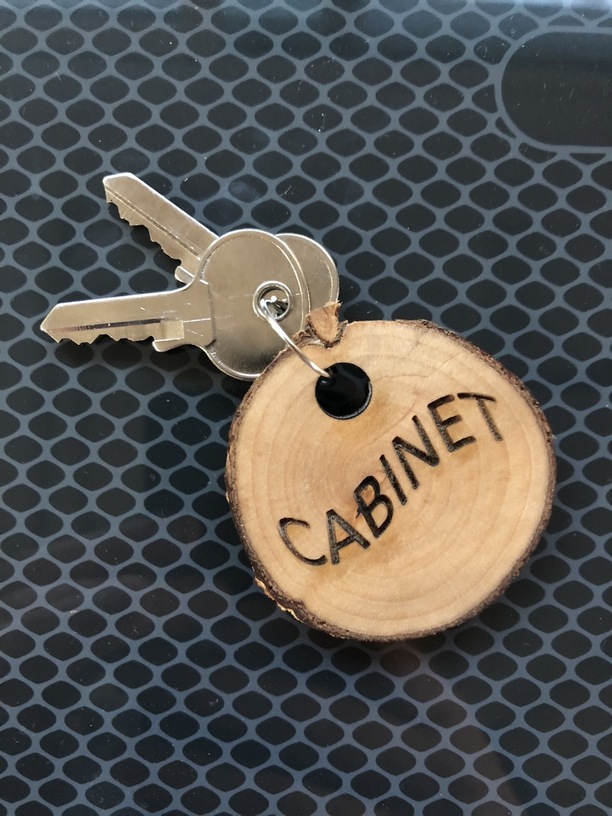
So let’s make a keyring for my filing cabinet, so I can distinguish its samey keys:
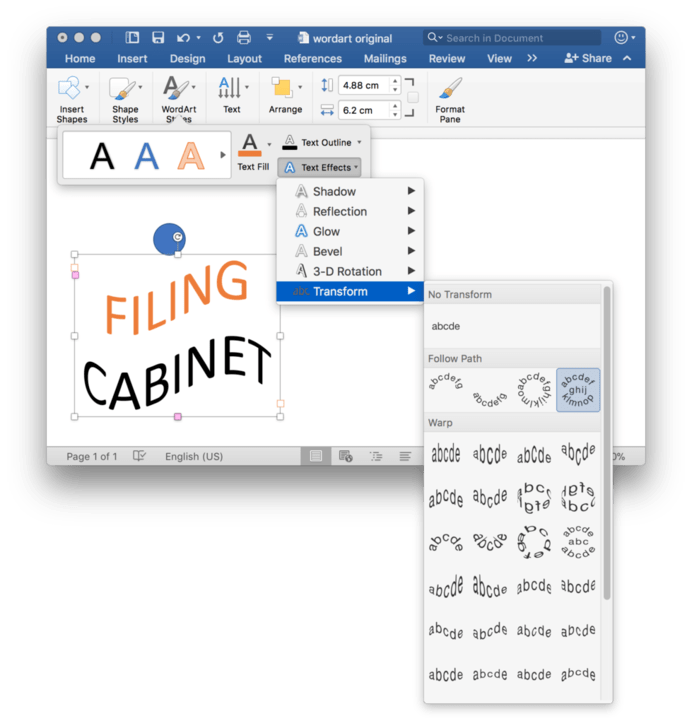
For giggles, I’m going to use Microsoft Word for the Mac (v15) to author it, and I’m going to use the classic WordArt feature, Plus a circle shape for the hole:
I then print this to PDF and upload directly to GF.
I place one log slice on the GF base (coin for size reference).
there’s around 5 layers. 3 relevant - the two text sides (engrave) and the cut through. I then tell GF a fib ‘it’s Thick Cherry Plywood’, hit Print to calculate and store the burn settings, then cancel and switch to Manual to set the actual focal depth.
For the first side I cut one word, plus the hole for the keyring, and then flip to cut the other side word only. Manual positioning using the bed image is sufficient here.
To finish I briefly sanded it to remove the burn marks, and wiped with JK Adam’s mineral oil wood conditioner.

It’s tacky, but it does the job, and it was quicker to make it than to write it up here!

