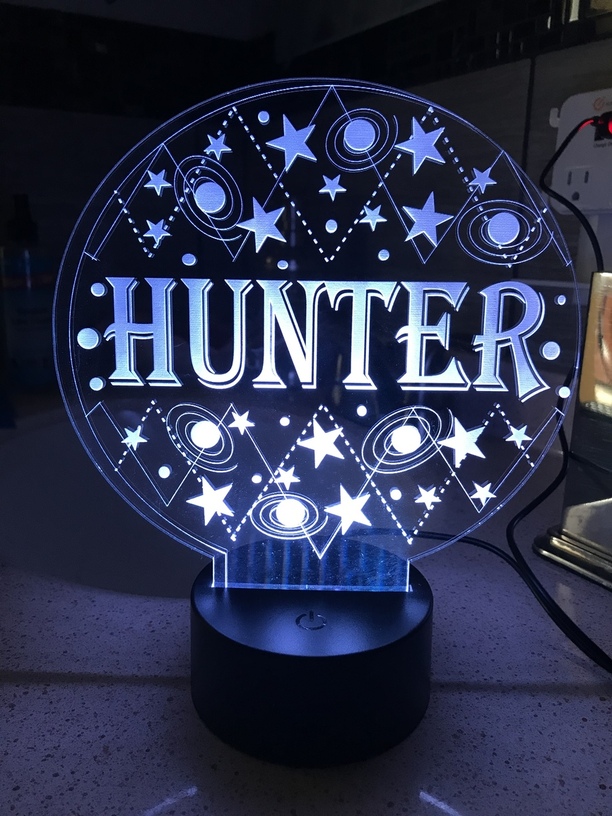
As I found out the hard way, inserting the cut line as an SVG file after the fact because the Glowforge trace function absolutely SUCKS for doing outline only cut lines proved to be a disaster. Even though the lines matched up on camera didn’t mean the cut lines matched up on the surface. I’m truly pissed at this lack of functionality or simplicity. Again, the reason why the Glowforge should have a driver because if it had, I could have cut and engraved thru my CorelDraw program and not have to go through all the hassle AND expense of misaligned cutlines! Jumping off the soap box now to say other than mentioned problems, the light turned out ok despite it being misaligned and the visible lines where the cuts were supposed to go.
19 Likes
They’re still working on improving the camera. But for now it’s always best to put your cut lines and engraving in the same job. They don’t necessarily have to be in the same file; you can drag additional files into the GF window to add artwork, but you should get them all loaded at once and lined up relative to each other before running a job.
8 Likes
Ideally, that was my intention but I didn’t count on the trace function being so… well…desperately lacking.
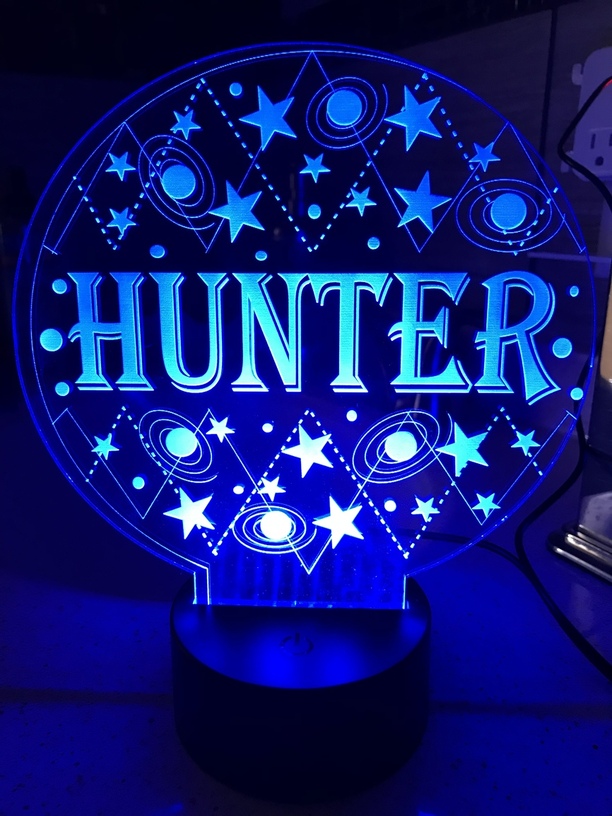
It turned out great. The miss alignment gave it a globe look, kinda cool. Nice job.
Looks fine. But lesson learned? All tools require trial and error. Don’t use expensive material until you understand the process. The project is a simple thing to do on the GF just not the way you wanted to do it.
7 Likes
Looks nice despite the misalignment, chalk that up to beta software. Until they get all that worked out, as mentioned much better to do the complete design in your software. Personally I’m happy to deal with those issues for the benefit of having this machine now, instead of still being in the ‘waiting room’. At least I can be learning all the stuff I didn’t know anything about.
A tip on edge lighted acrylic, notice how the bottom is much brighter than the top. The engraving at the bottom shades everything above it at that depth. A way around that is to split the file into different colors as you go up. In this case I would have the design below ‘Hunter’ in one color, the word another color and the top a third color. That way there will be 3 operations on the side bar and you can assign a higher power to the colors as you go up, and it will be lit more evenly.
Doesnt take much, just enough to be deeper that what is below it.
21 Likes
I am very familiar with the process. I have paper and vinyl cutters that run on the same concept. Only they run on drivers and a bridge that allows me to use “better” programs. And why not? Yes we are talking about a laser as opposed to blades but the process is exactly the same. Please don’t get me wrong, I love the Glowforge. I’m just not in love with the software. After two years of waiting, I just expected more, I guess. My bad.
5 Likes
I’ll keep that in mind for future reference. Thank you. I had no idea. To me, it looks fine in that respect but maybe if I do something more complex I’ll refer back to this post lol 
2 Likes
So you’re pissed that the engrave didn’t work exactly for you and prefer cutters that run on drivers. That’s understandable.
Quick question – Do any of your other devices scan for cutlines directly? I guess what I’m saying is that that you can use “better” programs to create and control each and every design (and should) – with your experience with paper and vinyl cutters, why wouldn’t you?
2 Likes
The engrave worked fine. It was the cutting the outer edge that was the problem. Is there a detailed manual that I’m missing somewhere that discusses how to do cutouts after engraving on the GF using The trace feature. I guess in my mind, it was pretty cut and dry (or should have been) But when it came time to trace the image most of the image didn’t even show up in order to trace it so I had to bring in the outer edge in an svg file. It didn’t help that I was in hurry because Hunter’s mom wanted to leave and I wasn’t done cutting it out
Well, it does look fine. It was @takitus that brought that nuance to our attention, and now when I see one I can’t un-see it! As artists, we are our own worst critic. Probably no one else would notice that.
You can still use the same programs you’re used to, be it CorelDRAW, Illustrator, Inkscape, Affinity Designer, etc. You just export an SVG or PDF file, open that in the GF app to assign the operations (Cut, engrave, score) and away you go.
Theres no need to use the GF trace feature for something like this. If you already have the design in your drawing program you can draw the cut around it in the same app then upload everything together to the GF in one pre-assembled file that wont have any alignment issues.
The GF app is not a design program, it’s basically a bridge, same as a vinyl cutter bridge, that accepts industry standard graphic files and translates them into instructions for the GF to follow. Except the GF doesnt care what program you use to create the file, so it’s way more flexible.
10 Likes
Where did you get the base?
You can buy them on amazon
1 Like
Yep mine does too.
If that’s the worst thing that happened to you in the past 24 hours, I would say you had quite a successful day! Might I suggest that you follow the tone of others on the forum, and look for solutions, rather than degrade a product that is still a work-in-progress. Oh, and by the way, yours is a user error, not a Glowforge failure. You simply tried to do something that wasn’t necessary, and the result was unexpected.
Most importantly, youf light looks really cool!
8 Likes
As a side note for anyone wanting to make these, I’d make the tab insert only a half inch. I made mine an inch and as you can see there’s too much extra showing. The slot on this particular base is 2.75”. I would make sure that your tab is the same width with kerf so it fits tight because the slot is a bit thicker than the medium acrylic and the thick acrylic is too thick to fit. Too bad there wasnt a size in between.
1 Like