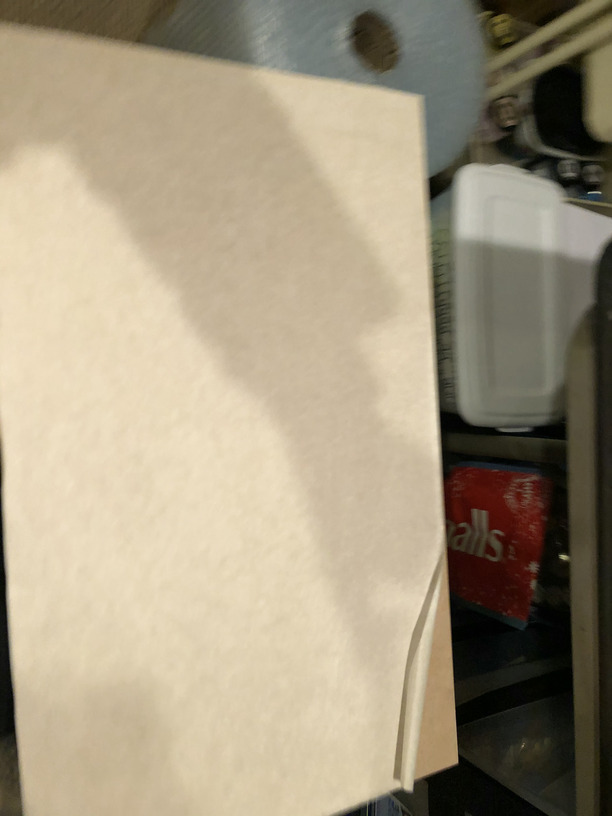
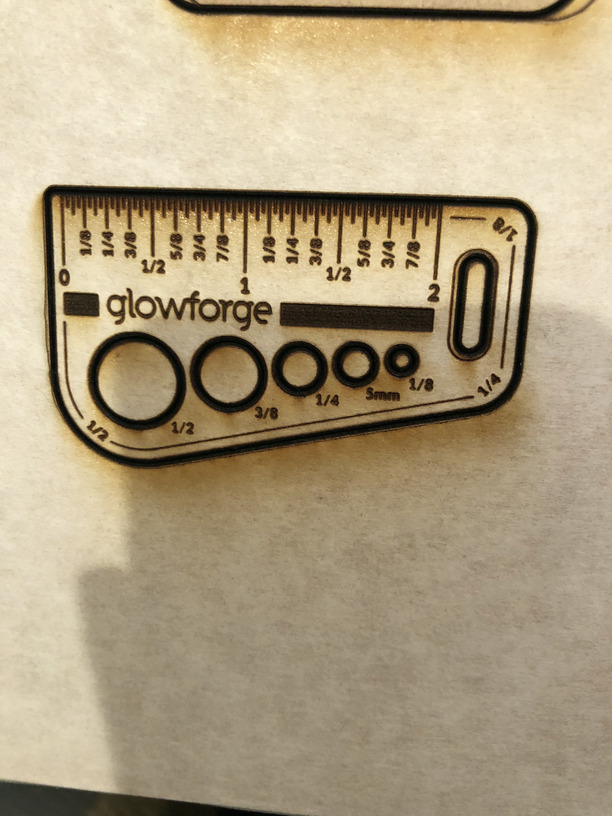
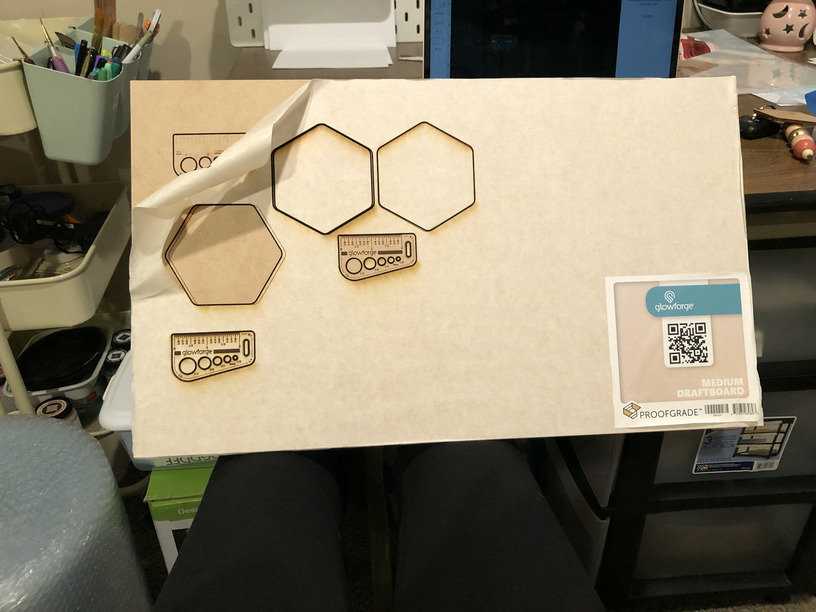
I received my glowforge plus last week, and finally set it up last night. We diligently went through the set up and tutorials. Unfortunately when we cut the “gift of good measure” project with the proofgrade medium draft board, it did not cut all the way through. It scored everything, but not actually cut through. We initially thought that it was because we did not choose the medium draft board settings, and tried the hex coasters fixing our potential mistake. We had the same results, cut around where it was suppose to be, but not actually through.
Congrats on your purchase and welcome to the forums! I’m just another owner like you, but hope I can offer some help while you wait for staff to respond.
Here’s a troubleshooting guide below for this issue you can read through.
One common first-day mistake is not having the crumb tray seated in the right place, or not putting your sheet of draftboard on it in the right place. The crumb tray needs to fall into the 4 dimples for its feet in the bottom of the Glowforge, pushed all the way forward so it sticks into the front door a bit. The draftboard should be over the honeycomb portion of the tray in the middle, not sticking over either of the flat sides, and pushed in snug so it’s sitting perfectly flat.
1 Like
I’m so sorry to hear about the trouble you are experiencing with your new Glowforge, but I hope some of the advice @dan84 provided was helpful. I appreciate you checking the optical components on your Glowforge, and sending over the photos via email.
I’ve extracted the log files from your unit to review your most recent prints, and compared it with the details you’ve posted. I’d like to check two things:
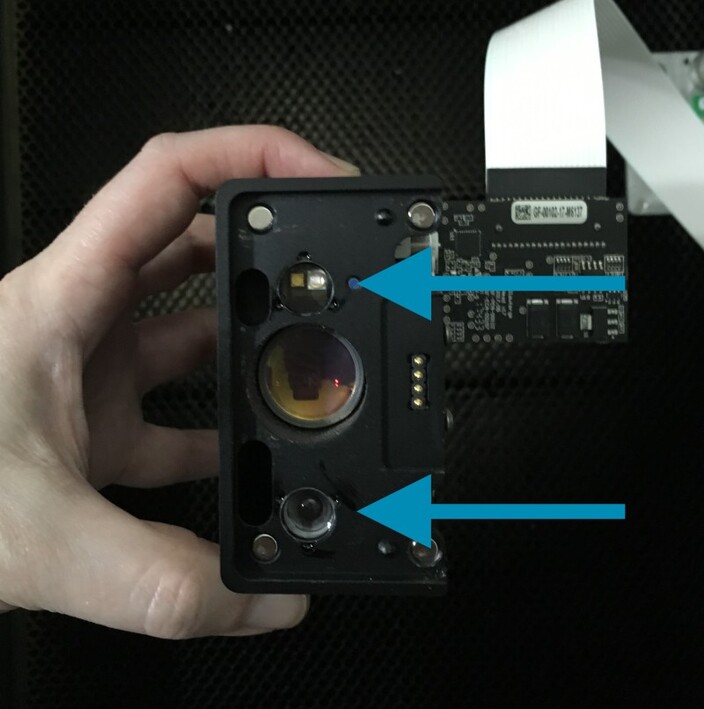
- Based on the photos of the prints you provided, the lines your Glowforge are covering appear to be thicker than normal. Could you make sure the Printer Head Lens located on the bottom of your Printer Head is installed correctly, with the Arrow pointing upwards?
- I’d like to make sure your Glowforge is measuring the height of the material properly. Could you please replicate the Gift of Good Measure print, using Set Focus, and let us know if the same behavior occurs?
Once you can work through these steps, we’ll review the log files from the Print, and send over any additional steps.
Hi Marc-
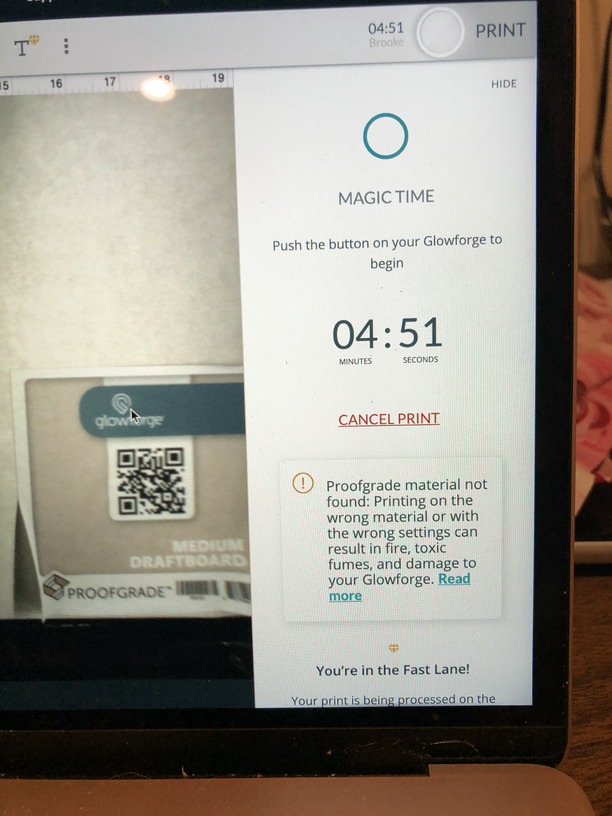
We double checked that the printer head is installed properly, and recut the Gift of Good Measure. Unfortunately, we had the same results. We also have been getting an error message that the materials we are using are not proofgrade when they actually are. I am attaching images to show you the cuts again and the error message.
Thanks in advance,
Brooke
Hi @bselep, I think Marc is talking about checking that the lens inside the head is installed in the correct direction…when you take the lens out, the bowl shape needs to go up into the head from the bottom. (Cup goes up.)
It really does look like it might be in there upside down. It defocuses the laser. If you haven’t taken the lens out to check it, the instructions are here, and there are pictures in the Things That Need Wiping section:
If you chose the settings from the dropdown menu (Unknown Materials) you need to also specify whether the Draftboard is Medium or Thick draftboard…be sure to check that the Material listed at the top of the left column says “Medium Draftboard”. (It’s easy to accidentally pick the wrong one.)
Last thing to check is to make sure that the crumb tray feet are down in the divots at the bottom of the machine.
See if any of those things helps with the defocusing issue.
1 Like
Hi @Jules- thanks for your tips, we triple checked the lens and it is facing the correct way. After our initial cut, we have been very careful to make sure we are choosing the correct material- especially since the GF won’t recognize the proofgrade material we were sent. We also checked the crumb tray and unfortunately we are still getting the same result.
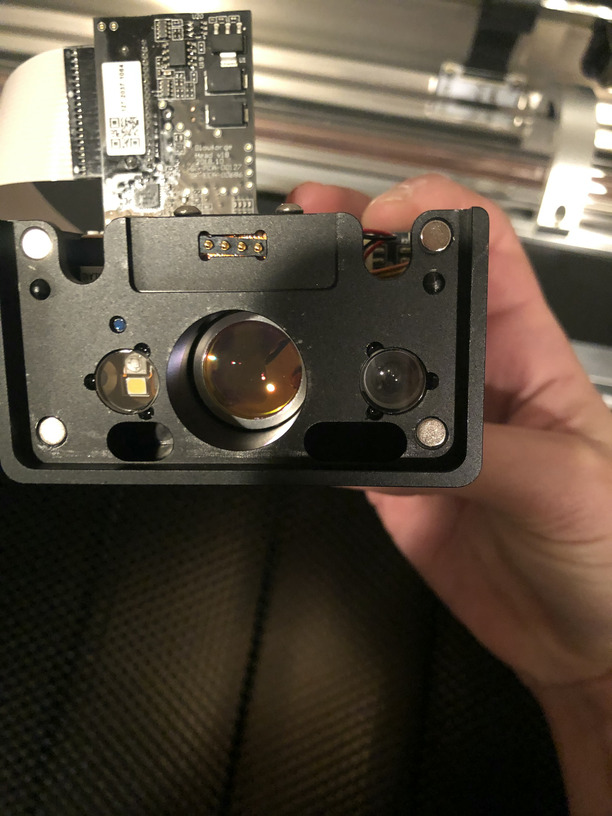
Hi @bselep HI . Thank you for sending those updated print photos and I’m sorry to see they were not able to show any visible cut lines on the back. I’ve reviewed the thread and see some great tips from other owners, I’ll be happy to continue with needed Support. I understand that you have repeatedly check the Printer Head Lens, but I noticed we didn’t have a photo of the Print Head Bottom yet. To cover all bases, and I’d like to inspect more of the unit with the following photo requests:
Print Head Bottom with Print Head Lens installed
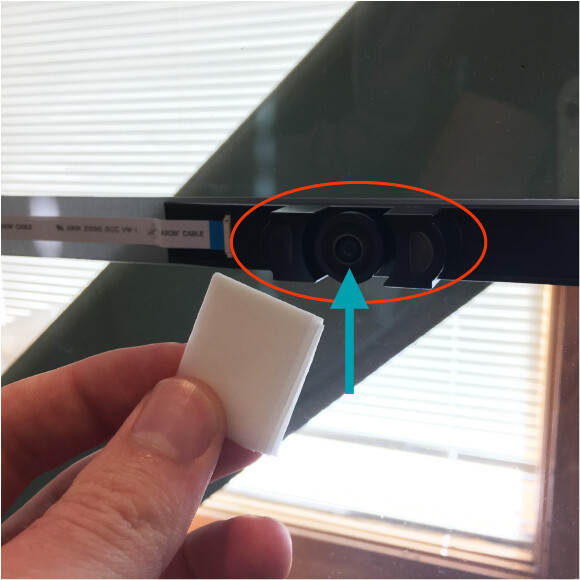
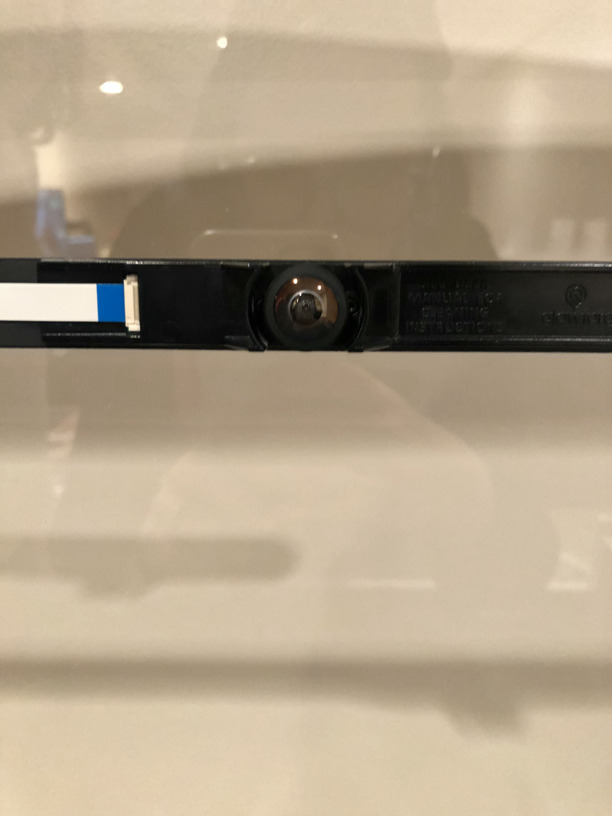
A clearer close-up of the Lid Camera
I apologize for any added inconvenience from the requests, and will look forward to your next response. Thank you!
Is there a phone number for customer service, or a quicker way to troubleshoot? It is very frustrating to have an expensive device that doesn’t work, and only getting one response every 24+ hours.
Hello @bselep - I’m sorry for the delay in getting back to you.
Based off the information we’ve gathered so far, I think it’s in our best interest here to go ahead and get a new printer sent your way that will better reflect the quality we expect from a Glowforge unit.
I’ve sent an email along with some instructions on how to get that process started, please keep an eye out for it!
Since we’ll be moving to email I’m going to go ahead and close this topic.